Table of Contents
Digital Body
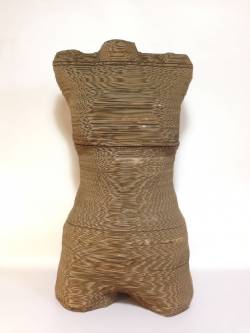
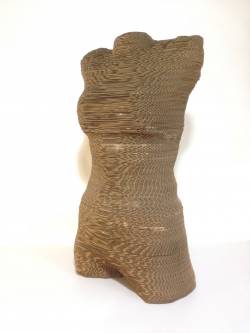
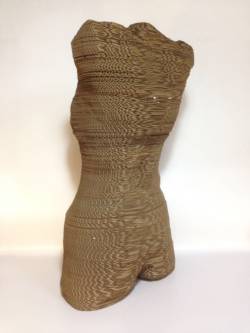
After the “Digital Body” conference we created a cardboard mannequin all together and learn how to use :
1. 3D Scanning :
You can use two different softwares to 3D scan an object or body :
- Recap : lots of pictures taken following a circle, action repeated from different angles of view ( = Photogrametry)
- Kinect (from Autodesk) : using the software Skanect. Place the body you want inside the 3D square and start to scan all around it.
We used Kinect, and scanned one of the student's body (Brigitte) thanks to the turning table :
VIDEO
Then we saved the body scan in obj and opened it on Meshmaker.
Meshmaker :
Select Discard > Lasso > Contour the parts you want to delete.
Edit > Make solid.
Sculpt >Brushes > Flaten à to smoothen the shape.
After that you have a solid and a mesh (the mesh is created automatically by the scan), so keep the mesh and import it on Slicer.
Slicers :
Manufacturing Settings > New material > Enter the measurements.
We use the « Hollow » command to make a hole in the middle of every slices so we could assemble them together by putting them on a stick
Note : If it doesn't work you can also use Rhino to do it :
Mesh to NURBS > Select the mesh you want to turn into a solid again (so you can modify it).
Create a cylindre > Boolean Tool > Difference.
2. Laser cutting :
We exported the file as dxf, than imported it into the software of the laser cutting machine.
We first did a test to define the right power and speed to use : draw a square and a circle so you try both straight and curvy lines.
We taped down the cardboard inside the machine so it doesn’t fly with the air circuling.
To avoid burning marks you can also recover the material with masking tape/normal tape is there is no PVC inside.
Select the lines you have to cut (use the selection icon on the top tollbar).
Tools > Unite lines (to cut in a smooth way, because it cuts following a continuous instead of point by point).
Then on the right you can see choose the speed, power and corner power (around 1/2 of the general power) buy double-clicking on the numbers.
You can also choose between : Cut or Ingrave.
To change the colors : on the bottom toolbar
Output>Yes>Select a color = print this color
Output>No> Select a color = doesn’t print
Pick the origin point to start cutting on the top toolbar.
Then place the laser manually on the machine where you want the cutting to start (the grid inside the software doesn’t represent the real space inside the machine).
Don't forget to set the height of the laser manually by unscrew it or putting up or down the cutting panel (and use the wood piece as a reference).
Once your file is ready :Download > Delete All>Download current.
To turn on the machine : Turn the key > Green button > Turn on the air (under computer).
Press the button TEST on the machine itself so the laser will do a rectangle going around all the different shapes without cutting to check if the postion of the material is right.
Note : Don’t put the laser too close from any side of the machine in case it would go too far and hit one of them
To start cutting : Turn the black button of the machine on ON and press START
If you need to change something : press START (=on pause) or STOP
Then to start cutting again from the same origin point press ANCHOR on the machine.
Settings for cutting cardboard :
Speed =125
Power = 75
Corner power = 40
3. Résultat:


Les problèmes rencontrés :
- Fichier très lourd quand nous l'avons exporté de Slicer à Rhino afin que l'ordinateur se bloque. Pour éviter cela, vous devez réduire le nombre de factures / côtés lorsque vous ouvrez le fichier sur Rhino (un peu moins précis mais plus facile à utiliser).
- Trous: les formes des différentes tranches sont à droite, et suivent la forme l'une de l'autre de manière graduelle mais les trous ne sont pas toujours en face l'un de l'autre.
- Problèmes avec la machine de découpe laser: nous avons dû fermer et ouvrir le logiciel à plusieurs reprises lorsque le fichier ne s'est pas ouvert ou mal ouvert.
4. Personal representation of the body :
After this team exercise, we had the possibility to represent a body, or a part of a body, using any of the tools we know.
Here is my work : Mineral hand