This is an old revision of the document!
Final Project: E-textile & Wearables application for ParaRowing Olympic Athletes
(25/01/2018)
My motivation: ParaRowing Olympic Athletes :fabricademy2017:students:detoledomotta.naiadelara:rowingmain2.jpg?nolink&430x183
The problem: Difficulty of arbitration and damaging current straps.

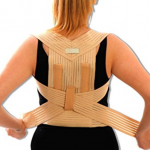
The idea: A E-textile vest coupled with back support :fabricademy2017:students:detoledomotta.naiadelara:28.png?nolink&200x218
- Back Support: The Idea for a back support comes from the fact that by offering
- E-textile application:
- How should it work:
-
What I did: Step-by-step production
- STEP 1: Research for inspiration of back supports and build electric circuit.
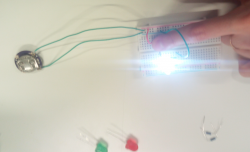
During this first step I did a research on back supports for upper back that already existed and fit my purpose and also make with breadboard, cables and a button for the touching function.
- STEP 2: Design in Rhino of the vest and electric system that should be couped with vest and grasshopper for the different patterns for back support
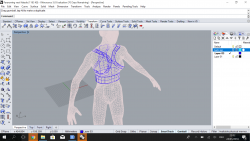 THE VEST: In this step things got a little more complicated with the software designs but after finding an inspiration I designed in Rhino using the 3D body model with had for dimensions. But using different layers and the previous experience with Rhino helped to shorten time.
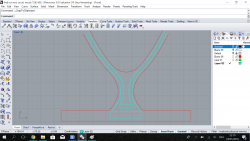
THE CIRCUIT: After dimensioning it I transformed from 3D to 2D made some arrangements and created the electric system in a different layer based on this 2D design of the vest. This step was necessary for the laser cutter, since I knew I waned to use it for cutting different e-textiles and testing with them.
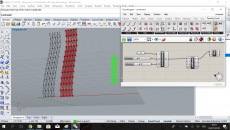
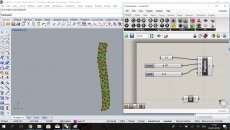 THE BACK SUPPORT: For the back support I decided to apply the knowledge acquired during the textile as scaffold week, where I used wood to make a back protector. This experience made me very confident that this technique would work. Therefore using the grasshopper function of rhino to design different patterns.
-
- STEP 3: Cutting and testing with different materials
This was the most fun part of the process and thanks to the laser cutter and rhino files I could cut the vest and the circuit using different materials to test their level of accuracy and chose the final one for the first prototype.
THE VEST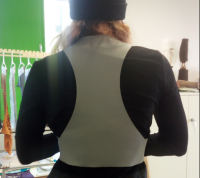
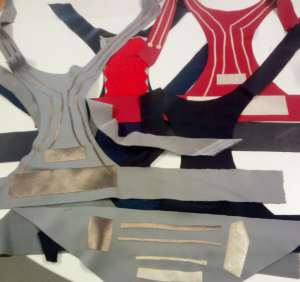 : For the vest I waned to test different textiles resistance and flexibility. Therefore cut the vest in the laser cutter in 5 different materials.
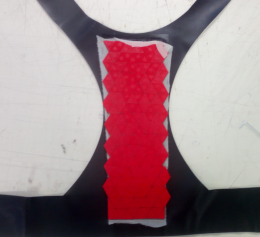
THE CIRCUIT: Same idea as for the vest but with conducting textiles. For this step I selected 3 different materials and tested their accuracy with stretching and water resistance.
At the end I chose two combination of textiles for the vest coupled with the conductive path. Voltmeter was used for measuring conductivity.
The conclusion I have made by testing drove me into thinking a not so stretchy textile should be used as base for the circuit.
THE BACK SUPPORT: Still with the same inspiration of different materials I used the laser cutter for two different materials: Acrylic and Wood
.
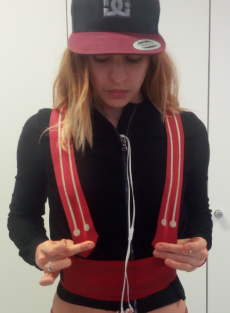

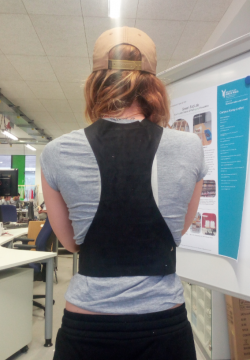
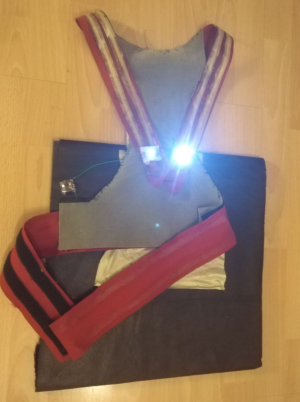
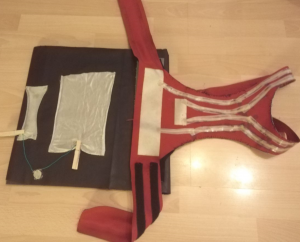
- STEP 4: Assembly - First Prototype finished
 .
.
.
.
.
.
.
.
.
.
.
.
.
.
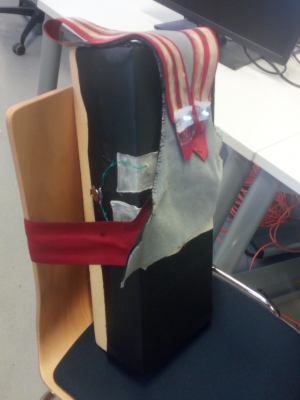
- STEP 5. Improvements - Second Prototype
What changed
Further suggestions of improvement:
Fabricademy knowledge applied at the end
Back support - Textile as scaffold and a lot of grasshopper design for different pattern ideas and use of laser cutter for production.
Circuit - E-textile experiments with conductibility, stretch levels and water and silicon resistance.