WEEK 2
DIGITAL BODIES

OBJECTIVES
Use software to obtain a body-figure and a digital fabrication process to produce it (the production happens in groups of 3-4)
3D SCANNING
I wanted to scan myself to use that for my final project.
This is how the process went:
1. MARKING MYSELF
Because I wanted to use this work for my final project, I asked a friend of mine, Pilar, who is a teacher at fashion college to put the marks we usually put on the mannequins.
I dressed with tight clothes so they didn't generate a problem during the scannig (not my finest fashion statement moment!)
She also took my measurements.


2. FIRST SCANNING PROCESS
Carlos, Eldy and I started the scanning process with the 3d scan we have in the lab which is this one:

And we started:


We try going around me many times, but we couldn´t get a solid scan. Many parts of the body weren´t been read, like the calfs, my back, etc.

3. SECOND SCANNING PROCESS
After this, we decided to go to make a try with a different scanner. We went to Universidad de Lima with Carlos, while Eldy kept trying with the scanner at ESAN.
This is the scanner they have:

So I had to get in costume again, this scanner dosen´t read hair, so I had to add a hat!
It also works with targets. So we changed the lines for this stickers, you have to put targets all over the body you want to scan and it finds 4 points and relates them, this is how it defines the volume it´s working with.


This targets are quite expensive, one box of 500 costs around 100 dolars :S ! So we had to use the whisely and reuse some.

We started scanning again:


At the end the conclusion was that the clothes I was wearing was not the ideal, so the plan is go back with other clothes when I can find cheapper targets. I´m going to try to make them myself, any recommendations?
4. ELDY SCAN
While Carlos and I were in Universidad de Lima, Eldy kept trying with the scanner at ESAN and at the end she manage to get a body. All the detail of the process is in her page.


5. DEFINING WORKFLOWS
Because it´s a group assignment, we sat down to plan how to move forward.
We decided to use Eldy´s body scan for the rest of the assignment.
The idea was to use different techniques from the lab to create an interpretation of a body figure.
So we talk of how to mix this techniques and make is aesthetic sense.


From that conversation I desgined the piece:
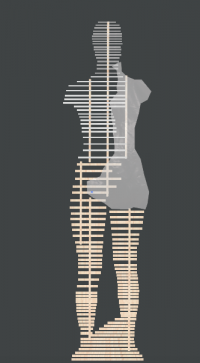
The idea is to use the slicer software to create a body figure,
-The first phase (from the feet to the tights) would be made of plywood cut in the shoopbot.
- The second phase ( from the legs to the head) in the same structure in acrylic cut in the laser cutter.
-The third phase (the side, front and back) will be made done with the folding tool of the slicer, then cut it in
cardboard and that would be use as a mold for a resin composite mix with fabric.
6. DIVIDING THE WORK
With that plan we divided chores.
Eldy (in her page)
-worked on the slicer file
Carlos (in his page)
-worked on the folding file
- Testing of the carbboard folding on the laser cutter
- Send the scale Eldy figure to 3d printing
Me
-Testing for the joints on the shopbot
- Composites work
7. SOFTWARE DESIGN
The 3D scanning was worked first in RHINO, we modify the scanning so it had a base to stand in.
RHINO


SLICER


FOLDING


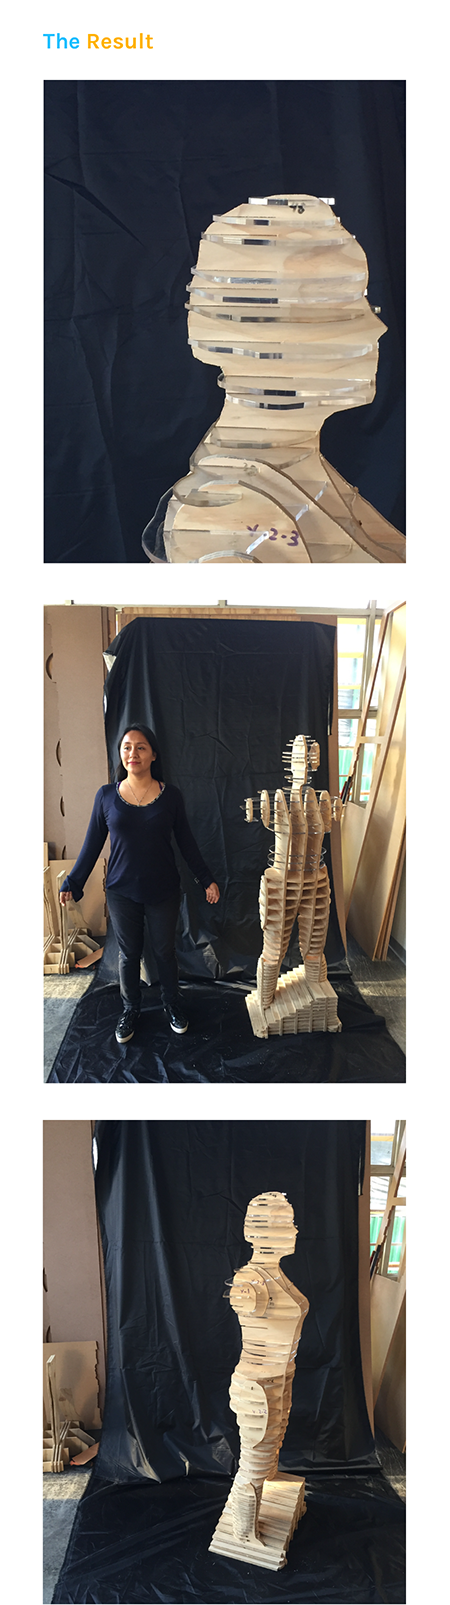
8. 3D PRINTING
We decided to scale print the body scan made.


9. JOINT TESTING
We decided to test how the pieces will fit between them, for that we made a file on Autocad, the plywood is 12mm, so we try with 12, 12.3. 12.5, 12.7
Then I took the file to the VCARVE software, which is the sofware of the Shopbot.
At the end, the better fit was: 12/12 (we made the cutting from the outside of the line)
I had use this machine before, but one forgets the details, so I went to my documentation site and Carlos Silva (our mentor) to track the steps. You can see them here:
Mine: http://archive.fabacademy.org/archives/2017/fablabutec/students/208/w7.html


9. ACRYLIC/PLYWOOD JOINTS TEST
As we did with the plywood, we decided to make a test to see how much space was needed between the joints, considering that the materials may act differently.
We try the thickness of the plywood, 1, 2, and 3 millimeters more.
At the end the better fit was 11.7 mm with our 12.1 plywood.


10. STICH TESTING
For the part that we work with the folding tool of the Slicer, we decided to use like a thin acrylic/plastic material (cant´find the name in english)
We wanted it to fold both ways but don´t break, so we did a test for this as well.
First I worked on Illustrator making dash lines of different lengths and gaps.

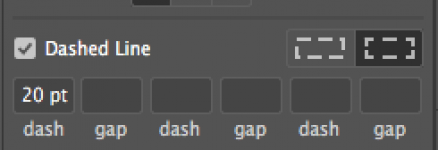
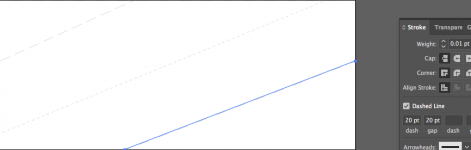


That test was very useful to see how far/close must be the dash lines, after folding the test piece, I chose 6/12 pattern.

I opened the AUTOCAD files on ILLUSTRATOR and used dropper tool to change the folding lines to the measurements of the testing file.
11. FOLDING CUTTING

After testing on cardboard, we moved to plastic.


After the folding tests, we decided not to use it.


FILES: https://drive.google.com/drive/folders/19pHr-LBMxFUvCcdB5QcUIxVM_imMiBgf