FELTING MACHINE
IDEA
Make a machine that felts fabrics together following a digital CAD pattern.


WHY
REAL REASON….. My friend Yvonne came from NY and showed the work she has been doing with some Polleras (traditional skirts from the andes) that I gave her
a couple of years back. She mixed the raw fabric of the pollera with a brocade fabric and the result was very interesting.
She told me it was done by a machine, so I started investigating and asking my friends in Lima, but nobody here knew about it.
After the internet search I found some information and got Carlos into the project of making our own felting machine.
STATE OF THE ART
We found different machines online, from the industrial ones, that create this effect with rollers and goes in lines, to the ones you can use at home where you move the fabrics with your hands to create or follow the pattern.
FIRST DESIGNS
I did the fab academy earlier this year, so that was my idea of a machine and we first planned on ussing a similar structure, but first I called my friend Patrix who is an expert on sewing machines and explained us what was the logic behind it and how for example the embroidery machines worked.


That made us change our first design in which the top piece, where the needles go, will also move like a 3D printer, But we decided to just make the top piece take the needles up and down (Z) and the “Bed” of the machine to move X and Y to avoid problems with the fabric.


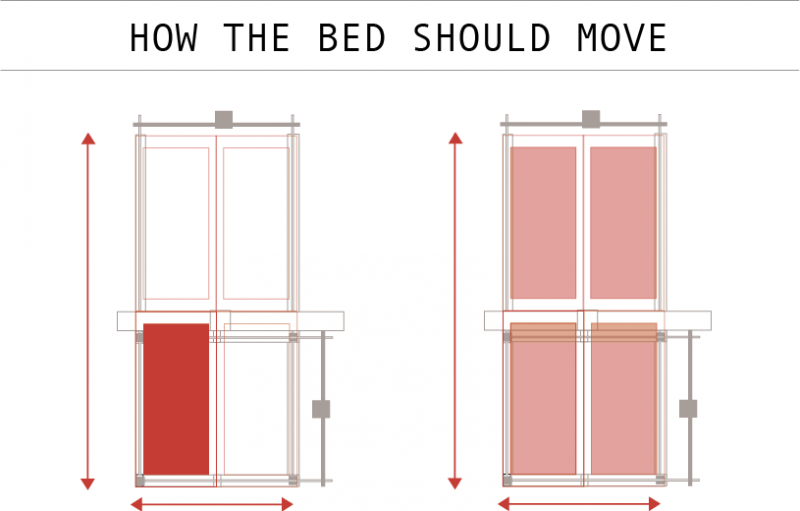
MOVING PARTS
This machine must do three movements:
1. The base of the bed will move back and front
2. The top part of the bed will move from left to right
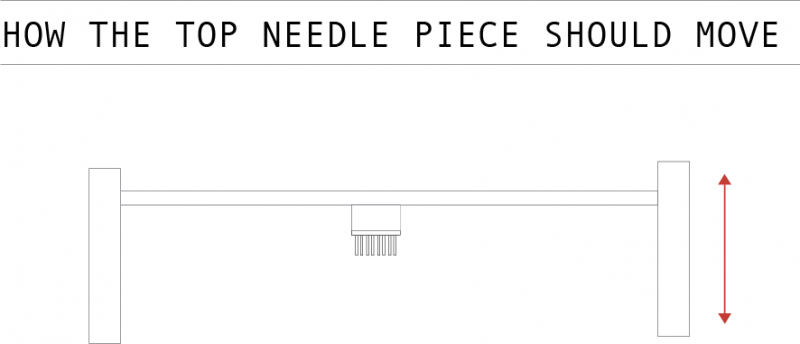
3. The top needle piece will go on an arch piece that will go up and down
THE GO IDEA
Carlos and I designed the machine, I did the draw on Illustrator and Carlos did the files to cut the boxes structures on Autocad.
Then Luis came and used his experties on electronics for the programming part. Then Eldy joined too and help us with the shopbot cutting part.


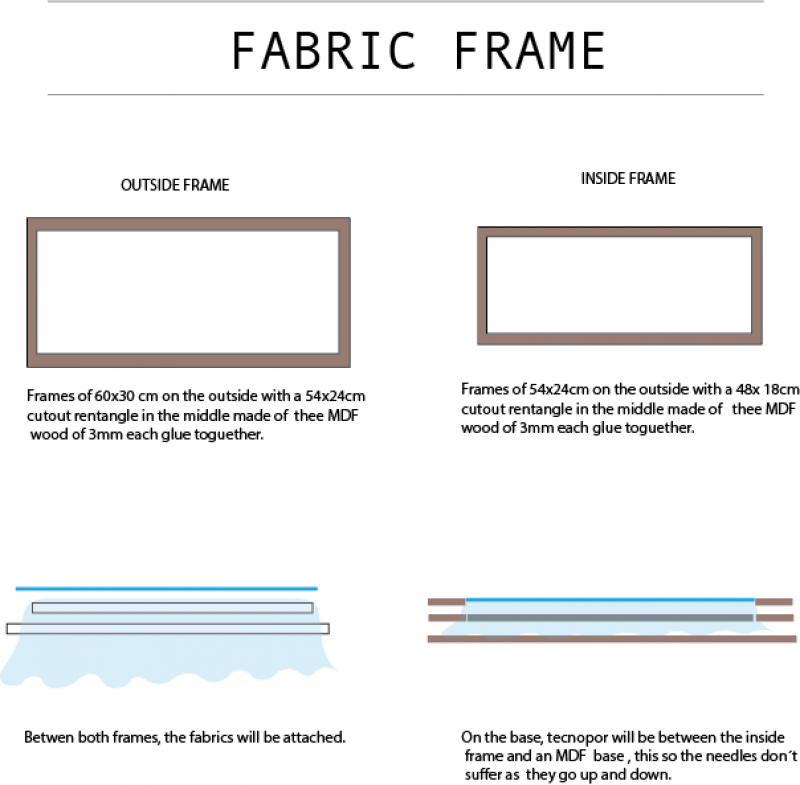
FABRIC FRAME
The idea of this machine is that works with several needles that go up and down over two fabrics or a fabric and thread.
With the movement, the threads from the top fabric go through the bottom one, this way both fabrics stay together and you can see the threads from one in the other.
To get the fabrics toguether Carlos and I designend a frame:


TOP NEEDLE PIECE
WHAT WE NEEDED:
We needed a piece that can holds, carry and move up and down several needles at the same time.
Carlos and I came with this:
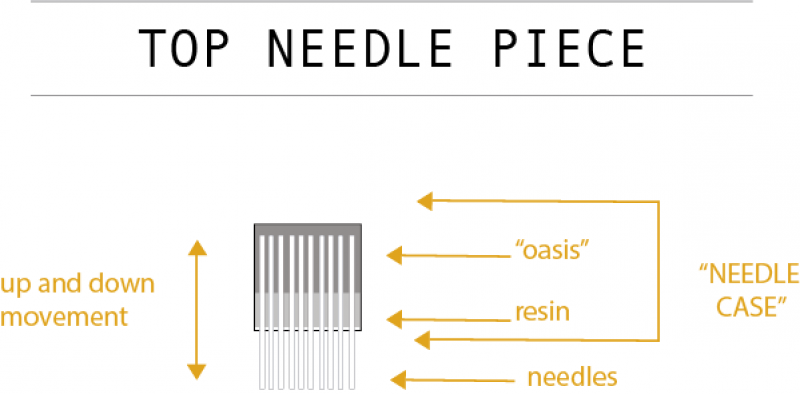
Then Carlos used Fusion 360 to make the 3D model of the needle case and then we printed it.


STRUCTURE
Carlos did the files for the structure of the machine and Eldy cut them on the Shopboot.
After that, Carlos and I started assambling the pieces, Carlos discovered that he has forgotten to put the tolerance for the material while designing, which made us have to work extra hard to get the pieces toguether.


INSIDE THE STRUCTURE
Inside the for wood boxes, we needed to have smaller boxes to lay the top piece on. This inside boxes will be moved on an endless screw and a couple guides all connected to an engine. First we decided to try and make this boxes on cardboard but didn´t worked well, so Eldy made an inproved design on Rhino and laser cut them on MDF.


GETTING IT TOGETHER

After, we put the mechanisms inside the boxes

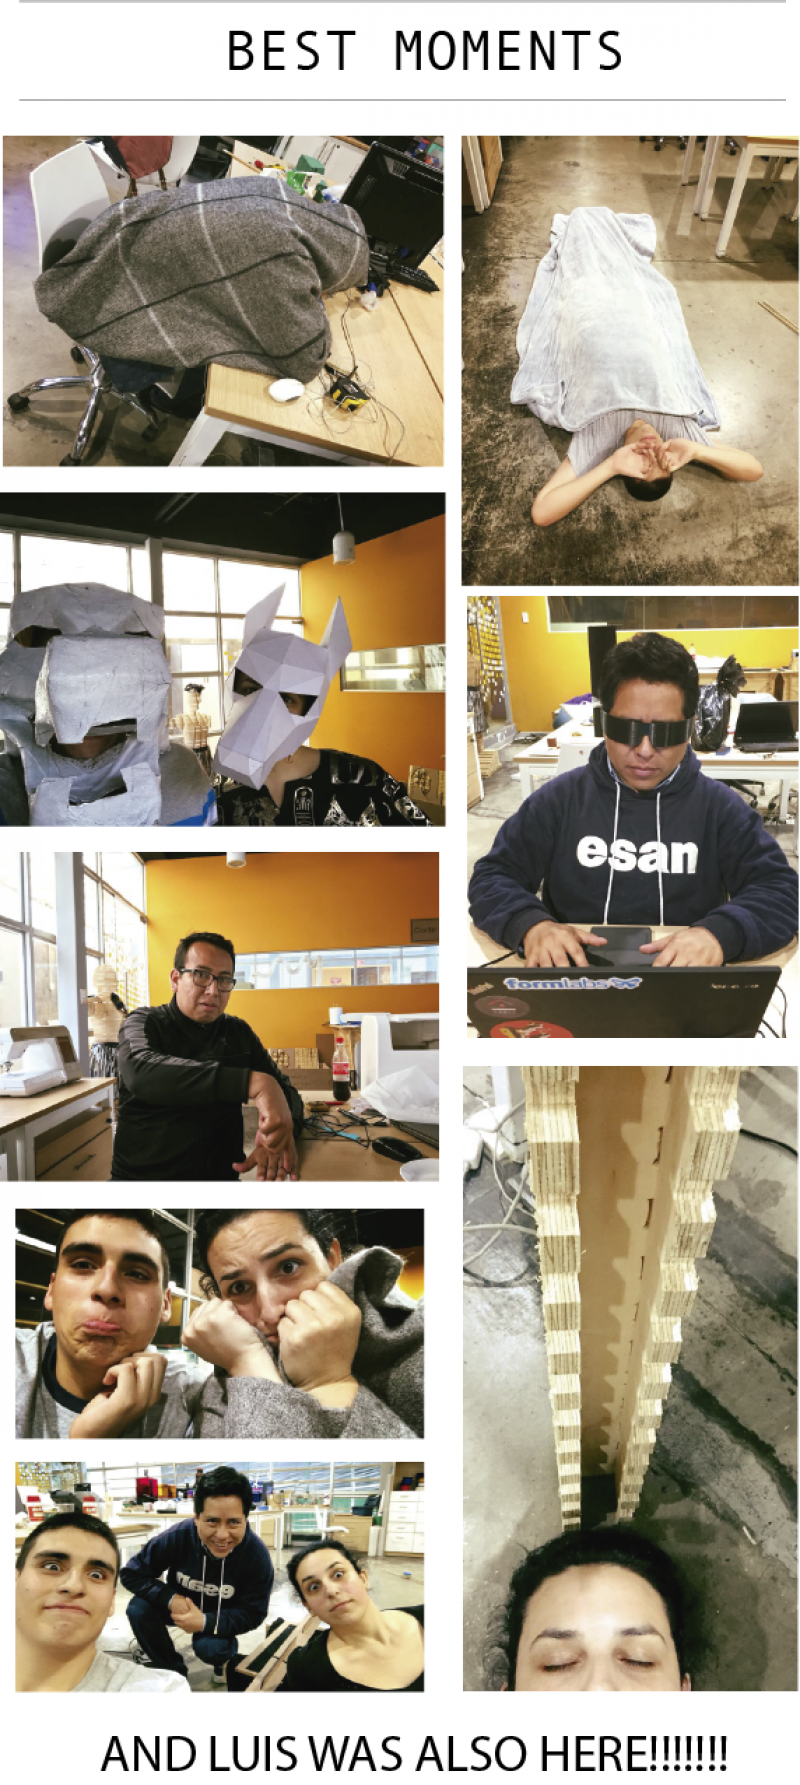
AND ALL THIS TIME.... WHERE WAS LUIS?
Luis is the one that took care of all the electronics, software and the hardware to how to make the motors work.
He started programing on Python using PY QT5 library to be able to interact with the program in a graphic way.
The Gestald nodes were used as drivers for the motors so the machine can move.
To see all related documentation go here