E-Textiles and Wearables 1
This week's assignment was to generate a circuit using conductive fabric and thread. Unfortunately, the FabLab did not receive the materials in time for us to finish the assignments. Be that as it may, I did work on the planning, schematics, and programming of my circuit.
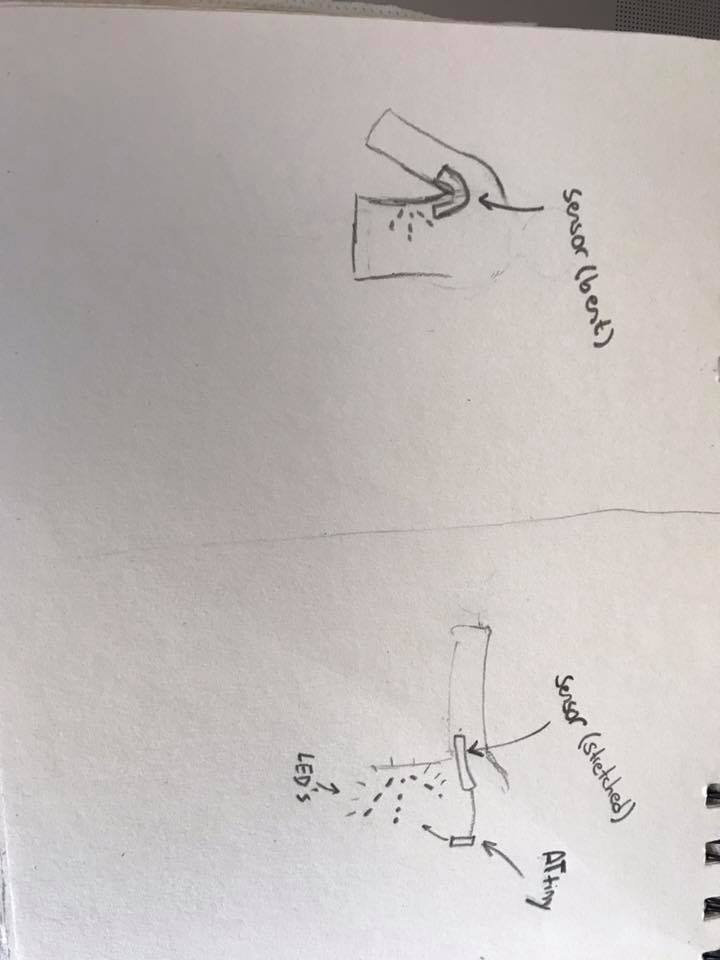
My idea was to create a circuit that would allow cyclists to use their clothes as a way of signaling left and right turns. I was planning on implementing two analog sensors, located near each of the cyclist's arms. While the cyclists are driving, the sensor will be bent, thus impeding the flow of electrical current. When the cyclist wants to turn. They would just lift their arm as they normally would, but, as current starts flowing through the sensor, an arrow-shaped array of LED's would start blinking, signaling the imminent turn.

For the sensors, I wanted to replicate the analog sensors from Kobakant. The documentation for these sensors can be found Here!.
The next step was to design the circuits. Because we did not have the conductive fabrics, I chose to use a vinyl cutter, to cut a copper and stick it to the fabric. In order to do so, I neede to create my schematic in Eagle. Because I was using an ATtiny 44 as a microprocessor, I downloaded the fab.lbr library from here!.
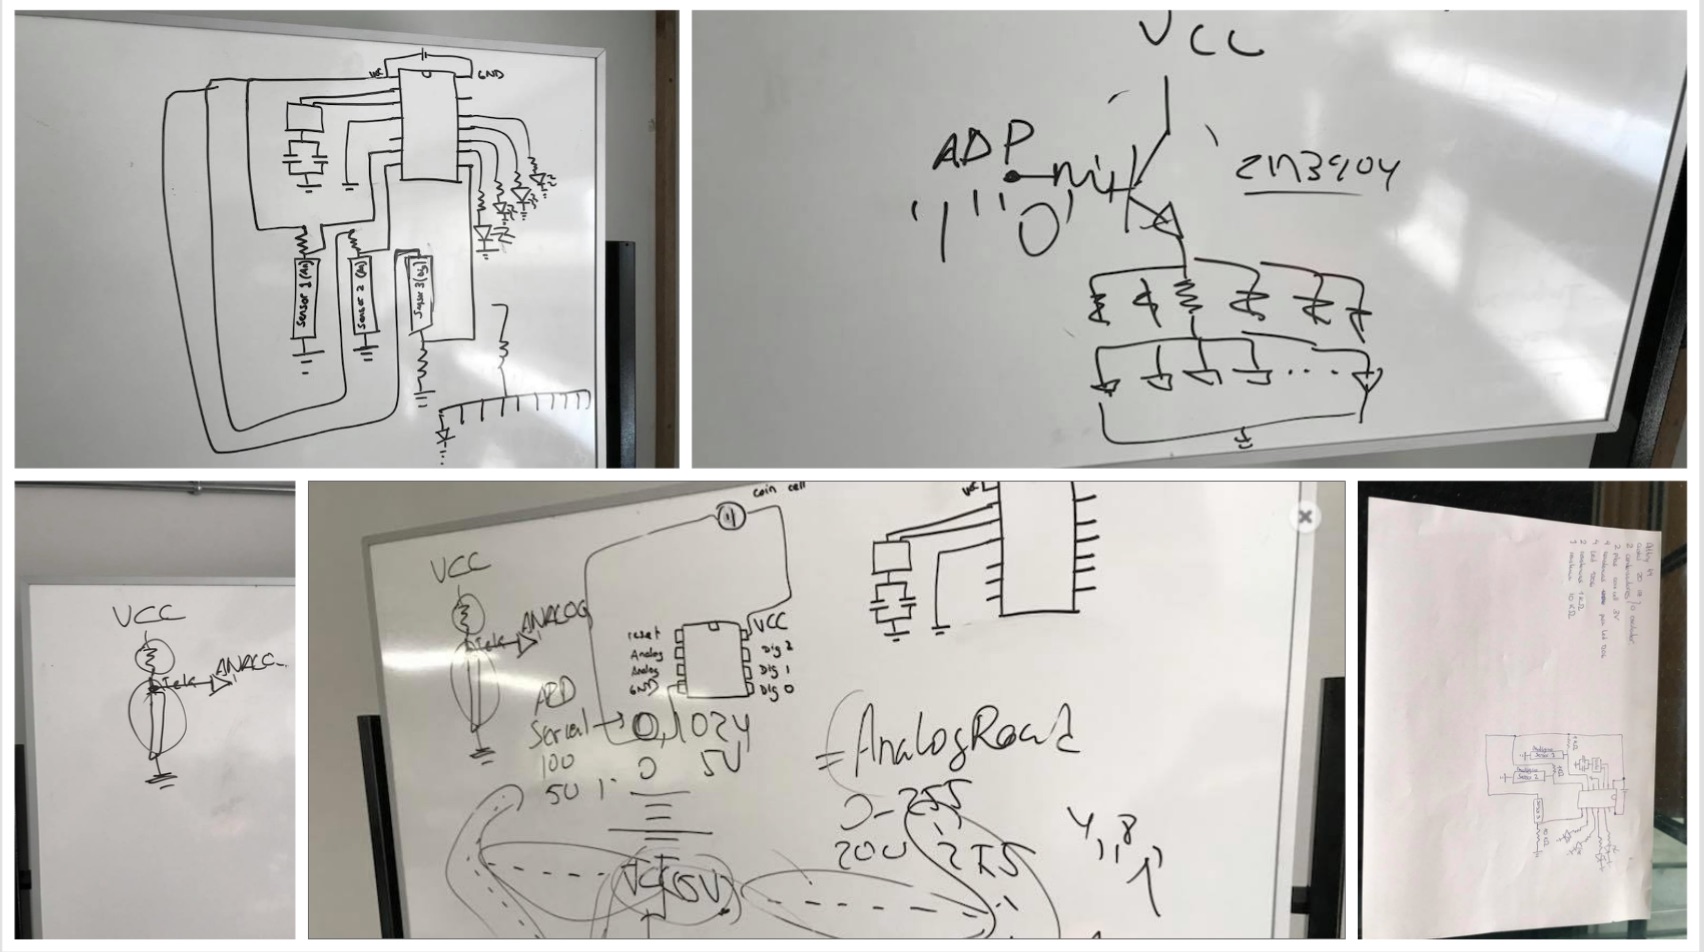
Before generating the actual schematic on EAGLE, I determined the components I would need, drawing my circuit on a whiteboard.
 Once I had an idea of the necessary components and the schematic, I started using EAGLE.
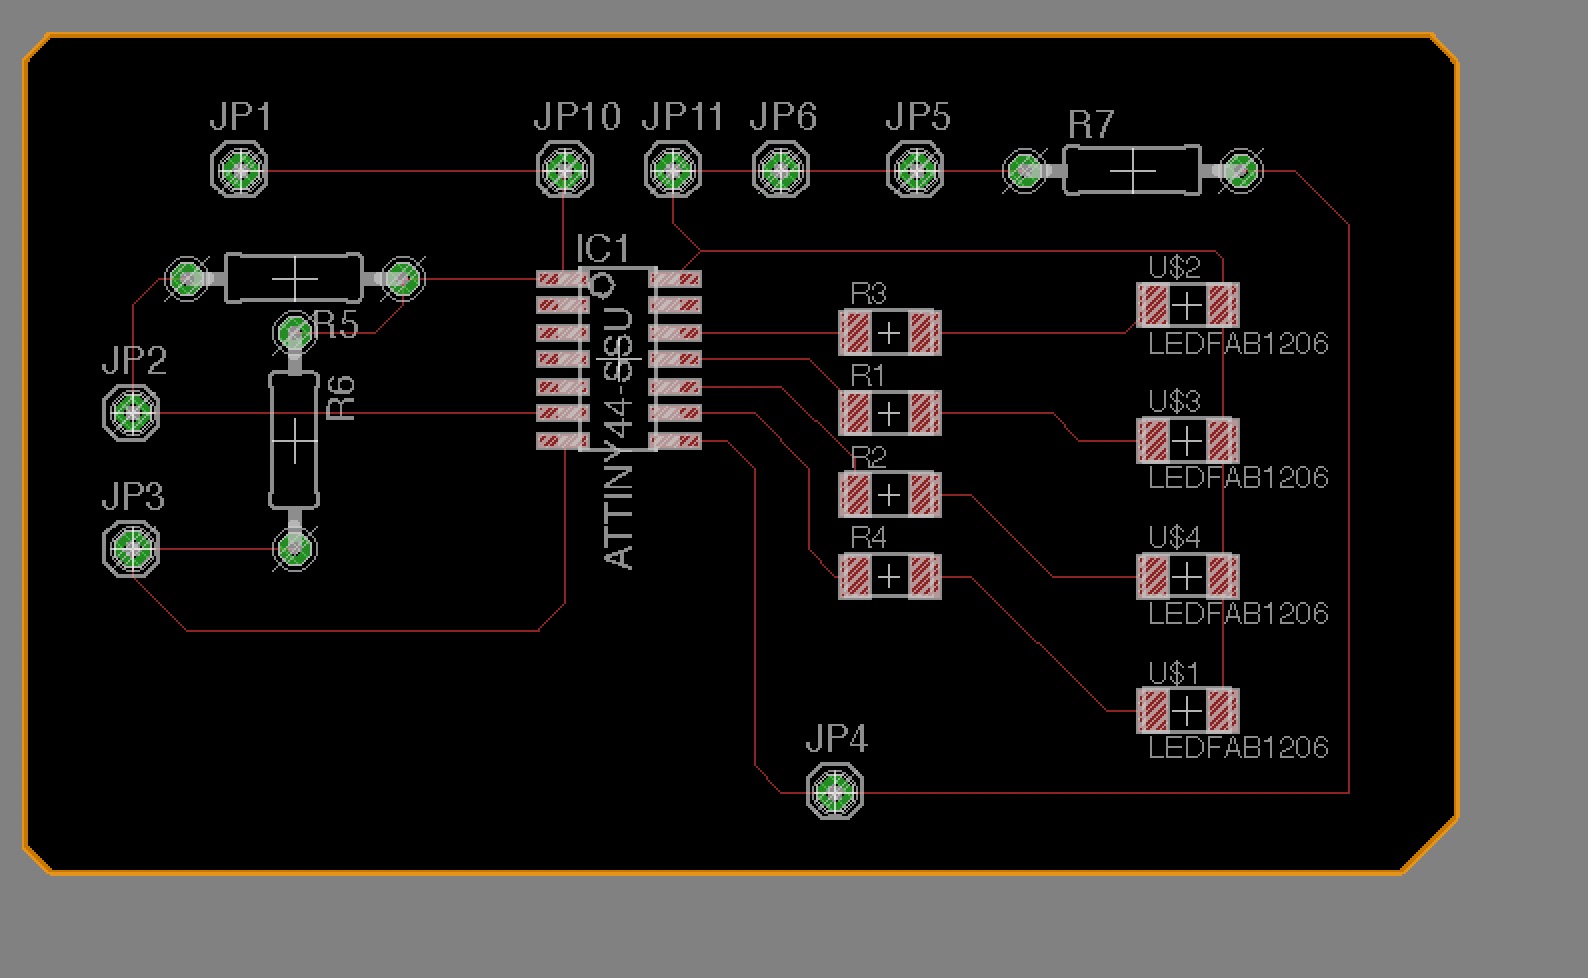
Generating the schematic was not very complicated. Here's the final result.

As for the programming, without the conductive thread and fabric, I could not connect the ATtiny with the Arduino Uno. However, here's what the code should look like. I'm confident it might work as expected.
int Right_arm =6;
int Left_arm =7;
int Button=8;
int Led1=9;
int Led2=10;
int Led3=11;
int Led4=12;
int Bl1;
int Bl2;
int Stop;
int Previous;
int Current;

Void setup()
{
pinMode(Right_arm,INPUT);
pinMode(Left_arm,INPUT);
pinMode(Button_arm,INPUT);
pinMode(Led1,OUTPUT);
pinMode(Led2,OUTPUT);
pinMode(Led3,OUTPUT);
pinMode(Led4,OUTPUT);
}
Void loop()
{
Bl1=analogRead(Right_arm);
Bl2=analogRead(Left-arm);
Current=digitalRead(Button);
if (Bl1<=100)
  {
  digitalWrite(Led1,HIGH);
  digitalWrite(Led2,HIGH);
  delay(700);
  digitalWrite(Led1,LOW);
  digitalWrite(Led2,LOW);
  delay(700);
  }
if (Bl2<=100)
  {
  digitalWrite(Led3,HIGH);
  digitalWrite(Led4,HIGH);
  delay(700);
  digitalWrite(Led3,LOW);
  digitalWrite(Led4,LOW);
  delay(700);
  }
if(Current && Previous == 0) // Comparamos el estado actual y el anterior del pulsador
  {
    Stop = 1 - Stop;
    delay(300);
  }

  Previous = Current;

  if(Stop)
  {
    while(Stop=digitalRead(Button) ==0)
    {
    digitalWrite(Led2, HIGH);
    digitalWrite(Led3, HIGH);
    delay(700);
    digitalWrite(Led2,LOW);
    digitalWrite(Led3,LOW);
    delay(700);
    if(Stop=digitalRead(PULSADOR)==1)
    {
     break;
    }
    }
  }

  else
  {
    digitalWrite(Led2, LOW);
    digitalWrite(Led3, LOW);
  }
}
Second Idea
Unfortunately, I did not have the necessary materials to make the board I wanted, nor did I have the necessary components. Thus, I had to change my idea. I decided to settle for a soft sensor. The lab had some pressure sensitive conductive fabric, so I fashioned myself a pressure sensor. I used two pieces of copper vinyl, one piece of pressure sensitive fabric, and a pocket made from regular fabric.
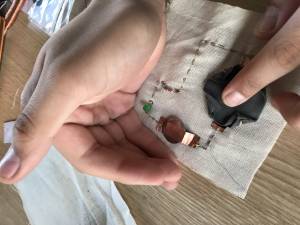
I thought this device could still be used in my original idea, as a way of determining when the blinking lights should go on, and how bright should they shine. I connected my sensor to a 330 Ohm resistor, a green Led and a 3-volt battery, and used the sensor as a way of controlling the Led's intensity. I connected everything with some silver-coated thread. This is my final circuit:


It worked! I plan on implementing this sensor on the next e-textiles assignment, this time with a microcontroller.