My Week 01 | Digital Bodies
Tuesday | October 3rd, 2017
Tuesday was a national holiday in Germany. Nevertheless, we decided as a group to make use of the free time for our project. We met at 10 o'clock in the lab to get an introduction to the programs Fusion 360, Slicer, Make Human, Meshmixer and Rhinoceros 5. As a first practical approach, Adriana showed us how to scan a body with an iPad and the program Scanner and how to use the Laser Cutter. We scanned different body parts of one another.
At 15 o'clock we joined the lecture.To review the lecture click here http://wiki.textile-academy.org/fabricademy2017/videos#week_2_-_digital_bodies
Work on this week's assignment
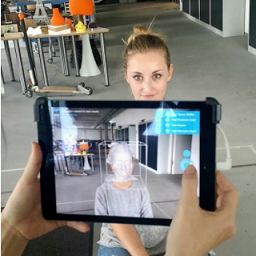
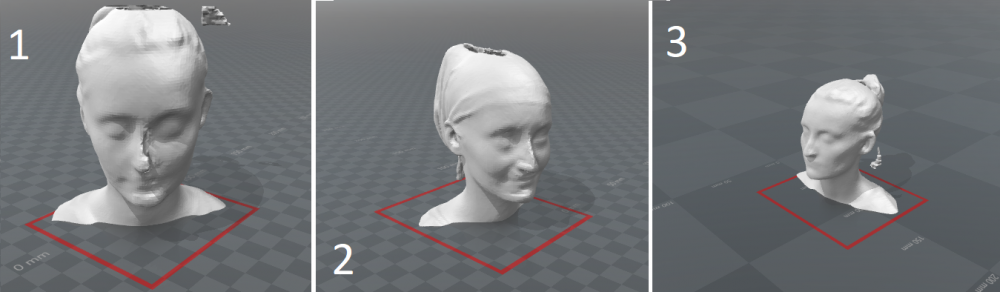
Making use of an iPad Mini and the application Scanner my head was scanned. The first scan had holes in the bun and deformations around the nose. For the second scan I tried to improve the quality of the scan by wearing a scarf around my hair but I was unsatisfied with the form the scarf gave to my head. To prevent extended needs for repair I decided to progress with scan three.
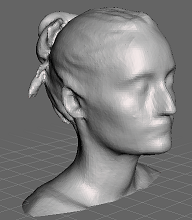
The scan I chose had holes on the chin and on the lower part of the bun. Using Meshmixer I was able to repair these holes. In addition I smoothed the surface and cut out the unconnected form which occured from hair that sticked out of my bun. Afterwards I exported the file.
Thursday | October 5th, 2017
On Thursday we came together in the FabLab to learn further techniques for Fusion 360 which allow to create joints. Next Adriana gave us a tutorial on CNC Milling.
Work on this week's assignment
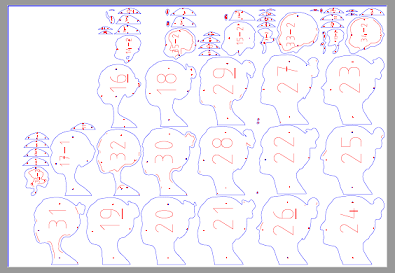
I prepared my head for the printing process with Slicer using the file I created in Meshmixer on Tuesday. I decided to cut the head vertically in it's real size (approximately 30 cm height). This led to 4 sheets of parts for my head.
I learned important steps for printing an .dxf file with rhino and illustrator. As a reminder for myself, the steps are:
- import .dxf file
- mark your sheet and click Str + J to joint your 'dots' to 'lines'
- turn your sheet if necessary
- open a new file and enter the right measures for your bed (1000×690)
- copy your sheet in the new file
- press print and adjust all settings : activate colour mapping; select red enter Speed 100 Power 10, deactivate raster, click on the double arrow; select blue enter Speed 60 Power 50, deactivate raster, click on the double arrow.
(if colour mapping does not work e.g. blue and red are printed with the same Power and Speed, deactivate colour mapping, print one after the other using general settings)
- when you have all the right settings print
When you print with the Laser cutter make sure the settings for focus and jog are precise.
The laser cutter took 20 minutes to print my first sheet. All other parts would have taken more than 1,5 hours each. Hence, we decided not to print them.

Friday | October 6th, 2017
Work on this week's assignment
On friday I changed the size in Slicer (approximately 16 cm height) and ended up with one sheet for my head. Finally, I was able to print all parts of my head.
In the evening I bought colours to paint the parts. Remark: Make sure you are aware of which side will be glued and which parts you can see. Only paint those parts which will be seen to save time and material!

Saturday | 7th October, 2017
Work on this week's assignment
On Saturday I painted some additional parts of my slices and glued them together.
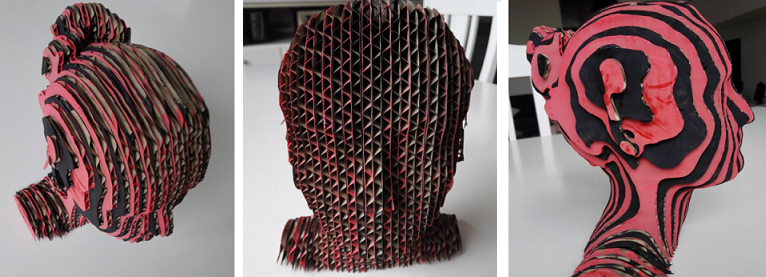
Reflection
I am satisfied with my model, since it is the first time I ever did something like that. Anyways I already see some aspects that I would change if I would do it a second time. First I would cut the neck and ears or I would use a bigger size to avoid having small pieces. I would add the glue with a brush on the whole part that is put on another piece to make it more robust. I would also use a different glue. I think it would be really intresesting to change the angel of the slices and compare the models to find out which angle makes a face more remarkable.