Human relations through technology: the original idea of #lightrunners
In my 10th week: Implications and Applications, I explained how i thought my ideal project of #lightrunners, but the initial ideas are easy to think but sometimes hard to make them real.
#lightrunners bornt as a way to play and to create a link between the members of a group, in this case I imagined clothes that can react and can recognize a friend member of your crew. I thought that could be fantastic to mix that with the real usefulness of integrate leds in running clothes, that can be used at night.

Firsts steps: reality bath
Like I said in another assignments of my Fabricademy, Im not a maker, I mean, I was not a maker. In fact I come from the world of marketing and there all the ideas are fantastic because normally they are made by others, Now I can say Im 50% maker and 50% marketeer so we can say I´m a MAKERTEER. Enough, let´s go back to #light runners.
When I had more or less clear my project I started to think in:
- The technology that I would use to connect the clothes
- The kind of garments that I would use
- The Leds issue for the clothes
Points 2 and 3 were easy, because the clothes were not dificult to choose and I had a very good experience in 12th week with the neopixels. But at point 1 I had a lot of problems. I had a few ideas about the performance of that:
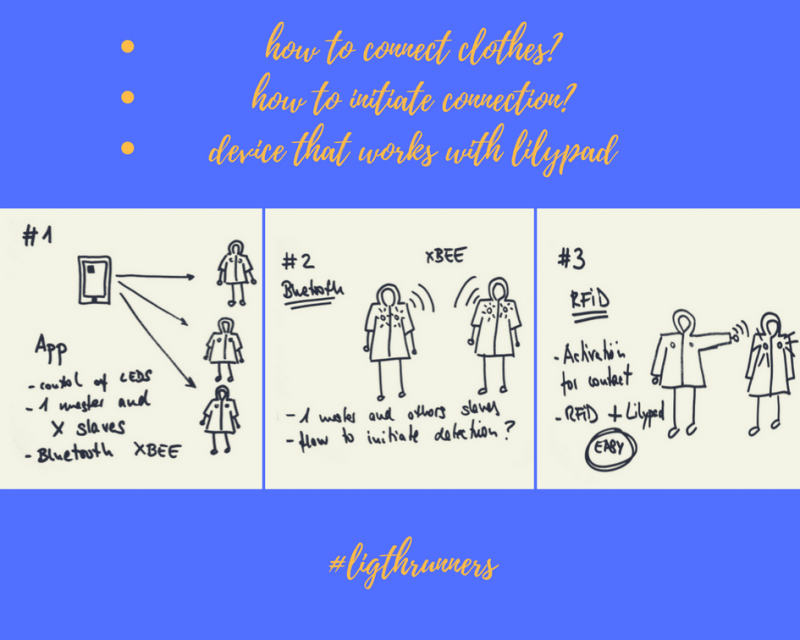
Option 1:
This was the best option, the possibility of control the sequence of colors and the detection of the differents devices. But being realistic i didn´t have, and actually I dont have the skills necessary to develop the project like this. First of all the develop of the app requires time, a lot of time and in my case more, because I have not done that.
Another big question is how the connection can be initiated, and in theory that was easy controlling the devices with the app, but is clear that this option i out of my range.
Option 2:
If i can not use a master device, like the phone, to control the devices I have to use another type of technology to connect them, but the biggest problem is how to initate a kind of boot loader sequence and let the different devices detect each other.
About this issue I was researching about use the XBee modules. So the connectivity using this wireless system is possible, but again i have the limitation of not having the programming skills needed to create a protocol that can detect other system to initiate the different sequences of colors.
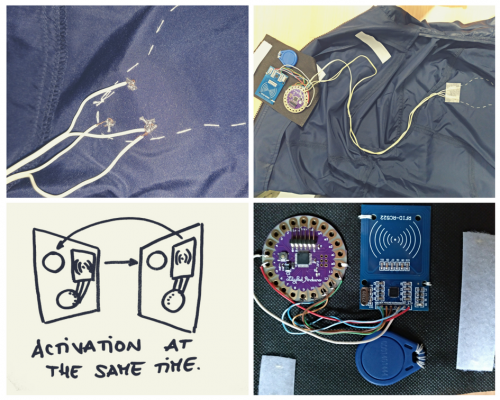
Option 3:
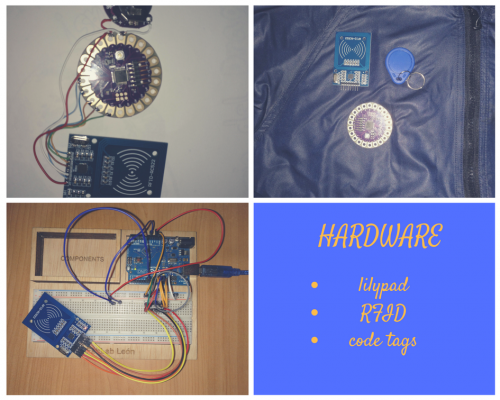
After discarding the original ideas I decided to research about the possibility of use a contact technology. Obviously i wanted to use lilypad, because it gives to me the same possibilities that the Arduino UNO, and the RFID tehcnology works perfectly with it.
In addition the concept of interaction that can be reached using this system goes in the same direction that I wanted, using a simple thing like a greeting the activator of the #lightrunners
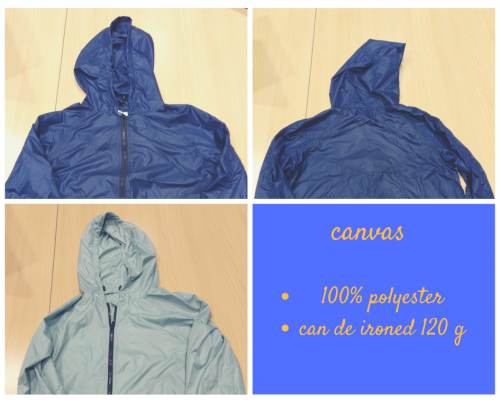
Second step: Choosing the materials

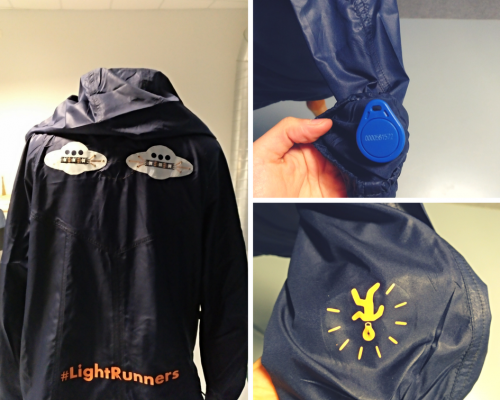
Third Step: #lightrunners style
My intention from the beginning was to create a product where I could develope a marketing strategy, or at least, with a bit of design, because this is only the prototype of what I want to make in the future.
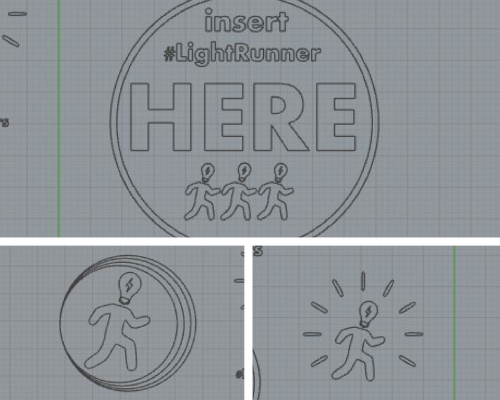
I created using rhinoceros symbols, designs and a logo that can make the product a bit more attractive.
I used the same skills that i learned in Week 9. I cut with the plotter the textile vinyls, and I ironed them in the garments.

Fourth Step: Harware and software
About the hardware:
First I made several tests with an Arduino UNO and a protoboard. I decided to use one tag code to activate the leds and another different to switch off the system. This is very interesting because a lot of different codes can be programmed and the activation of the lights can be different depending of the member of the crew that meets other.

About the software:
#include <SPI.h>
#include <MFRC522.h>
#include <Adafruit_NeoPixel.h>
#define NUM_LEDS 6 Number of NeoPixels
#define PIN 7 DIGITAL pin # where NeoPixels are connected
#define RST_PIN 9 Pin 9 for reset of RC522
#define SS_PIN 10 Pin 10 for SS (SDA) RC522
MFRC522 mfrc522(SS_PIN, RST_PIN);
Adafruit_NeoPixel strip = Adafruit_NeoPixel(NUM_LEDS, PIN, NEO_GRB + NEO_KHZ800);
void setup() {
Serial.begin(9600); serial communication
SPI.begin(); Bus SPI
mfrc522.PCD_Init(); MFRC522
Serial.println(“Identificación LightRunner”);
strip.begin();
strip.setBrightness(100); 100/255 brightness (about 40%)
strip.show(); Initialize all pixels to 'off'
} byte ActualUID[4]; to save tag code
byte Usuario1[4]= {0xAB, 0x00, 0x17, 0xA3} ; user 1 code AB 00 17 A3
byte Usuario2[4]= {0x64, 0x62, 0x15, 0xA0} ; user 2 code 64 62 15 A0
void loop() {
Revisamos si hay nuevas tarjetas presentes
if ( mfrc522.PICC_IsNewCardPresent())
{
to select a card
if ( mfrc522.PICC_ReadCardSerial())
{
Serial.print(F(“Card UID:”));
for (byte i = 0; i < mfrc522.uid.size; i++) {
Serial.print(mfrc522.uid.uidByte[i] < 0x10 ? “ 0” : “ ”);
Serial.print(mfrc522.uid.uidByte[i], HEX);
ActualUID[i]=mfrc522.uid.uidByte[i];
}
Serial.print(“ ”);
comparation of UID to switch on, swith off or make another different kind of sequence
if(compareArray(ActualUID,Usuario1))
{
for(int j=0; j<256; j++) {
for(int i=0; i<NUM_LEDS; i++) {
strip.setPixelColor(i, Wheel ;
}
strip.show();
delay(20);
}
}
else if(compareArray(ActualUID,Usuario2))
{
for(int j=0; j<256; j++) {
for(int i=0; i<NUM_LEDS; i++) {
strip.setPixelColor(i, Wheel1) )</sup> )</sup> ;
}
strip.show();
delay(20);
}
}
else{
for(int j=0; j<256; j++) {
for(int i=0; i<NUM_LEDS; i++) {
strip.setPixelColor(i, Wheel2) )</sup> )</sup> ;
}
strip.show();
delay(20);
} to switch off the leds
for(int j=0; j<256; j++) {
for(int i=0; i<NUM_LEDS; i++) {
strip.setPixelColor(i, 0);
}
strip.show();
delay(20);
}
}
mfrc522.PICC_HaltA();
}
}
}
uint32_t Wheel(byte WheelPos) {
if(WheelPos < 85) {
return strip.Color(WheelPos * 3, 255 - WheelPos * 3, 0);
} else if(WheelPos < 170) {
WheelPos -= 85;
return strip.Color(255 - WheelPos * 3, 0, WheelPos * 3);
} else {
WheelPos -= 170;
return strip.Color(0, WheelPos * 3, 255 - WheelPos * 3);
}
}
boolean compareArray(byte array1[],byte array2[])
{
if(array1[0] != array2[0])return(false);
if(array1[1] != array2[1])return(false);
if(array1[2] != array2[2])return(false);
if(array1[3] != array2[3])return(false);
return(true);
}
Fifth Step: Making my own neopixels
As i said in the materials descripition, the neopixels originally are in a strip that can be cutted and welded in order to form different shapes. I decided to try making my own neopixels, trying to build some kind of modules, in which i could use the skills that i learned in all the assignments done before:
- Week 5: E-Textiles and Wearables I
- Week 9: E-textiles and Wearables II
- Week 12: Skin electronics
First I designed the shape of the neopixel that i wanted to get. I used POLYVINYL that allows me to weld the neopixels directly between them, attached to the vinyl form.
![]()
I decided to put 3 neopixels in each of the modules. Then I welded the neopixels to a flexible circuit of FLEXIBLE COPPER SHEETS that I cut in the plotter.
![]()
About the power supply
In the datasheet of th lilypad Arduino appears the voltage specifications to work with:

The datasheet for neopixels strip:
![]()
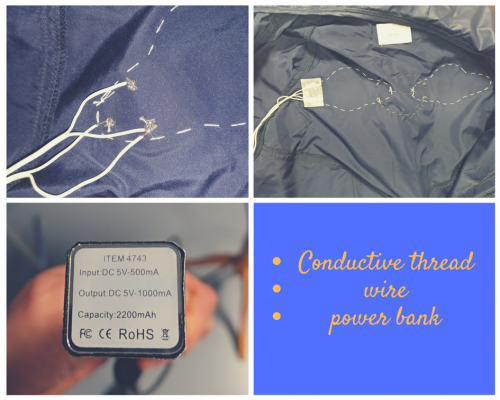
To give power to all circuit i chose a power bank, that is used to charge phones. That allowed me to use the mini USB plug on the lilypad and gave me 5 volts, enough to give power to the neipixels and to the lilypad. In addition is easy to charge but this is only useful for the prototype, because is very heavy and very big. Maybe is better to try with another kind of smaller battery.


FINAL ASSEMBLY