E-Textiles and Wearables II
https://www.emiliapucci.com/week-9-e-textilesandwearables2
INSPIRATION
I want to work on heartbeat and the connection between physical and emotional wellbeing as a part of my final project.
My focus for this assignment is to develop a heart rate sensing top that can capture heartbeat and translate into pulsating LED lights. This will allow me to start experimenting with heart rate sensors as input and led as a possible output. In the future my project will be more complex, but it's a start!
{photos of my heart stuff and links of heart rate sensors}
OBJECTIVES & PLAN
In order to ensure I have an interactive product ready for the assignment and start building my final project step-by-step, I decided to break down the process in digestible modules:
- MODULE 1 - CAPTURING HEARTBEAT WITH AN ECG SENSOR
- MODULE 2 - MAKING A PARAMETRIC HEART EMBROIDERY
- MODULE 3 - CODING A PULSATING HEART
- MODULE 5 - ASSEMBLING A SMART SPORTS BRA
- MODULE 4 - ADDING A CAPACITIVE PRESSURE SENSOR
In the next step, the goal is to experiment making an optical heart beat sensor, and to compare it with the ECG for accuracy and wearability.
MODULE 1 - CAPTURING HEARTBEAT WITH AN ECG SENSOR

I wanted to start playing with heartbeat sensors, so I hooked up the Sparkfun AD8232 Heart Rate Monitor and tried the tutorial here , to create a monitor for my cardiac activity.


The hookup on Arduino went smoothly. My difference with the tutorial was that I used an Arduino UNO vs an Arduino Pro Mini 328. The only difference with the UNO is that it has 3.3V or 5V instead of VCC, so I checked the AD8232 datasheet and found that I need to use the 3.3V.
The issues came when I tried to display the ECG on Processing. I continuously got the error
Error, disabling serialEvent() for /dev/cu.usbmodem1411
null
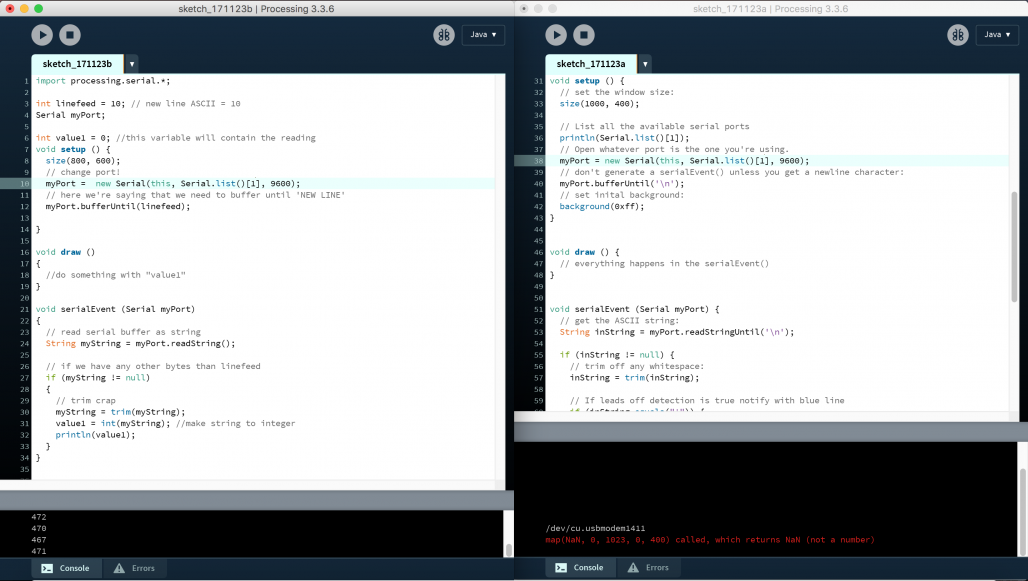

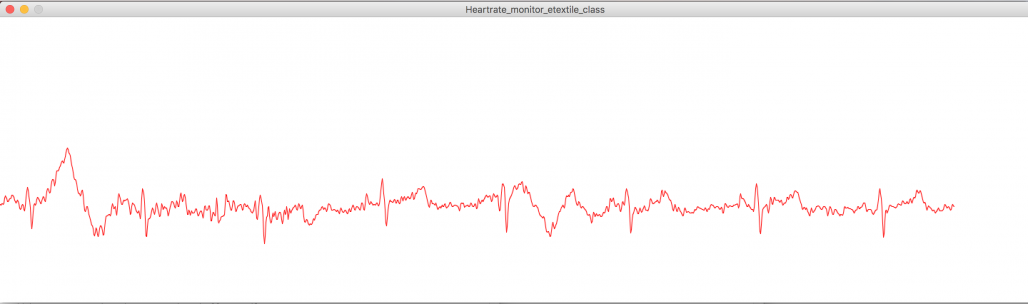
I went on this forum to troubleshoot my issue, and found that one user solved it by downloading the 2.2.1 version of Processing. It worked! Now I can visualize my heartbeat easily on the screen.
MODULE 2 - BUILDING A PARAMETRIC HEART EMBROIDERY
Sketched a parametric heart outline.


Uploaded the drawing as a background on Rhino. Created the outlines.
Then opened Grasshopper and used the Delaunay edges to create a nice parametric geometric design.


Traced the lines on the cotton fabric and stitched the embroidery with red thread.
Then I drew the circuit:
{image of circuit}
And started sewing the LEDs with conductive thread.
Once I connected all the + sides to the Lilypad, I realized I didn't;t have enough conductive thread left. I had another one, but about 1/2 as thick.
So I took my multimeter and measured the resistance of the two threads:
THREAD 1 270 - 280 Ohm
THREAD 2 900 - 940 Ohm
So the second thread has three times the resistance of the first. I believe this will be an issue for the circuit, so I will go and find a way to make the circuit with the same thread.
Here**is a link to help choose the right type of conductive thread and in general how to understand conductive's thread's behavior.


MODULE 3- CREATING A PULSATING HEART
I broke down the interaction in its 2 main components:
INPUT - A capacitive pressure sensor (while waiting to add the heartbeat sensor)
OUTPUT - Fade in fade out LEDs
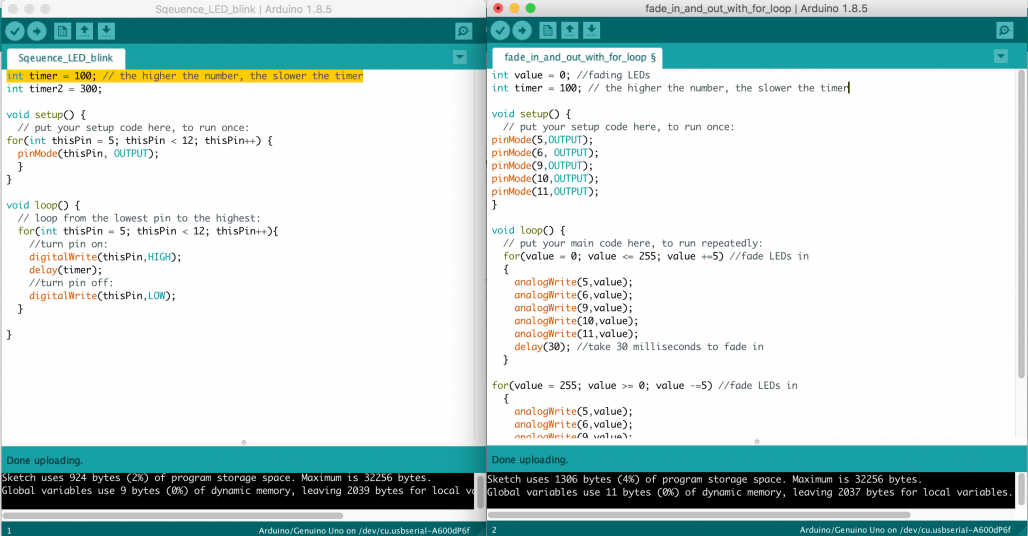
On Arduino, I tried to build up my skills by starting with two different sketches:
- LEDs blinking in series
- LEDs Fading in and out
TBC with details on the coding

MODULE 4 - ASSEMBLING A SMART SPORTS BRA
Created the pattern by using a bra I have.
Checked the pattern with online sports bra patterns
Made it in Rhinoceros
Laser Cut the pattern (speed 12, Power 18)
Sewed with a sewing machine
MODULE 5 - MAKING A CAPACITIVE PRESSURE SENSOR
This capacitive pressure sensor is going to substitute the heart rate sensor in this iteration, so I can add an INPUT that will cause the OUTPUT of the pulsating LEDs.
I used the tutorial Fabric Piano in the book Sew Electric, written by Leah Bueckley (the inventor of the Lilypad) and Kanjun Qiu. The piano keys are capacitive pressure sensors and I found the tutorial delightfully comprehensible and very achievable :)
{photos}
Step 1 - Sew the conductive yarn from Pin A4 to a side of the sports bra
Step 2 - Writing and uploading the code for the pressure sensor from Sew Electric
Step 3 - Testing if it works
Step 4 - Putting together the Pressure Sensor input with the LED fade in and out output.
Check herethe video of the smart heart bra making of