Open Source Hardware: from Fibers to Fabric
https://www.emiliapucci.com/week-8-circular-open-source-fashion

INSPIRATION
When we assisted to the class Open Source Hardware: from Fibers to Fabric, we had no doubts on what arouse our enthusiasm irremediably: the Circular Knitic. It is elegant, not exceedingly complicated and properly documented, plus the teachers of the class - Mar & Varvara, were the makers so it would be easy in case of troubleshooting. I have never made a machine before and this was a great challenge especially with the support of the fashion design and the engineering students at Fablab Yucatan.


OBJECTIVES & PLAN
Our Objectives were the following: to reproduce the Circular Knitic adding a few functionalities to hack it :)
HACKS
- Adding a potentiometer to control the speed of the knitting machine - This will control the tightness or looseness of the knit
- Adding a direction switch, in order to change the direction of the knitting - This will be fun to have and experiment with
- Adding a place for a second yarn - This will enable the creation of multiple yarn knit fabric and CREATING FABRIC WITH CONDUCTIVE YARN!
PLAN
Because of tight deadline and the presence of weddings, boyfriend visits and a Mexican National Holiday - La Revolucion Mexicana del 20 Noviembre, we decided to engage a broader team and divide tasks in the following order:
- Read the tutorial material - as quickly and thoroughly as possible to change pieces in case of need
- 3D printing - Some pieces require up to 15 hours, so with the collaboration of Jesus we started that ASAP on Tuesday
- Material sourcing - a lot of screws, nuts, bolts, needles and other materials are needed for the Circular Knitic, so we made a list and a city hunt plan
- Building the Electronics - not too complicated but need to ensure all works
- Building the wood base - a bit labor intensive so needed in time
- Laser cutting - least labor intensive process and we needed the acrylic
- Assembling - once all the pieces were available :)
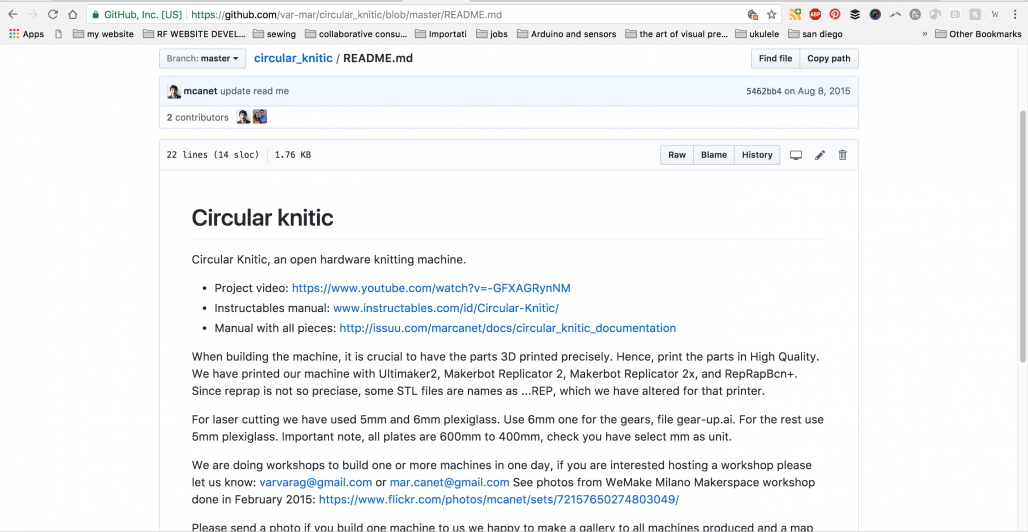
We used the documentation material coming from the following sources:
Instructables is good to read the instructions and ge a basic idea of how it works
GitHub has all the files you need and links to find other resources
Issuu has a very thorough technical guide on how to assemble which pieces
SOURCING THE MATERIAL
Once we read the Instructable, we found a BOM on Github. What we discovered is that the item list was not as precise as we needed. Ideally we should have a BOM updated for each country that makes the Circular Knitic.
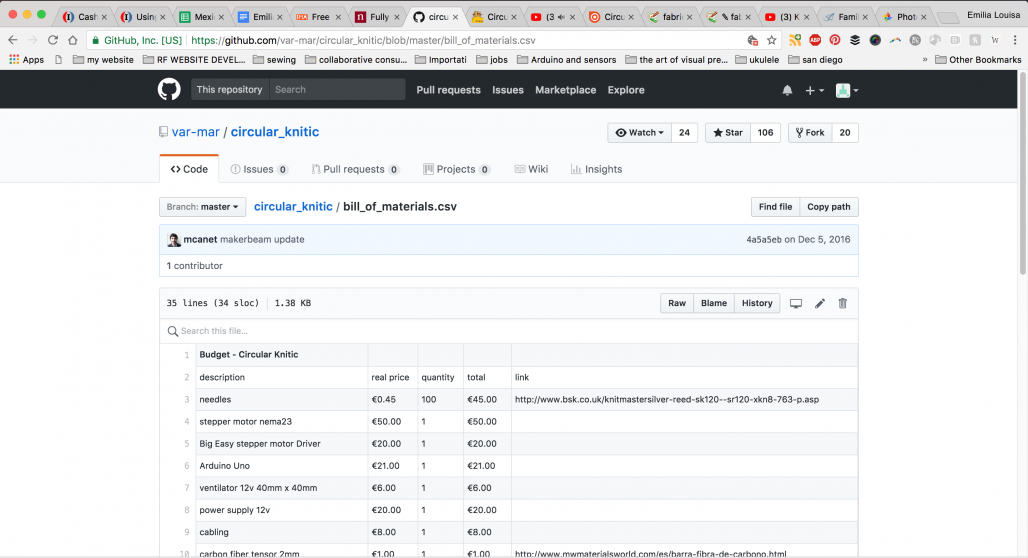
The list on Issuu is much more specific and helpful than the BOM on Instructables. Use that one :)
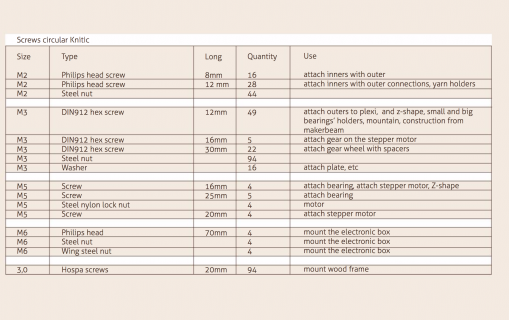

Now that the list was found, the challenge (el reto) was to translate it to Spanish, and more specifically, to technical Mexican requirements. Technicalese is specific in every country, and I drew a VISUAL LIST with all the different screws, nuts and bolts that we needed in order to put everything together.


Then we went around Merida to find all the different pieces. Ordering online might not have enabled a quick enough arrival so we made a list of places (check the map) and went around on our mission.


(For all the people buying screws in Merida: PTB is the ONLY place that will sell M3 screws and nuts!!)
RESULT
M2 screws and nuts
Are pretty impossible to find, so we are changing the size (Mexico has a mixed bag of screws between milimetric and standard and they don’t work well with M2
Makerbeams
We can only order these online or find alternatives at the Fablab (3D printing them, using something different..)
Local stores don’t have anything comparable that we can use or that will arrive before 4 weeks from now.
Knitting Needles XKN8
After going to 4 different places and finding absolutely NOTHING of the sort - Merida doesn't deal in knitting needles, period - we checked on Ebay and found the saddening truth: the needles are out of production 0_0
Bearings
We cannot find the 5 x 10 x 4 mm, only 5 x 11 x 5 mm, so we will either sand or reprint the pieces that have to go with them.
{Images here}
3D PRINTING THE PARTS
With the help of our saviour Jesus, a mecatronic engineering student interning at Fablab Yucatan, we immediately started printing the pieced of the Circular Knitic.
3D PRINTER - Proyectil FDM 20
SLICER - Repetier
MATERIAL - Colored ABS
SIZES - Varied
TIMING - varied between 2 hours and 15 hours
TEMPERATURES - nozzle 195, glass bed 65


Here are the pieces that were printed on Friday. We still have a lot to go but so far it's been a pretty smooth process with a few hiccups given by changes in humidity, which jammed on of the 2 3D printers.

BUILDING THE ELECTRONICS
As we were 3D printing and sourcing the material, once again thanks to the multitalented Jesus, we started putting together the electronics of the Circular Knitic.
MATERIALS
- Stepper motor nema23 - taken from the CNC router at the Lab
- Stepper motor Driver coming from Somey (the company providing the CNC driver to Fablab Yucatan)
- DCCduino Arduino UNO R3 Development Board Atmega328 Module with Acrylic Experimental Platform - BLUE
- ventilator 12v 40mm x 40mm
- power supply 12v
- cabling


PROCESS
- Removed the stepper motor from the CNC router at Fablab, to speed up process
- Sourced a Stepper motor driver from Somey at their premises in Merida
- Programmed the DCCduino Arduino Uno R3 to make the stepper motor move
- Attached power supply and verified it works
- Designed circuit board for the Electronics to fit elegantly inside
- Still need to print the circuit board and attach the ventilator


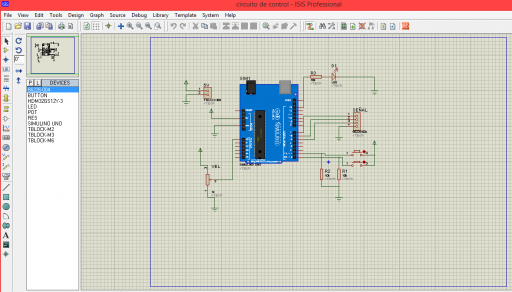
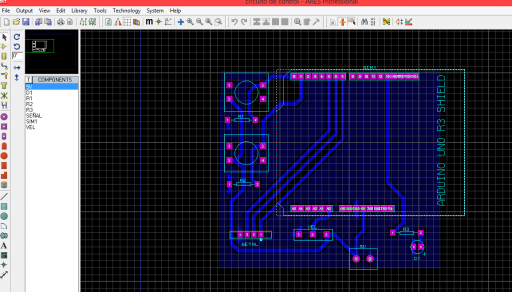
The diagrams and circuit board design are the product of Jesus' work, as well as the electronics assembling. I am learning from him :)
BUILDING THE WOODEN BASE
For this part, I worked with Alex a physicist and the Fablab's expert in woodworking.
MATERIALS
Metallic angles - from
“Hospa” screws - from there is no such thing as a hospa needle in Mexico, so we got something different which ended up being a bad idea
Drywall screws 8 x 1 ''
Wood - from scrap material at the Fablab
Power Drill

PROCESS
- We cut the wood with a circular saw to create all the pieces with the desired length
- We decided to make the base of the pieces rectangular, not square - 3,8 x 3 mm. It was easier for us and we felt would be more stable.
- Then we started assembling the pieces with the metallic angles and realized the Hospa screws were too soft - the top cross would get ruined by applying rotation with a screwdriver or a drill, so we changed approach.
- We drilled a hole in the two wooden pieces and put a long screw inside to keep it together, paired with Resistol glue.
- We then used the angles for the weakest corners of the structure.
- As decided in the Objectives, I added an extra holder for a second yarn. The yarns will come together at the tower.


THE MISSING NEEDLES: EXPLORING SOLUTIONS
As mentioned in the Objectives and Process, the needles required in the original tutorial are not produced anymore by the UK based factory :(
I guess we should have listened better during the class, but I believe we got so excited about it that that information was not registered in our brains.
There was no store in Merida selling these needles, but unfortunately more than one told us yes when we called and then the yes ended up being a misunderstanding. Only one store called Brito told us a client had an order a long time ago that is buried in their warehouse, and they promised they will look for it.
As discussed with Varvara on the Instructable comment thread, it's a good occasion to reconfigure the tutorial with different needles. Currently I'm exploring the following possibilities:
- Email the company in UK and ask if they have any extra pieces (60 by any chance? :) of the right size
- Send request on ebay/craigslist for the needles and hope someone has them used
- Check what needs to be adjusted in order to use the other needles - email varvara
- Call brito again ad see if they found their excess needles in their warehouse, and check if they work
- 3D print the needles (feels challenging though but maybe possible)
- Use different needles. These look similar and are 1 cm longer, so maybe we can tweak the machine.
- Whatever works the fastest and the best :)
LASER CUTTING THE TOP + ROTATING PIECES
We haven't done it yet since we were waiting for the acrylic to come and then decided that we are going to change the design of the control panel to fit the extra functionalities.
REFLECTIONS & NEXT STEPS
THE BAD NEWS - The needles are not available anymore, and we could have paid more attention to discover this on time.
THE GOOD NEWS - We now have in-depth knowledge of the material providers ecosystem and can out together a Made in Merida Circular Knitic.
THE COOL NEWS - We might be going to adjust the machine to make it work with different needles
Check a WIP video of this adventure here :)