E-textiles and Wearables II
Assignment for this week was to create an interactive object.
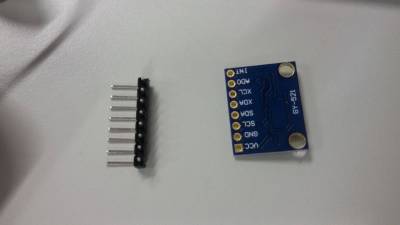
For this project, I used an Arduino and an Accelerometer-Gyroscope GY-521 MPU6050.
The MPU6050 contains both a 3-Axis Gyroscope and a 3-Axis accelerometer allowing measurements of both independently, but all based around the same axes, thus eliminating the problems of cross-axis errors when using separate devices.

Specifications
Accelerometer ranges /-2, /-4, /-8, /-16g
Gyroscope ranges: /-250, 500,1000, 2000 degree/s
Voltage range:3.3V-5V ( the module include a low drop-out voltage regulator).
This module contains everything required to interface to the Arduino and other controllers via 12C and give motion sensing information for 3 axes -X, Y, Z.
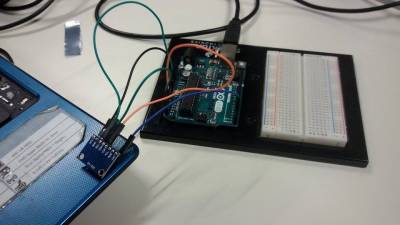
I connected the module- to-Arduino this way:
SDA-A4
SCL-A5
VCC-5v
GND-GND
INT-pin2
The following libraries were necessary to download and be put on the Arduinos libraries folder in order for me to understand better the module and read his values.

Then I went to my arduino and run the sketch I2C_scanner and read the values on the serial monitor.

By moving the module I was observing his values and wrote down which values are showing a fall in all 4 directions.
Then I used the following code provided from githube and changed the values in this code according to my gyroscope values.
#include <Wire.h> //library used for I2C communication

long accelX, accelY, accelZ;   //data read from MPU itself
float gForceX, gForceY, gForceZ;

long gyroX, gyroY, gyroZ;
float rotX, rotY, rotZ;

void setup() {
  Serial.begin(115200);
  Wire.begin();
  setupMPU();
}

void loop() {
  recordAccelRegisters();
  recordGyroRegisters();
  printData();
  delay(100);
}

void setupMPU(){ //establish comunication with MPU, setup registergs used to read data
  Wire.beginTransmission(0b1101000); //This is the I2C address of the MPU (b1101000/b1101001 for AC0 low/high datasheet sec. 9.2)
  Wire.write(0x6B); //Accessing the register 6B - Power Management (Sec. 4.28)
  Wire.write(0b00000000); //Setting SLEEP register to 0. (Required; see Note on p. 9)
  Wire.endTransmission();
  Wire.beginTransmission(0b1101000); //I2C address of the MPU
  Wire.write(0x1B); //Accessing the register 1B - Gyroscope Configuration (Sec. 4.4)
  Wire.write(0x00000000); //Setting the gyro to full scale  /- 250deg./s
  Wire.endTransmission();
  Wire.beginTransmission(0b1101000); //I2C address of the MPU
  Wire.write(0x1C); //Accessing the register 1C - Acccelerometer Configuration (Sec. 4.5)
  Wire.write(0b00000000); //Setting the accel to  /- 2g
  Wire.endTransmission();
}

void recordAccelRegisters() {
  Wire.beginTransmission(0b1101000); //I2C address of the MPU
  Wire.write(0x3B); //Starting register for Accel Readings
  Wire.endTransmission();
  Wire.requestFrom(0b1101000,6); //Request Accel Registers (3B - 40)
  while(Wire.available() <6);
  accelX = Wire.read()<<8|Wire.read(); //Store first two bytes into accelX
  accelY = Wire.read()<<8|Wire.read(); //Store middle two bytes into accelY
  accelZ = Wire.read()<<8|Wire.read(); //Store last two bytes into accelZ
  processAccelData();
}

void processAccelData(){
  gForceX = accelX / 16384.0;
  gForceY = accelY / 16384.0;
  gForceZ = accelZ / 16384.0;
}

void recordGyroRegisters() {
  Wire.beginTransmission(0b1101000); //I2C address of the MPU
  Wire.write(0x43); //Starting register for Gyro Readings
  Wire.endTransmission();
  Wire.requestFrom(0b1101000,6); //Request Gyro Registers (43 - 48)
  while(Wire.available() <6);
  gyroX = Wire.read()<<8|Wire.read(); //Store first two bytes into accelX
  gyroY = Wire.read()<<8|Wire.read(); //Store middle two bytes into accelY
  gyroZ = Wire.read()<<8|Wire.read(); //Store last two bytes into accelZ
  processGyroData();
}

void processGyroData() {
  rotX = gyroX / 131.0;
  rotY = gyroY / 131.0;
  rotZ = gyroZ / 131.0;
}

void printData() {
  Serial.print("Gyro (deg)");
  Serial.print(" X=");
  Serial.print(rotX);
  Serial.print(" Y=");
  Serial.print(rotY);
  Serial.print(" Z=");
  Serial.print(rotZ);
  Serial.print(" Accel (g)");
  Serial.print(" X=");
  Serial.print(gForceX);
  Serial.print(" Y=");
  Serial.print(gForceY);
  Serial.print(" Z=");
  Serial.println(gForceZ);
}
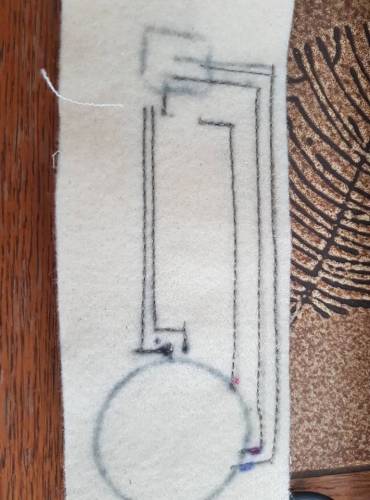
I wanted to integrate the system in a belt using the conductive thread as wires and a lilypad. I first tried to a small version to see if I could make the idea work.
 I
I
I used the sawing machine to saw but unfortunately, the connection was very weak. I used a voltmeter to check the connection and from one side of the connection to the other the resistance was or very high or didn't show any connection at all.
For a time I was still thinking or how to ingrate the system but wasn't successful so when me and Melissa where doing our final project I first tried this assigment on the armband and was working.