week 2
Digital Bodies.
Assignment | 3 oktober 2017
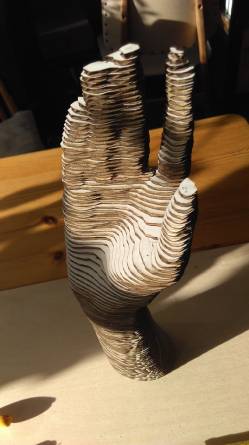
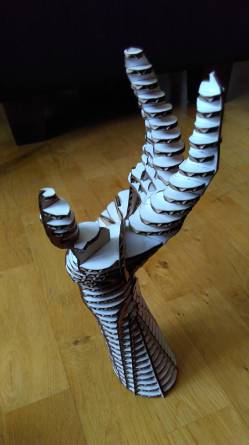
Use software to obtain a body-figure and use a digital fabrication process to produce it.
ref.: http://fabricademy.fabcloud.io/handbook/classes/01_digital_human.html
3DF Zephyr
In the past I have used the photo geometry software 123D Catch but sadly it's not available anymore as a free program. So, scouting the internet I found a new option called 3DF Zephyr. (https://www.3dflow.net/3df-zephyr-pro-3d-models-from-photos/) First thing I immediately like is that they state clearly on their website what functions are included in the free version of the software (limit to 50 photo's). On their tutorial page you can download a test photo batch, which gave a nice result when rendering. So I felt it was worth the time to continue, though I did had to resort to a different computer for more rendering power.
The difference between 3DF Zephyr & 123D Catch is the rendering. In 123D Catch renders in the cloud while 3DF Zephyr relies on the capacity of your computer. 123D Catch was user friendly with a “it either works or not a all” type of result. Usually it was not worth the effort of trying to edit the photo shoot to improve the outcome. 3DF Zephyr program looks looks more complicated but essentially works the same. With the advantage of letting me render one step at the time. So first to point cloud before rendering the mesh etc. Which let's you judge earlier in the process if it's worth the effort to continue.
The first two photo batches I tried were a fail. It was late in the evening and the “quality” of photo's where not good enough for the software. Meaning: even light source, no over-light/under-light, no burry shots, even distance shots from object etc. are things to be picky about when creating photo batch to import. (https://www.3dflow.net/technology/documents/photogrammetry-how-to-acquire-pictures/)
Looking at the failed result of the hand photo shoot I was wondering if also the reference points (or the lack there off) where an issue. So when trying this again in the morning I photographed a shoe. Which is a nice textured object that does not move while practicing to make good photo's (yes, it's a skill). And I did the shoot outside because it was a cloudy day (nice even light source). And Hurrah, this worked. :)


3D scanning
I'm not sure if it was necessary or if it helped the software at all, but I drew random shapes with a marker on my skin as reference points. The first rendering outcome looked a bit messy. To improve the model I tried the programs option of adding a mask. Which means editing each photo, defining what is the model and the background. When you continue to the next photo, the software does a guess for you which you can edit and detail. Editing the 50 photo's took me about 2 hours of clicking, but it was worth the effort. Then from point cloud you can render a mesh. Which was quite a bumpy model. Now with the mask in place I re-rendered the whole thing in it's highest resolution.


Open source 3D editing
MeshLab has a bunch of filters which can be applied to your 3D model. One of it's powerful filters is reducing a mesh. Downside is that it's also capable of introducing geometry mistakes. Which I think are caused when filters are not applied in the right order. Switching between MeshLab and Meshmixer can be a good solution. The strength of that program is the set of brushes which you can use to “paint” (edit) the geometry. However, in my opinion, Meshmixer should only be used for small edits. It's not good for trying to re-sculpt an entire model. If that's your intend then your better off getting to grips with Blender.


3D editing Fusion360
This is a software new for me, so I spend quite some time just browsing trough tutorials. To up what I did to my model:
- In preferences (top right of screen) > Preview > turn on the mesh workspace checkmark (Mesh is currently still a Beta function).
- (in model mode) Insert > insert mesh.
- Turn off capture history (right click left menu, top one of list).
- Switch to mesh mode. (button top left of screen).
- Modify > Make closed mesh.
- Modify > Reduce.
- Modify > Plane cut (Fill type > uniform).
- Modify > Remesh (if necessary)
- Switch to Model mode.
- Right click in left menu > Mesh to BRep.
- Make > Slicer for Fusion360.
Note: (as far as I understand now) If you want to edit a STL or OBJ file, yes, that is possible in Fusion, but the fuction is still in Beta so it has it limits. If you want that model to interact with other objects drawn in fusion, the STL/OBJ has to be converted to BRep. Which is only possible is you turn off the timeline feature. If you want to add parametrics to the model, you have to create a TSpline model. This can not be converted from BRep. You have to trace by hand to define how and whee you want the splines placed in your model.


3d editing Fusion360 Slicer app
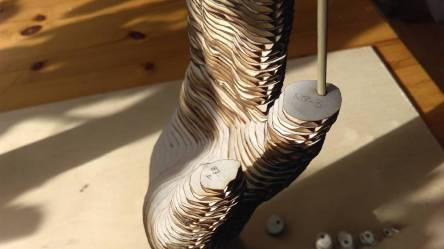
I am familiar with this program, previously called 123D make, but now converted to an app for Fusion360. Though once installed you can (for now) still use it independently of Fusion. It's a simple and straight slicing program. Only the “folded panels” option still has a lot of bugs. Though I hope that it will be solved in the near future, since it's discussed as topic in the Autodesk support forum.


Helpfull video tutorials
- MeshLab - simplifying mesh: https://www.youtube.com/watch?v=w_r-cT2jngk
- MeshLab - cleaning noise: https://www.youtube.com/watch?v=aoDLrXp1sfY&list=PLBBF41579E4B65566&index=2
- Meshmixer - fixing 3D scanned model: https://www.youtube.com/watch?v=yMaih-vPNr4
- Fusion 360 - mesh to solid: https://www.youtube.com/watch?v=8Z0IiVKt5Hg&sns=em
- Fusion360 - mesh to BRep: https://www.youtube.com/watch?v=njbzuzqRLSs&feature=youtu.be
- Fusion360 - what is a TSpline: https://www.youtube.com/watch?v=Gf1lNAGEalQ&feature=youtu.be
- Slicer - instruction: https://www.youtube.com/watch?v=4fFH_TcI-9U
