Skin electronics
Step 1: Shape and Cutting of Mask
For the shape i found an outline online and used this to 'trace' the outline on Rhino. Once i had the shape i used the laser cutter to cut out the main part as well as the little orange bandana part. I used artificial felt for the mask as it provided a good structure and added to the stability.

Step 2: Programming the Attiny85
- Open the software “Arduino” and go to examples, clcik “Arduino ISP”.
- Open the sketch and select the board “Arduino Genuino Uno”
- Choose the correct programmer, click tools, then programmer and choose “AVRISP MKLL”.
- Following the pin out diagram of the Attiny85 connect (in my case): Reset pin of ATtiny to Pin 10 of Arduino, Pin 0 of ATtiny to Pin 11 of Arduino, Pin 1 of ATtiny to Pin 12 of Arduino, Pin 2 of ATtiny to Pin 13 of Arduino.
- Choose board you are working with, click tools, select board - here you select “ATtiny 25/45/85”.
- Choose the choose “ATtiny85”, the clock has to be “internal 8 MHz”
- Choose programmer: “Arduino as ISP”
- The libraries were installed before, so the next step was to g to examples, open the sketch of the neopixel called “RGBW”.
- Burn the bootloader. (do this once everything is ready)
- The Attiny85 is now ready and will operate the neopixels!
Step 3: Preparing the neopixels
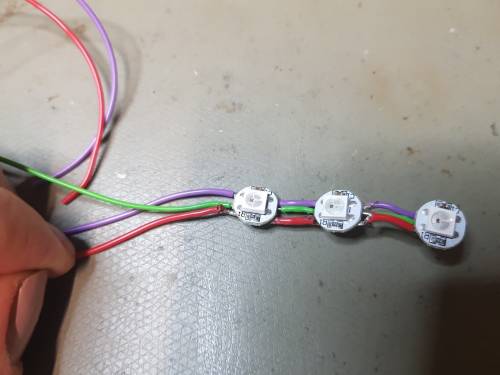
The neopixels are easy to connect, all the GNDs have to be connected as well as all the 5V - these will also be connected to the respective pins on the Attiny as well as the small battery pack. The best would be to solder all connections, this ensures hey stay in place and there is a definite connection. To make it a bit neater i placed the Attiny on a small piece of PCP - this made soldering to the cables easier.
 | 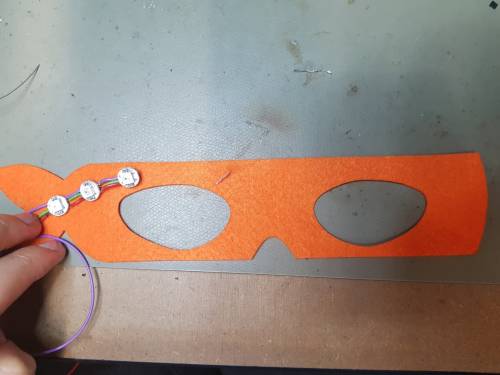 |
After everything is soldered and secured, place 2 3V coin batteries in the battery pack. The mask now has lights that blink!
