Soft Robotics
It was requested to build a pneumatic with flexible material like silicone.
To create the form it is necessary to make a mold.
To build the mold and understand how it works I follow the tutorial on the soft robotics tool kit page.
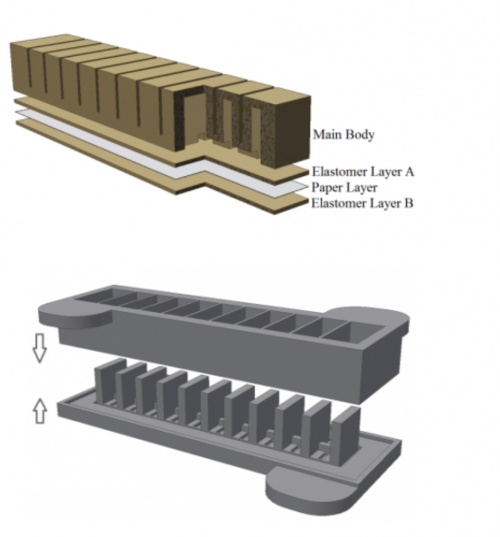
To do so, we need a base in 3 parts :
- 2 layers of silicone with a paper in between.
Then two molds to create the surface in volume which will contain the air and another mold on top that will define the shape and create opened surface to be able to bend.
_
I took the mold I made for the previous assignments and try to understand how I could transform this pattern in a pneumatic object.

I decided to use this part as a cutter that will goes on top.
the thickness is 5mm.
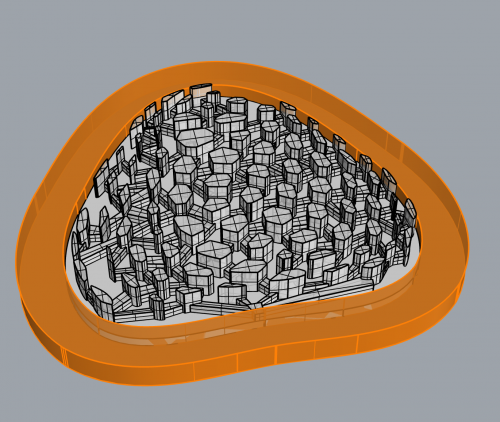
to create the mold underneath I had to draw in 3D another surface with chambers (to receive the air) and canals in between to let the air goes through and print in 3D.
_
- The first mold needs to be on top of the chambers mold with a space of 1 or 2 millimeters in between.
As the first mold was 5mm thickness, I needed to find a way to raise it so use the negative of the laser cut in Plexiglas (5mm also) and place it underneath on the sides to sustain it. (see “Plexiglas 5 mm” on the schema) in total, the “cutting structure is 10 millimeter in height.
- the second Mold has to be less than 10 mm. I had 1mm base then 2mm in height for the canals and 7mm for the chambers. the canals and the chambers are on the same level so in total there is 8mm in height.
- It means that the chambers will have 2 mm thickness on top.
Here is the schematic :

This schema is normally for a rectangular mold with air chambers connected by canals.
This configuration can be used with any type of mold with air chambers.
_
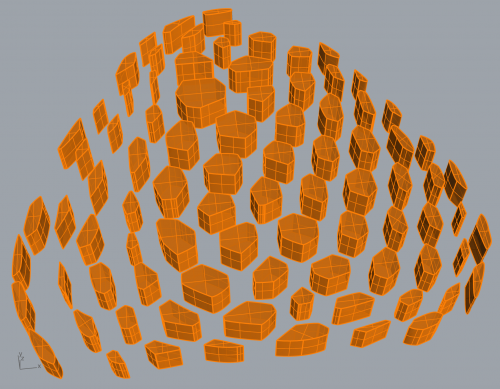
Air Chambers that fit inside the holes of the first mold.
_
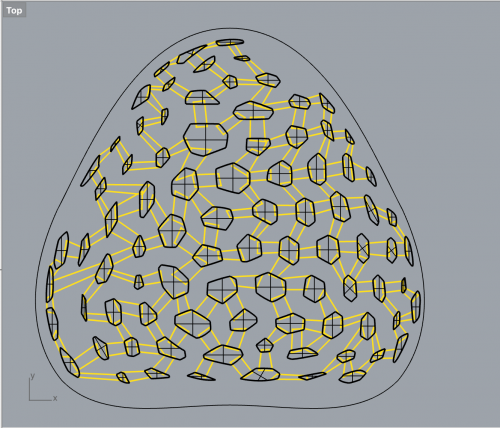
Added connections (cannals) between the chambers.
_
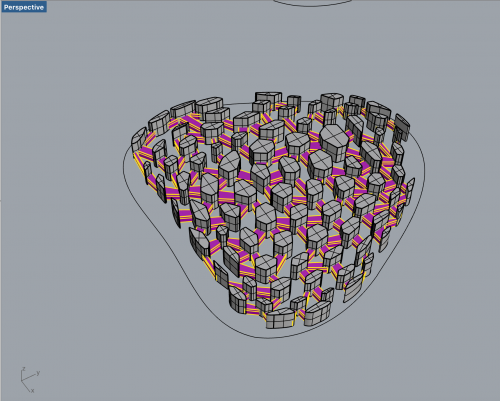
Extrude tool to create volume.

The silicone will goes on top and leave the space for the air.
_
After long reflection, instead of using an external laser cut Plexiglas to support the first mold, I decided to create a 3D piece connected directly to the mold.
I add a 3mm base underneath,the height of the chambers is 10mm so I add also 3mm on the side structure (8mm thickness).
With the structure on the side the print would have taken more than 5 hours so I went back to the first option, the plexiglas of 5mm thickness so had to change the base.
I decide to make just a small layer instead of a base and augment the thickness of the canals. (3mm instead of 2mm).
_

Side structure Plexiglas 5mm thickness. Too large, mistake, didn't take the right measure.
_

Add structure to be able to support the first mold.
_

Second mold during the 3D impression.
_

3D printed mold. It took more than 2 hours. During the process it has some issue. A high quality would have make it too long.
the top of the chambers are not covered well. the silicone might goes inside the structure.
the base is to thin so the plastic twists.
I used this mold because I was running out of time to start a new one.
_

Add the second mold inside the structure.
_

The first mold is on top, the cutting part surround the air chambers.
The problem in this red mold is the 3D impression wasn't accurate so it has made the mold imperfect. the first mold touch the canals underneath and might create problems with the silicone on it.
_
The red mold is not perfect so I print it again.


unfprtunately it doesn't work.
one of the possibility is that there is holes so the air is going out.
other possibility, when the base of silicon was put on the plexi and the mold put on top, the silicon might goes inside the canals blocking the air to pass. it should have dryed more to stay flat.