Table of Contents
Ângela Barbour _ Final Project Development_ Fabricademy 2017 - 2018
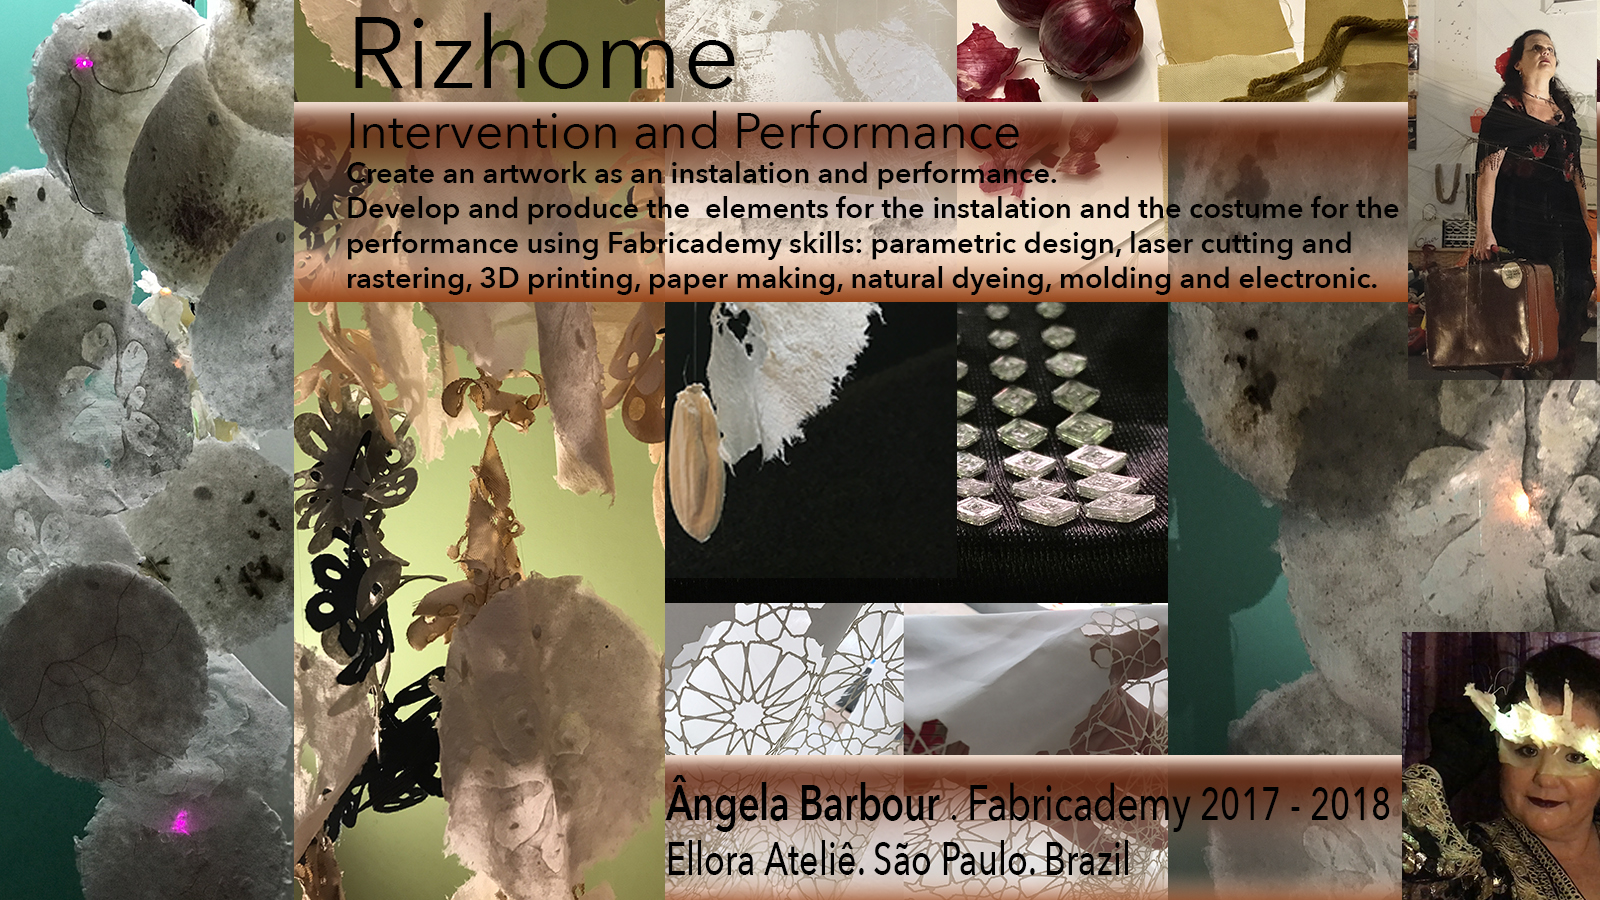
Rhizome - Intervention and Performance
Ângela Barbour - Ellora Ateliê - SP Brazil
I'm Ângela Barbour from ELLORA Ateliê in Sao Paulo Brazil. I’m a visual artist and researcher in digital fabrication actuating in the Fab Lab SP. I've founded in Brazil, the first communitarian, public and free Fab Lab in the country, that was in Latin American Memorial Foundation, and also the PORTOFabLab, specially dedicated to art.
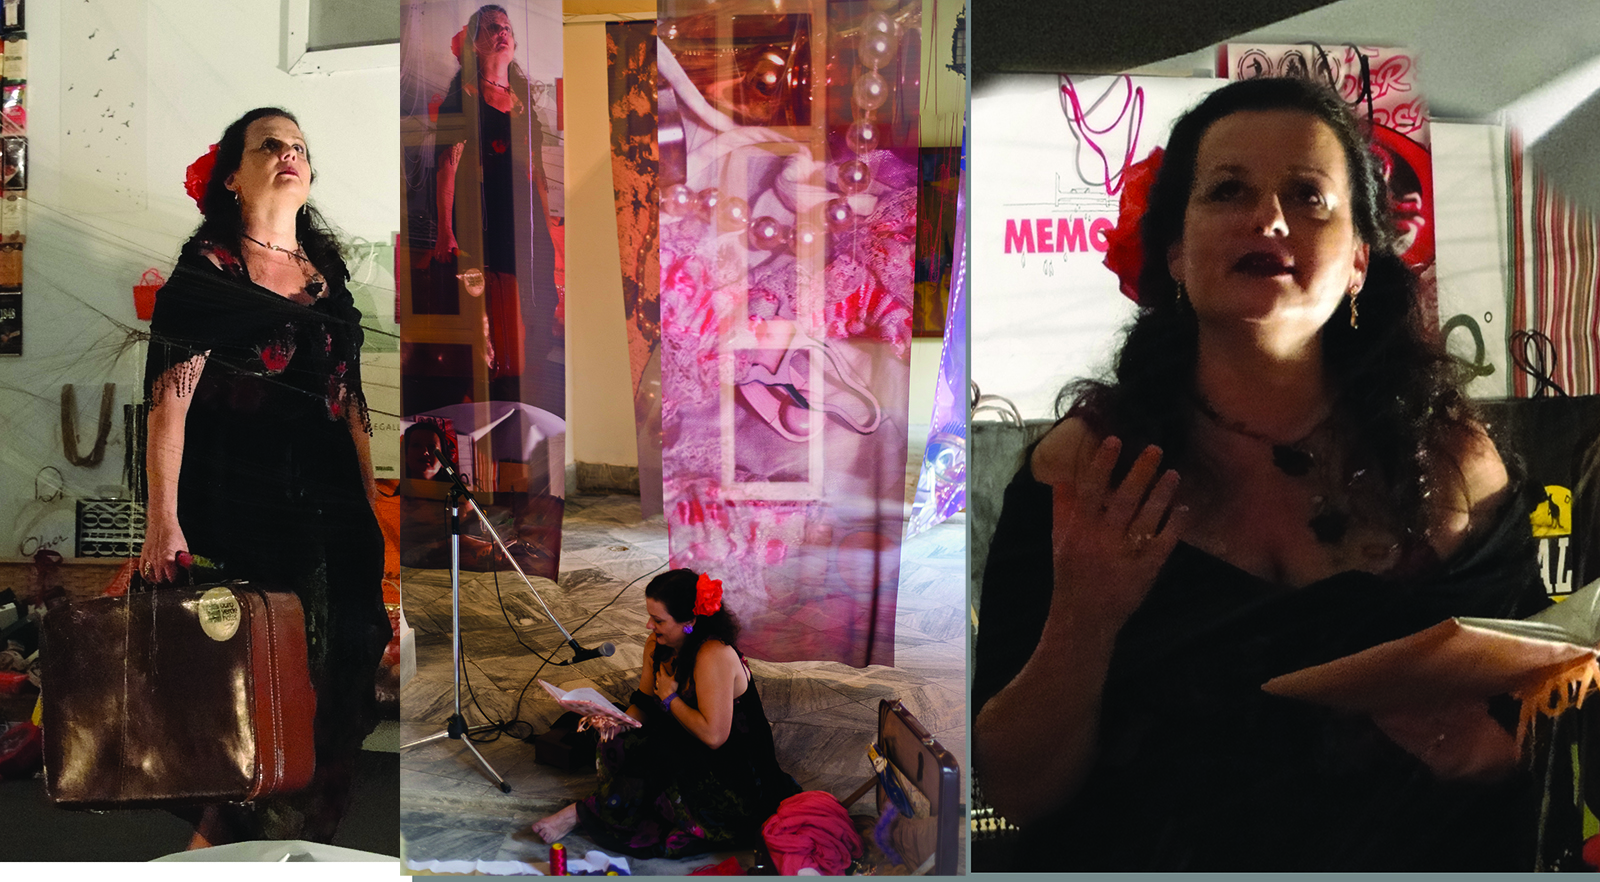
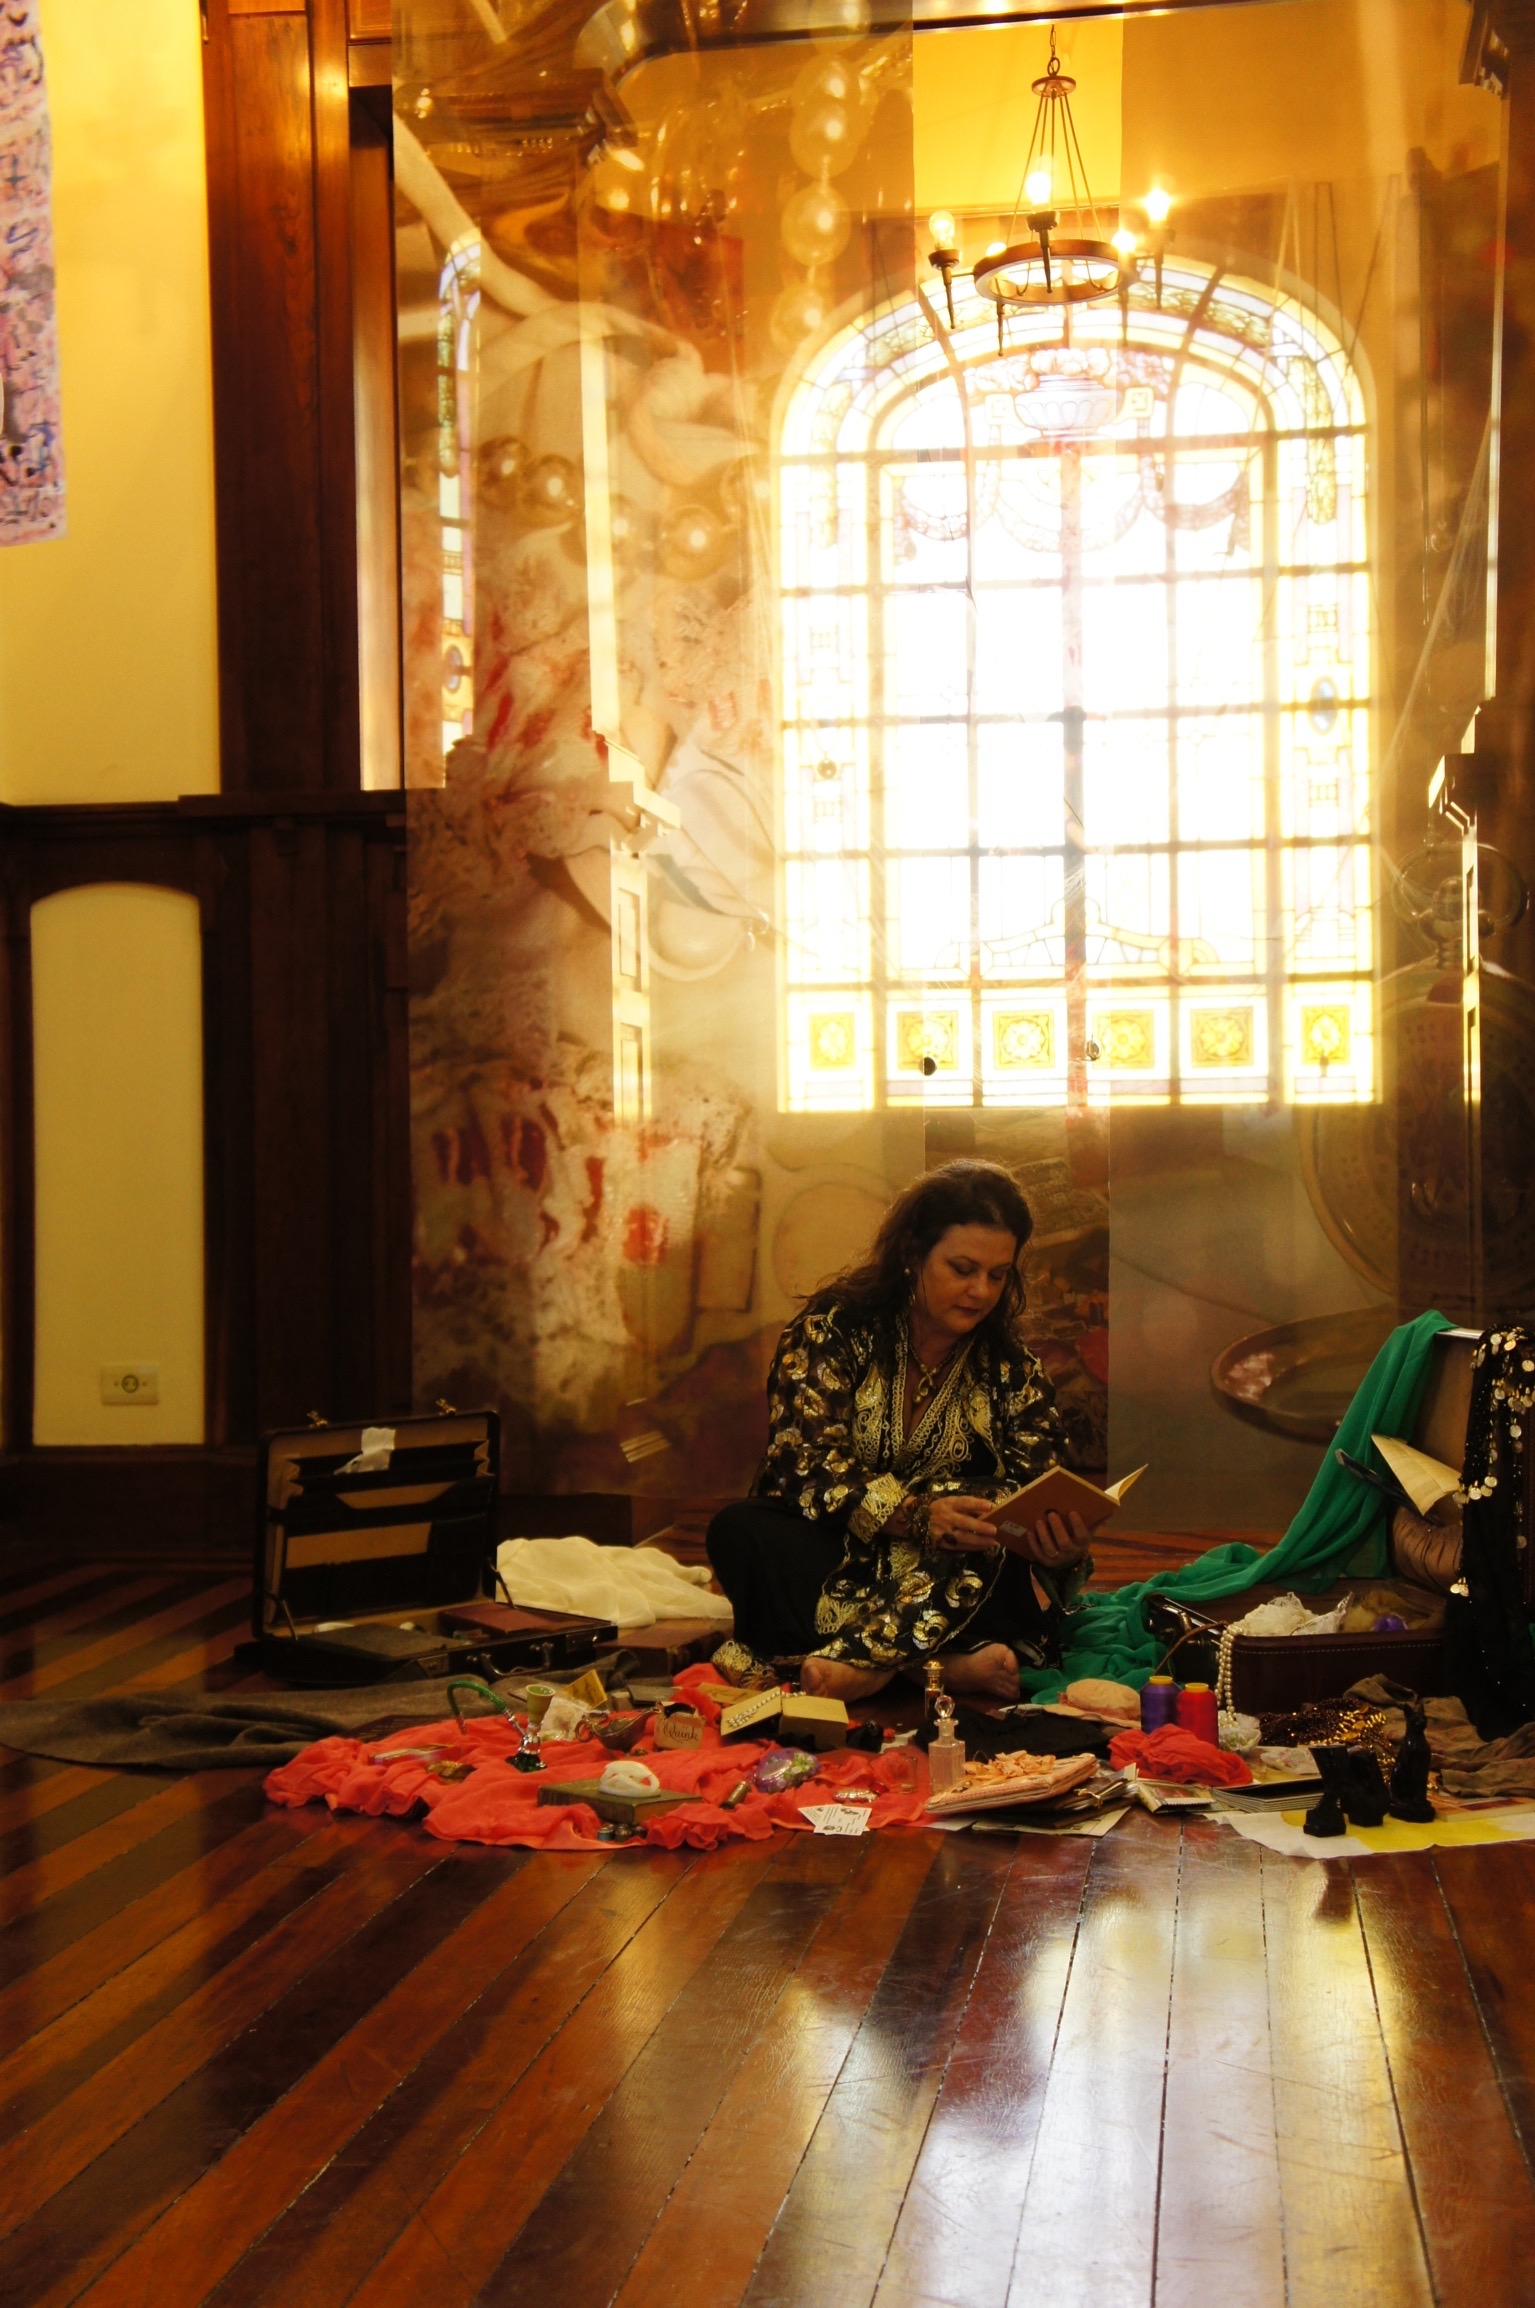
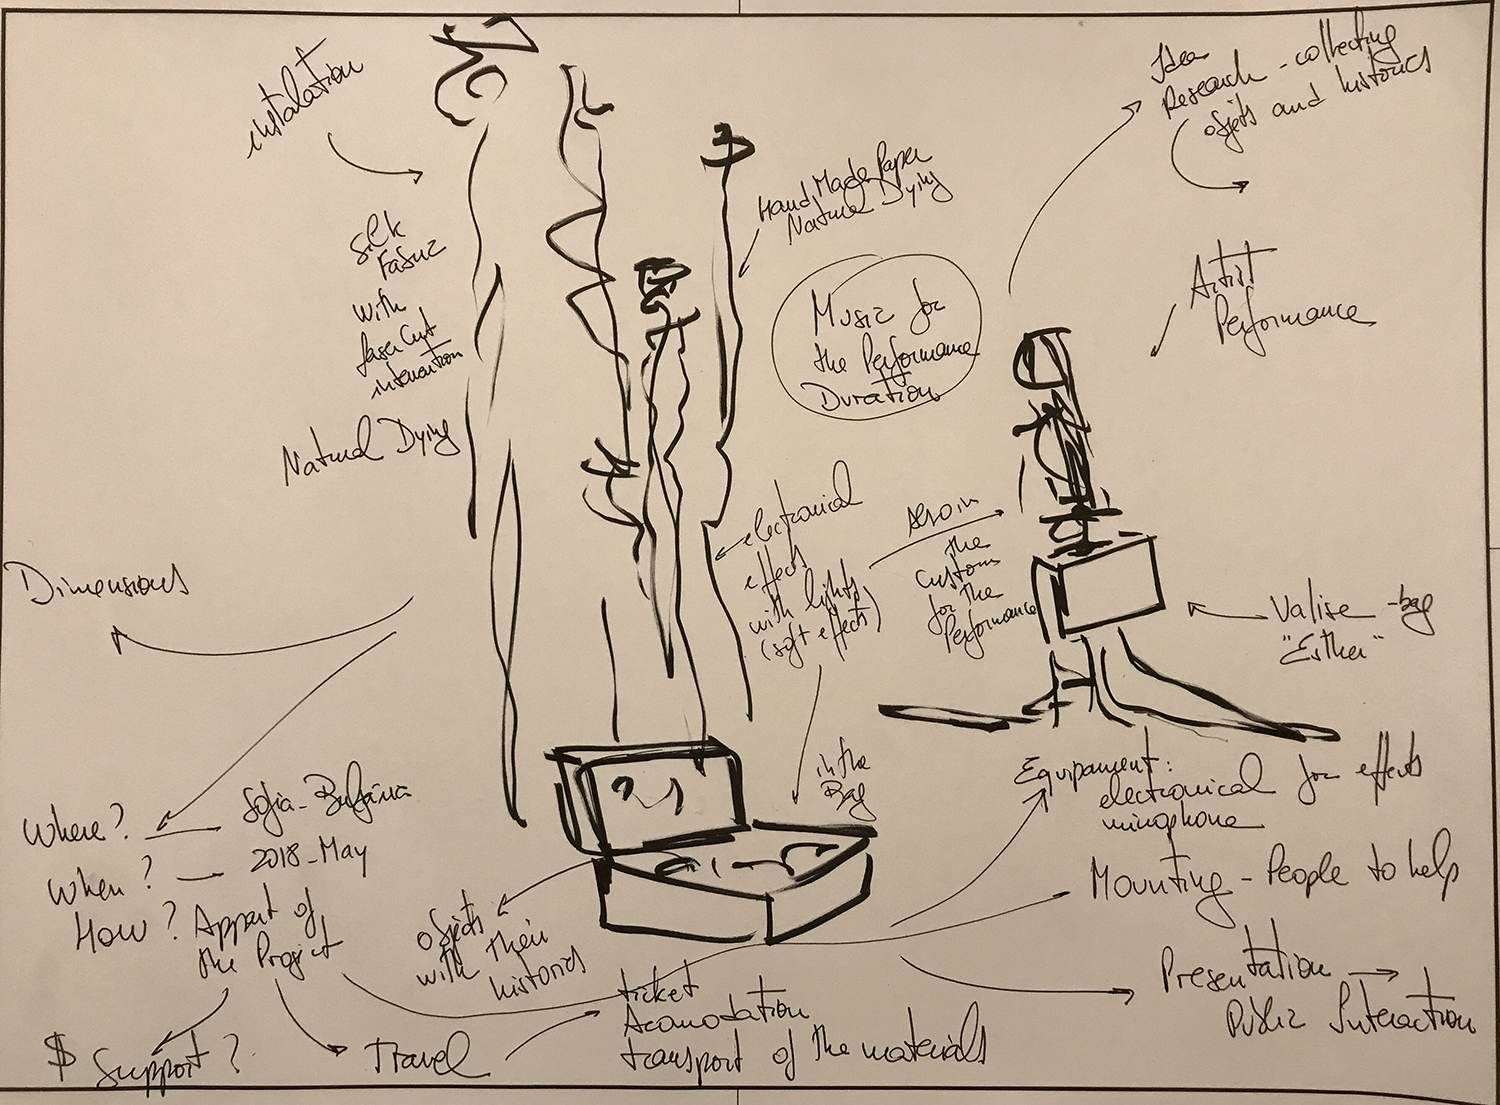
As an artist I have a project where I assume a character called Esther, that is a woman and also her suitcase, she collects objects and histories from people around the world, and in the Performance take out these objects from the suitcase and tell their histories in an intervention made in the museum. In 2018 May I will present and Intervention and a Performance in Sofia Paper Art Festival 2018.
My Final Project is to create and produce this artwork, that is an intervention and a performance. using the skills from Fabricademy to prepare the elements of the intervention, the costume for the Performance and the objects in the suitcase.
01. Planning
The Hole Process
Idea and Research
- Collecting objects and histories to tell at the Performance.
- The Research “in locu” will be made specially at the Center Of Cinema from Sofia, appart from the research that I've been maden before.
- Decide the sound track and prepare ir in a file to be reproduced during the performance.
- Research and prepare the costume to be used at the Performance (this is part of my final project).
- Plan and Produce the elements of the installation.
- Plan and produce the electronic circuits for artwork.
How to make it Possible
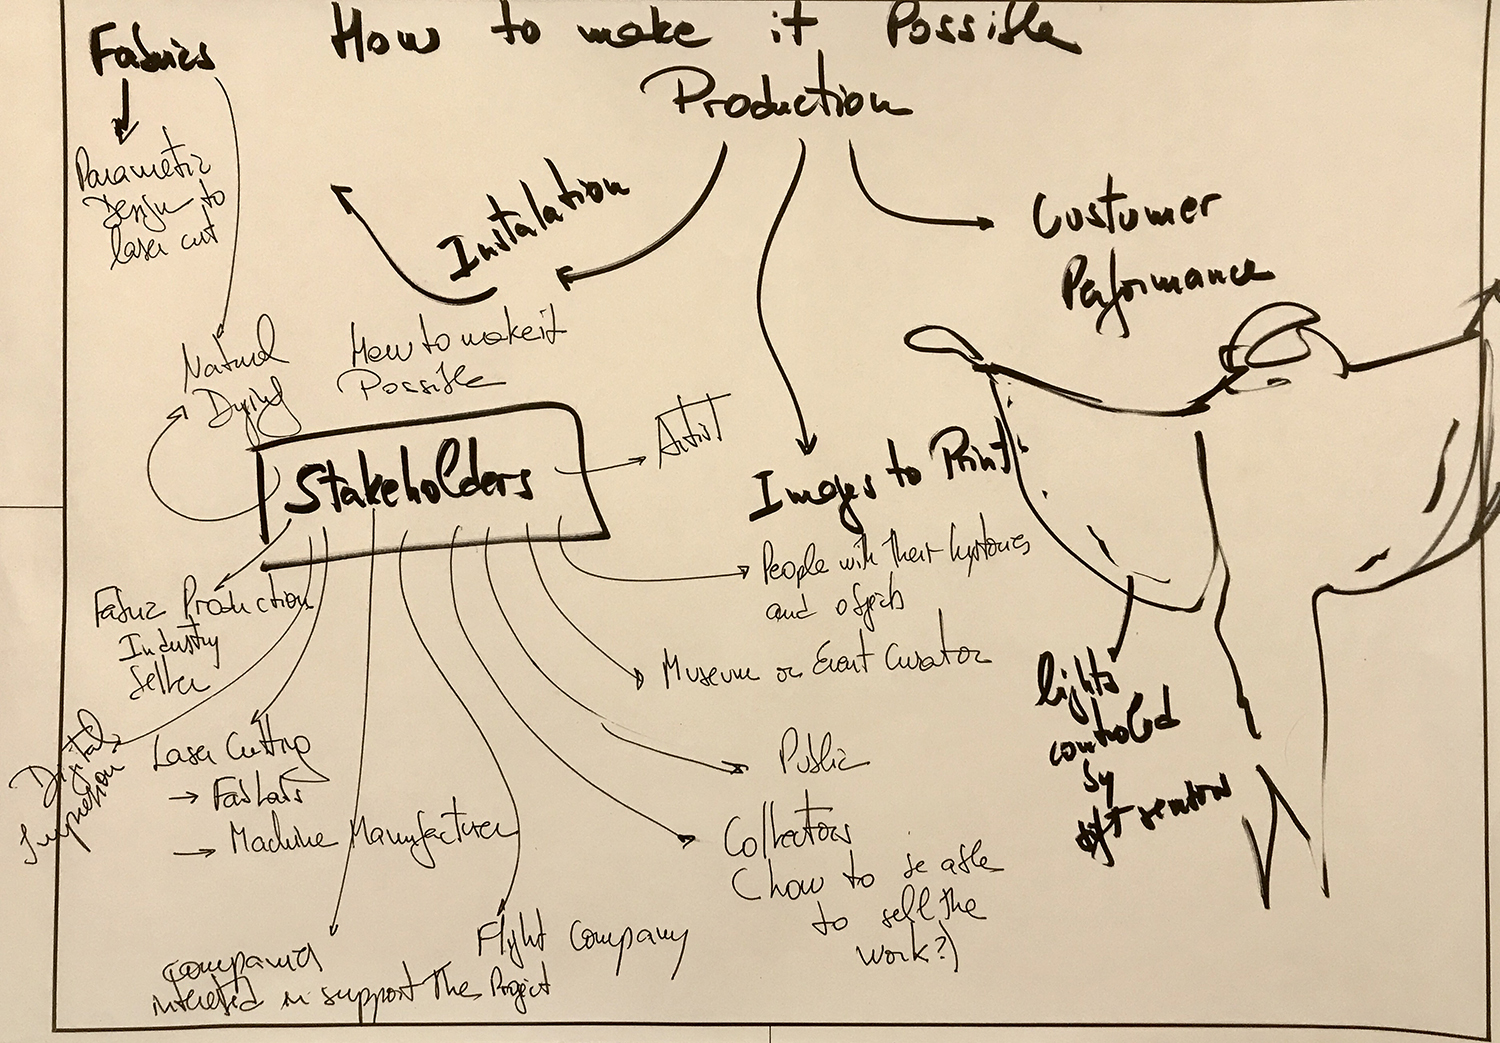
- Stablish the stakeholders, people or companies that may be interested in support the project.
- Study the possibility of donating a part of the work to the Museum, for adding value to the all work.
- Check all the steps of the production in order to have a check list of the procedures and materials, to calculate the time , deadlines and costs.
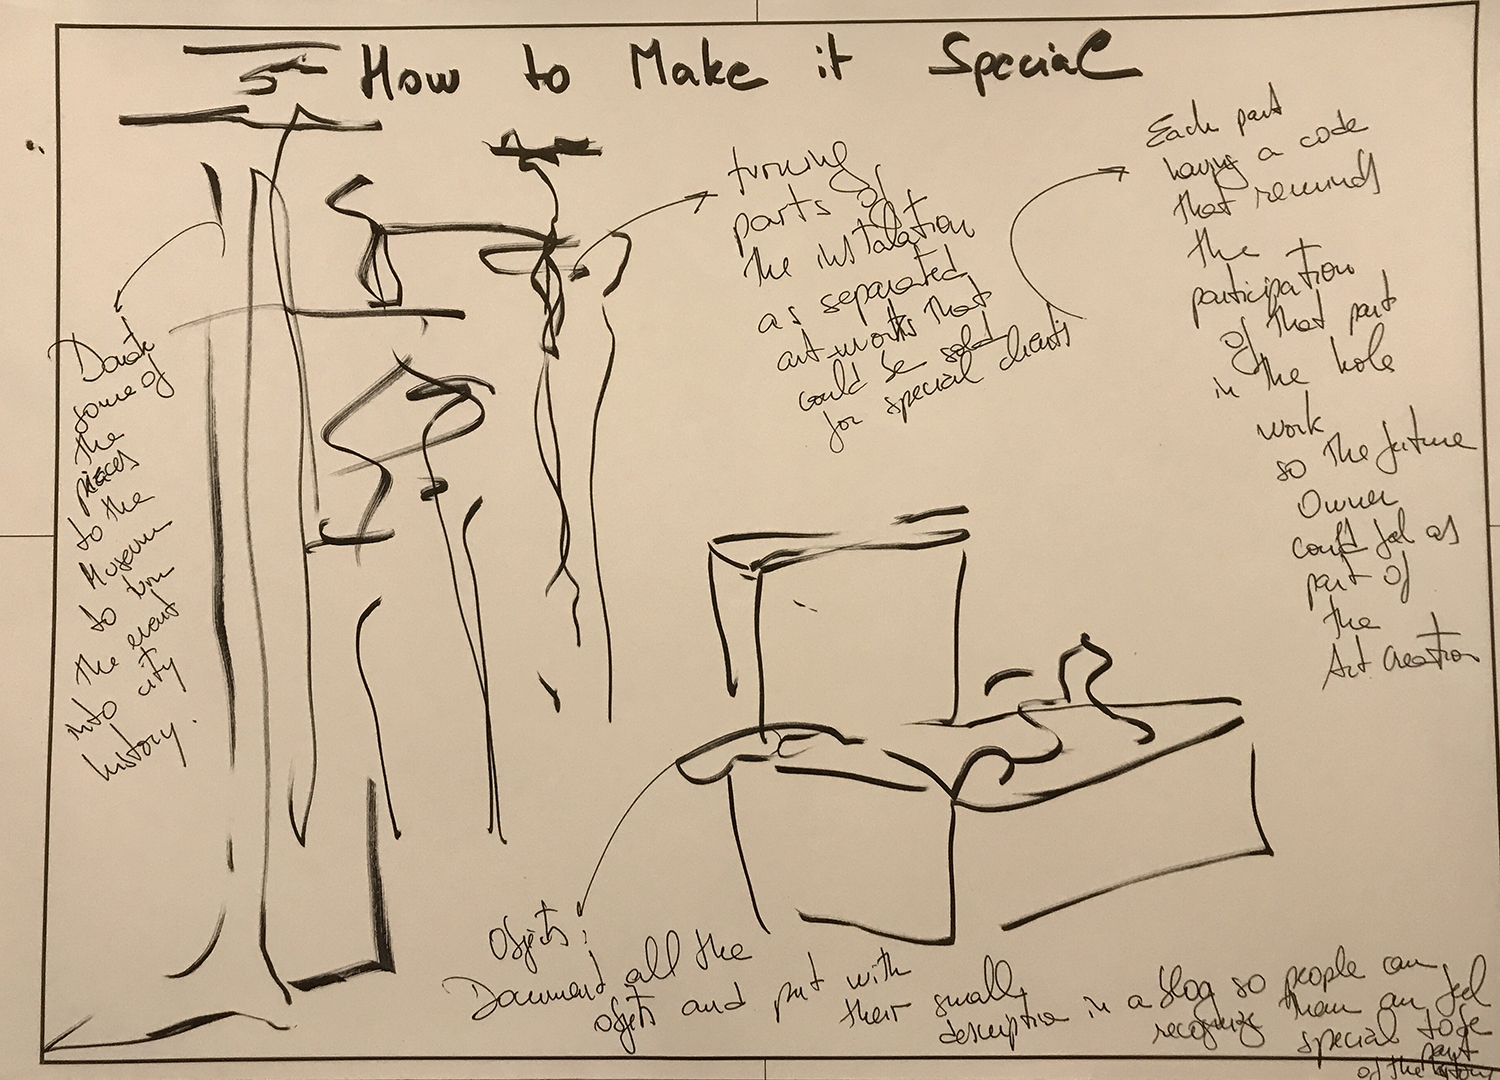
How to make it Special
- Develop a system for the public interaction.
- Collect the public feedback.
- Document all the process for a possible catalog and portfolio.
- Evaluate the success of the Project by the public and crytic feedback.
02. Skils or Technologies Used
a. Modular element
This element was developed in the Weekly assignment from week 03, and can be seen in the link beloww.
b. Laser Cutting
Intervention Elements
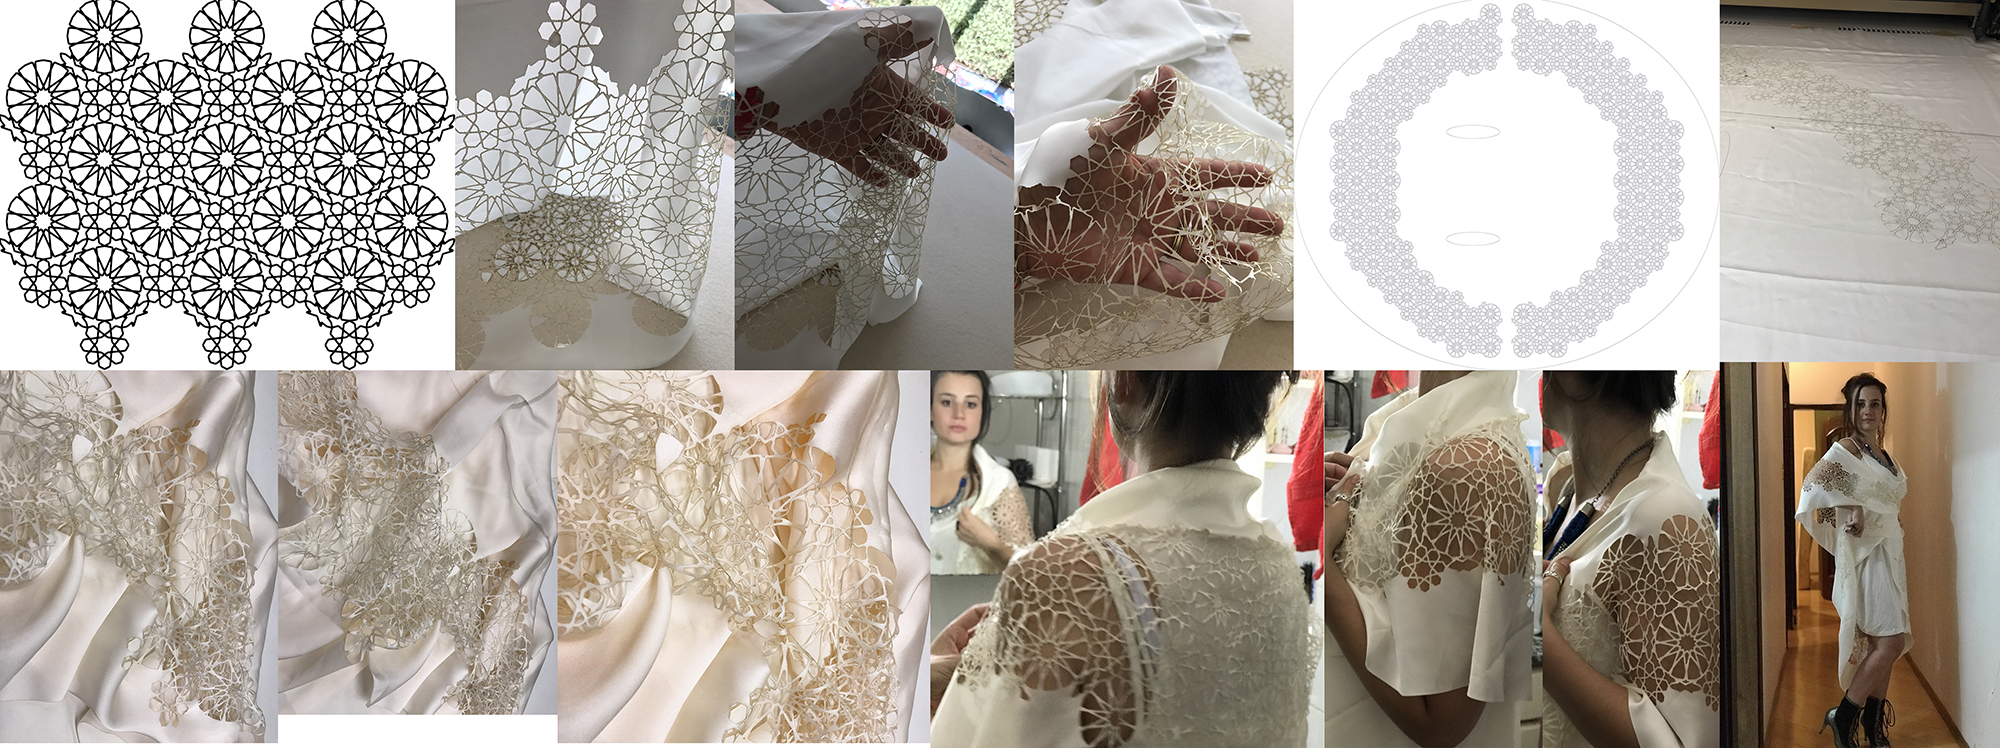
In the intervention I will use the material developed for the Circular Fashion, making pieces to construct the scene of the intervention.
c. Laser Rastering
I 've used laser rastering to produce some images that will be used in the final presentation of the work in Sofia to compound the installation.
I used it in a special paper that has a pearl layer cover that is removed with the laser, and the image is revealed only by this slightly diference between the original paper and the areas without the pearl revestiment.
Below you can see some images produced like this and presented in another exhibition
d. HandPaper Making and Molding
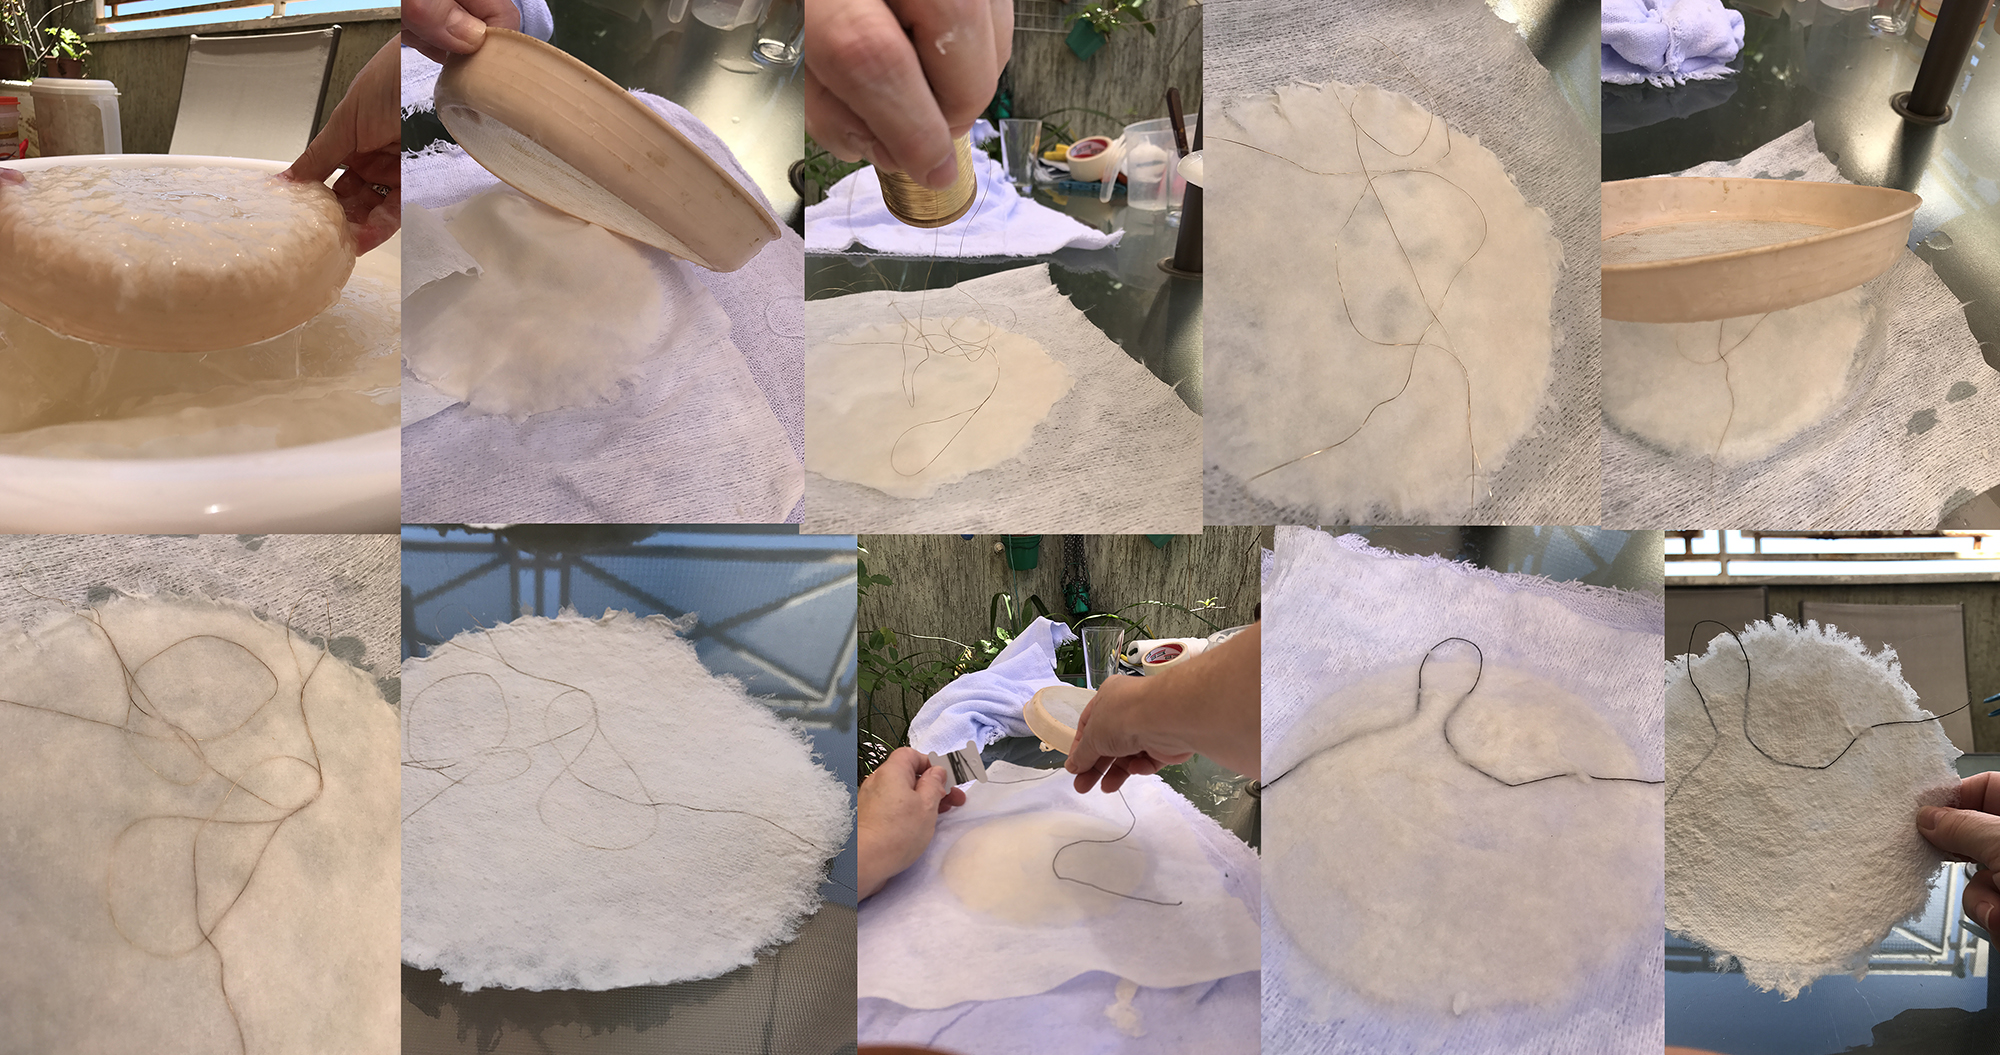
Using discards from cotton truck air filters. The whole process can be seen on weekly assignment from week 07, and can be reached at the link below.
e. Natural dying
Using discarded materials from vegetables. Process described and explained in the week 04.
Week 04. Biofabricating dyes & materials
To compose with the fabric I will use HandMade Paper dyed with Natural Dyes :
f. Parametric design
During the weekly assignment from week 06, I developed two parametric designs to be 3D printed and laser cut in the costume.
The Costume
g. Electronics
In all these elements in the papers, the objects in the suitcase, and in the costume I will install LED lights to be controlled by me during the performance and by the public by IOT, so I can have a feedback in the end of the presentation.
Suitcase and Objects
Slide
Vídeo
Final Project - Final Production
Rizhome
Considerations after Midi Term presentation
After the MiDi Term presentation, and the comments of Neil about all projects, I've decided to concentrate my efforts in constructing an artwork as an Object, instead of the complete installation, because the complete installation, will be a site specific work that I will produce “In Locu” in Bulgaria, and now, for the end of the Fabricademy course, I need a complete work already finished. Another comment ou question of Neil , this time, specifically about my project, “How do you know that your project was successful? ” I answered that if I achieve all that I was proposing, it was successful, but for answering better this question, I developed the Rizhome artwork as an Object, and applied it to a very important International Exhibition, that will be also in Sofia Bulgaria, in the National Palace of Culture, to celebrate the Presidency of the European Union , that this year comes to Bulgaria. And I have already the answer, that my artwork was selected to be one of the works in this exhibition that will present 65 artists from 25 countries, and from Brazil only two were selected, mine and one more. As an artwork, the better way to evaluate a project is submitting it to a jury evaluation, if the work is selected is because it is really good and successful. So I'm using for this end project the dimensions allowed by this exhibition, that permitted me to essay very well everything I was planning. So for now on I will describe the final production of this work.
Assembly
The Support
01. As the National Palace of Culture is a very important place and has their rules for hanging the works, I planned a support to hang the work, so it can be sendo with all I need, and independent of the place and condition of the space itself. This is always a problem in participating of an international exhibition, where you can't see previously the exact place your work will be, so you must think in everything, since way of fixing in the wall, the light, the assembly and the public interaction.

02. First of all I planned the work in a way that it could be very easy to:

a.) Send by mail
b.) Mounted at the Museum
c.) Fixed in the wall
e.) Carry its own planned and desired lighting
f.) Facilitate the Public
g.) Previewing the Public interaction

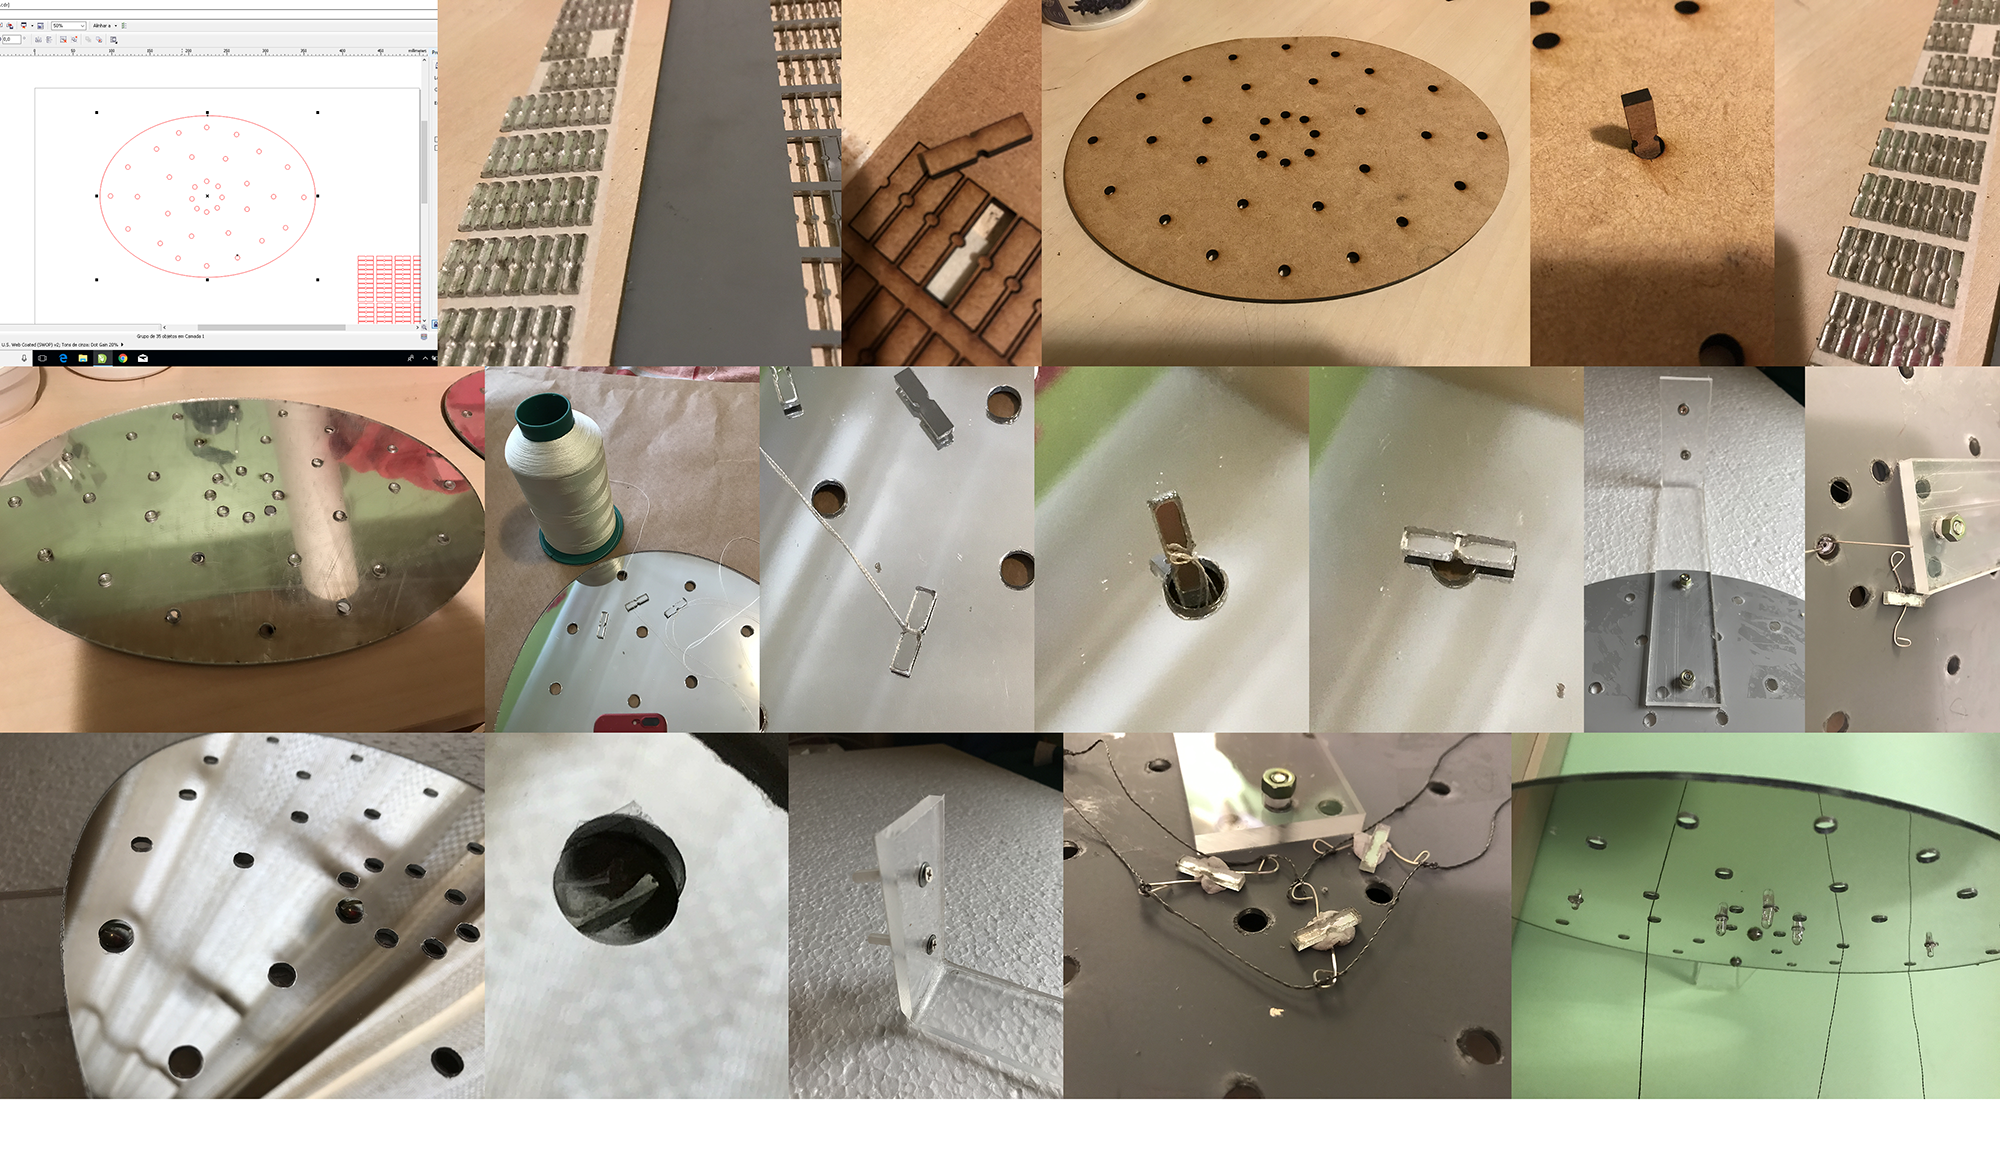
03. The first part I developed was the Support, that I decided to be an eliptical form with 6mm diameter holes, to be able to pass the lines, LED lights and conductive threads nedded for the work function.

a.) I designed it in Corel Draw and send this draw to cut in Laser cut machine, first I made a model in MDF and after in the final material, mirror acrylic.
b.) I also planned a litle piece to take everything above the support, hanging the pieces sent already mounted from Brasil, because it is very difficult and a construction very complicated as a painting, so this structure pass trough the hole, and after can be fixed by a adhesive paste to the support and blocking the piece to come down during the exhibition.
c.) These pieces can be seen in the following images.
d.) After everything was laser cut, I begin mounting the work, first mounting the wall support to the base, this support has two screws to be hanged in the wall and two others to be fixed to the base in two of the holes,  with washers.
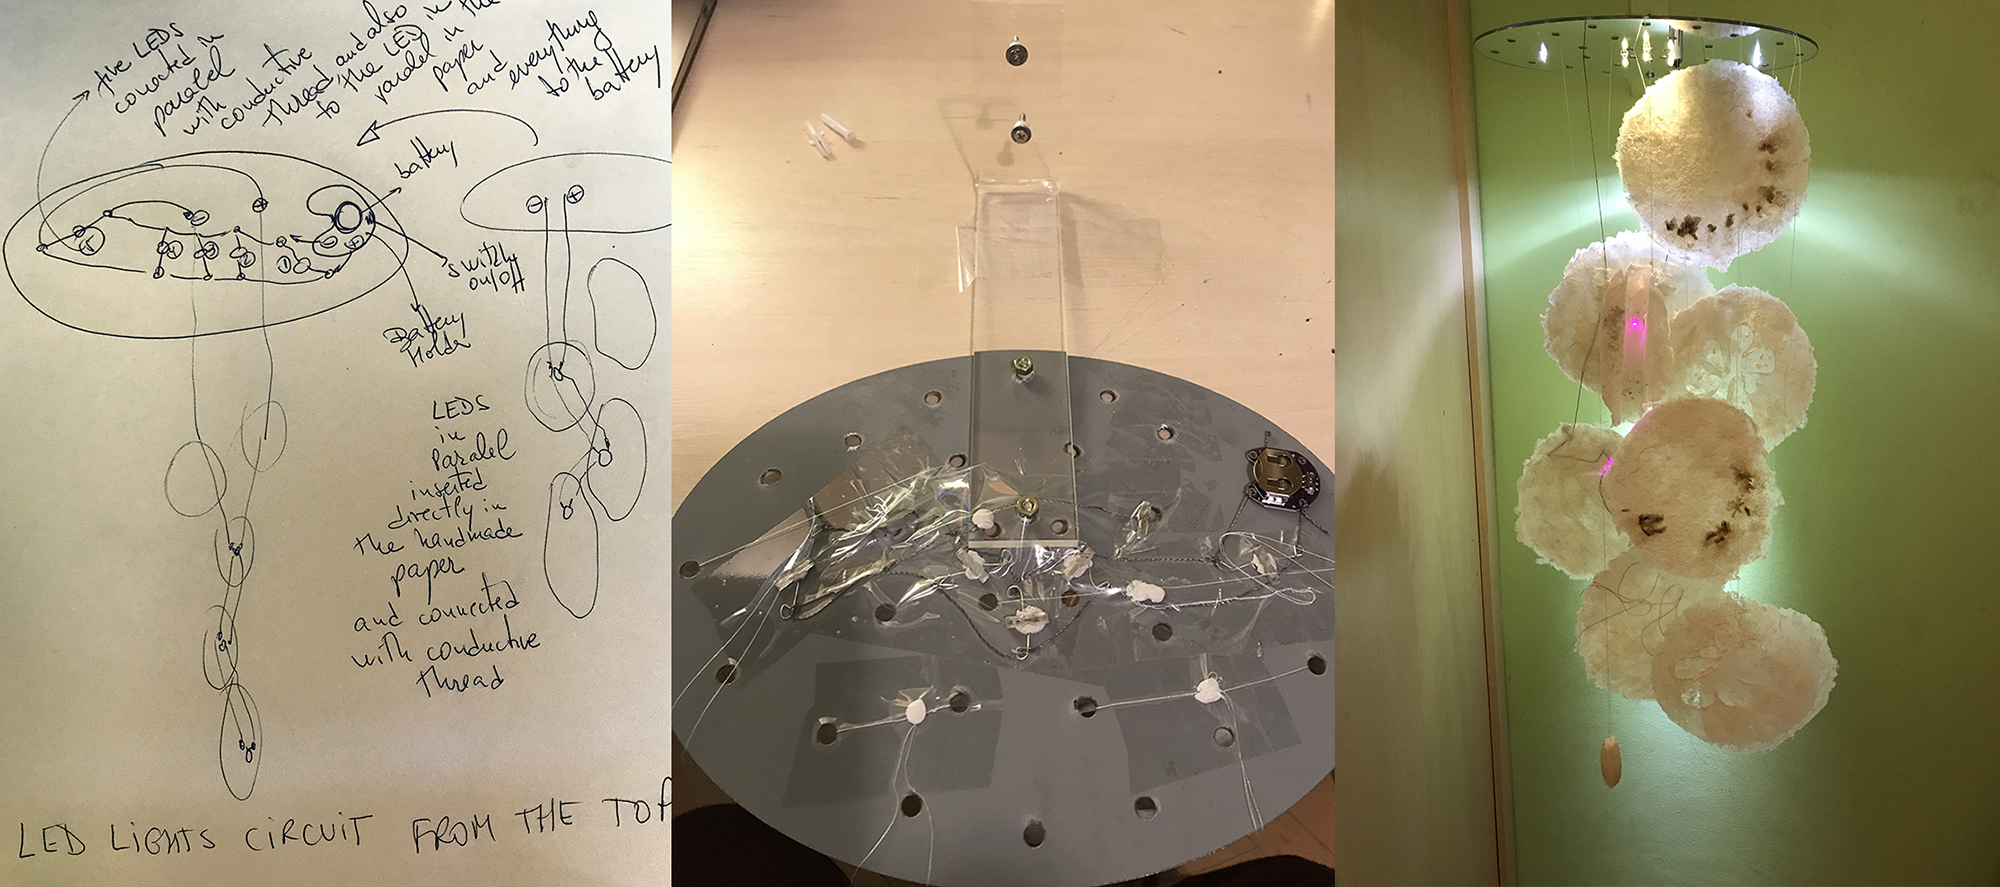
e.) When the support was already in the wall, I pinned the LED lights in the holes (I also used this adhesive mass to fasten the LEDs to the holes) and joined with the conductive threads until the battery holder to close the circuit.
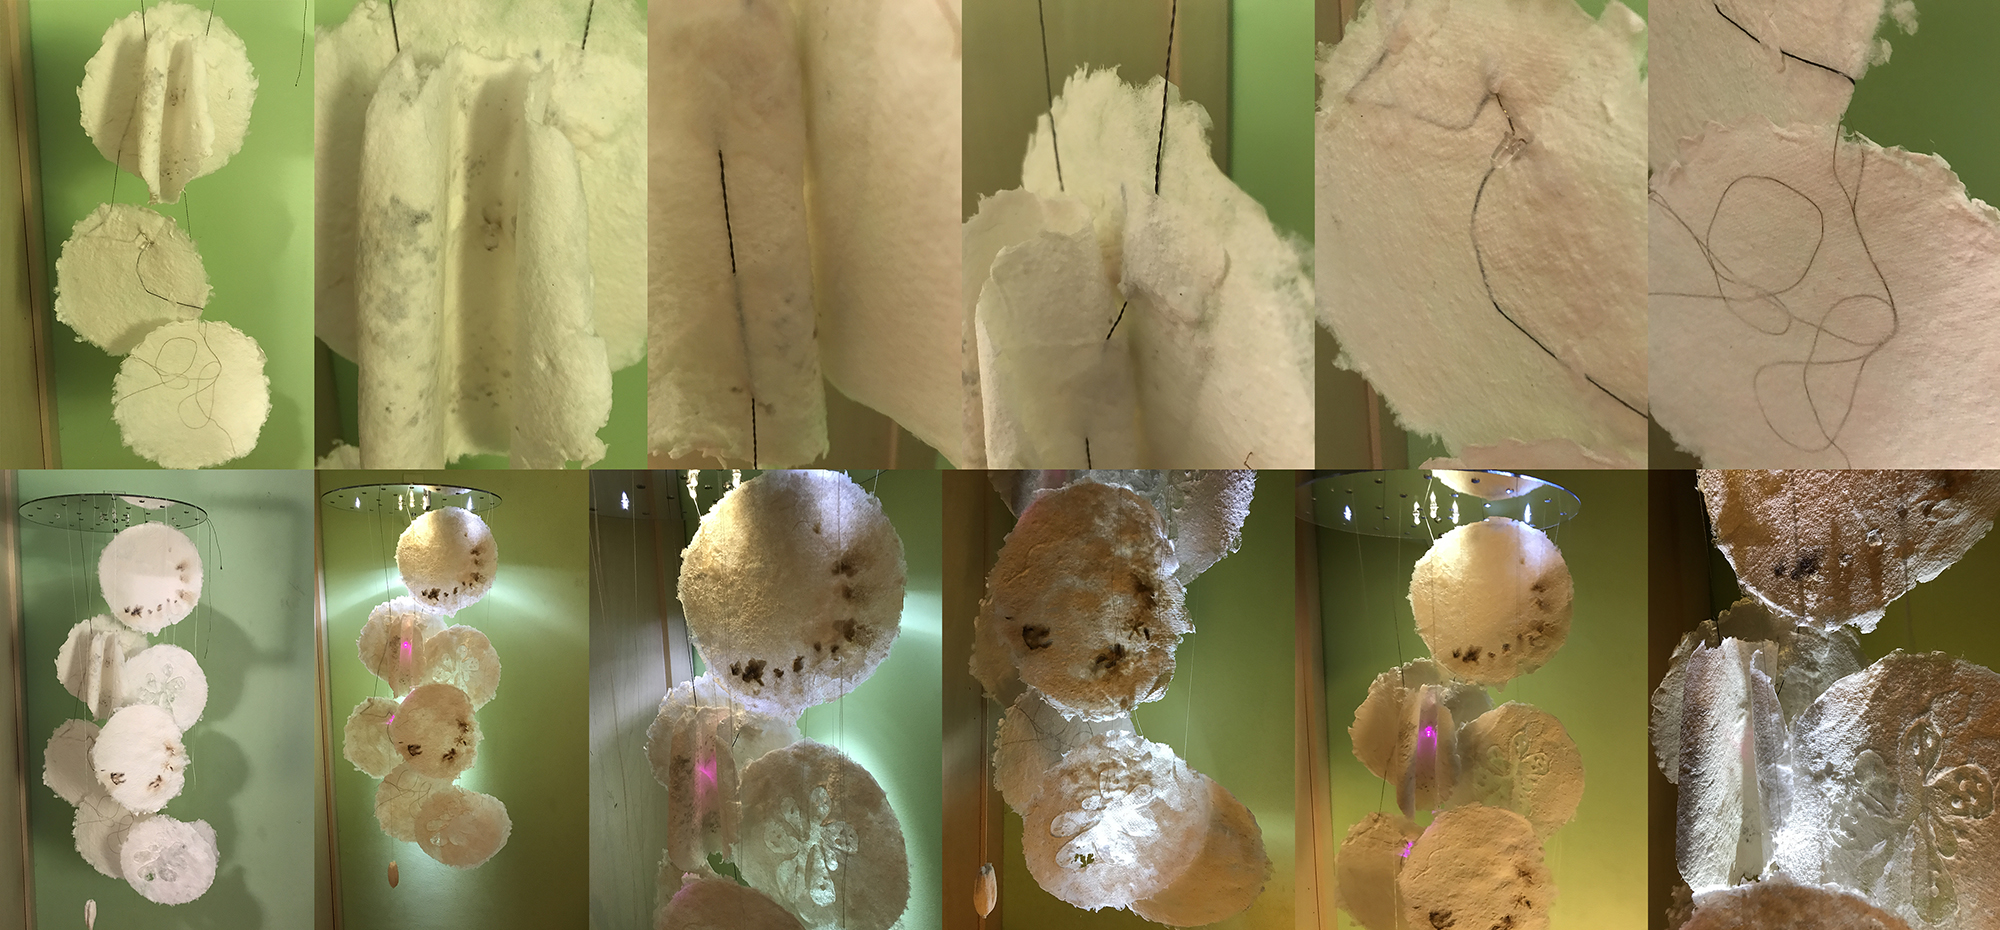
e.) In the sequence I mounted all the handmade paper tying up each one with silk line glued in the paper with the paper pulp, so it seems to be part of the paper. These lines passes through the holes and tyied up to the litle pieces and fixed with the adhesive mass to the top and back of the support.
f.) In this way from the front of the artwork we can see only the lights on the top and the papers hanged and lighting.
g.) The battery holder used in the top turns on and off this LED lights all together, by the switch button on it.
The Papers
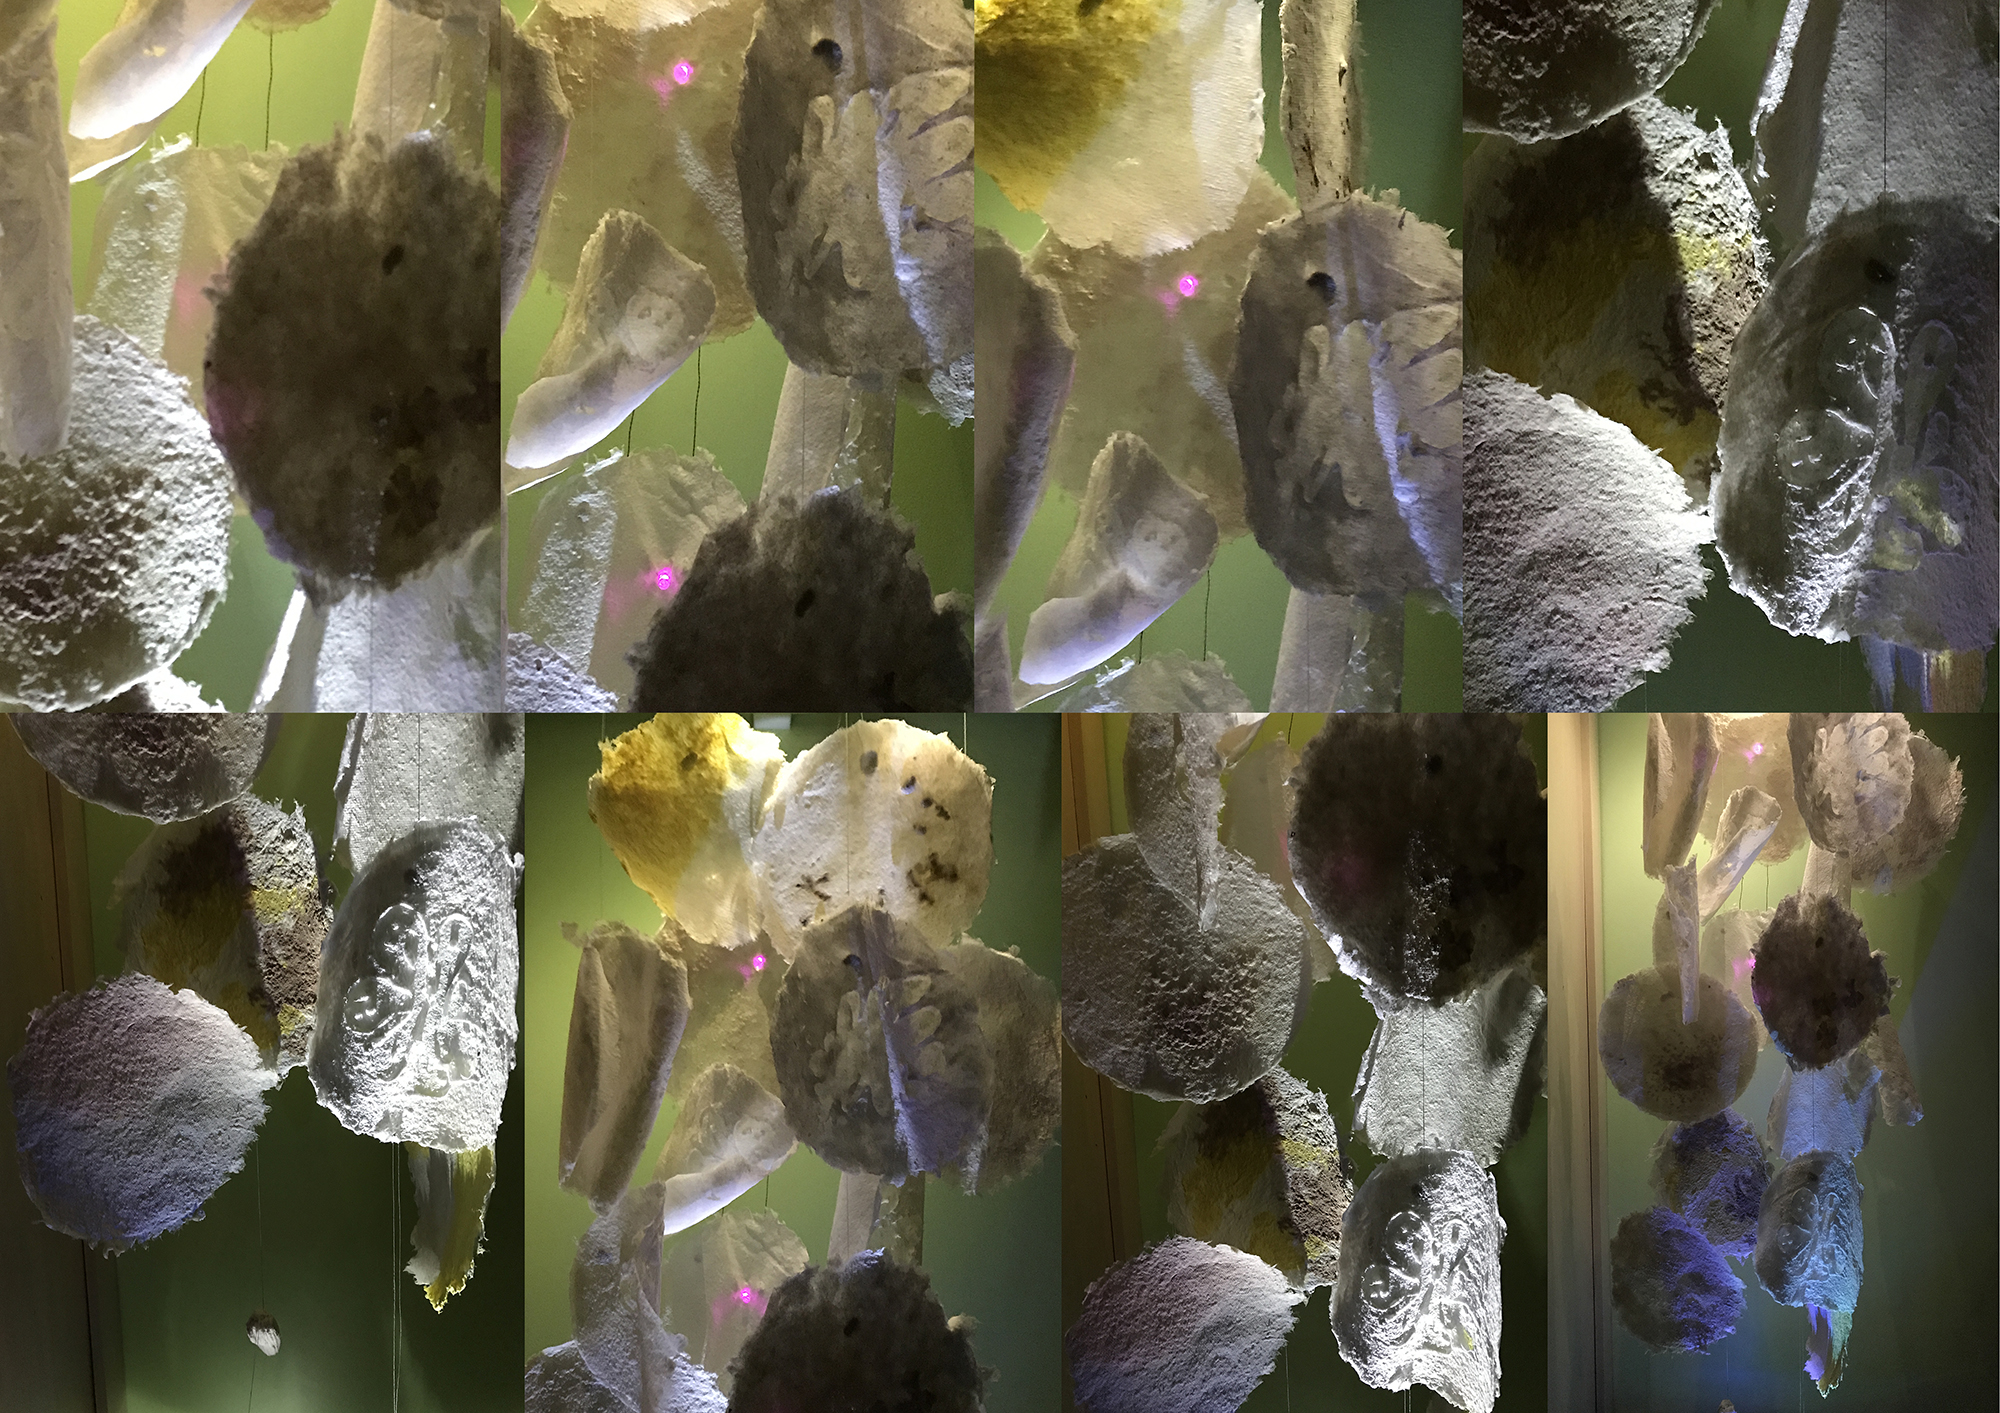
I constructed the artwork inserting the handmade paper sheets one by one, studying their position and relation with the whole work. As can be seen in the sequence below, firstly the conductive lines can be seen, but after it is incorporated to the work , and works as one group more of lines that take art of the final construction.
Also after inserting almost all sheets, I begin studying a complementary light to iluminate the work , and I found that a light coming from the botton could be very intersting because it highlights the texture of the paper, and the forms inserted on it using the modular mask made in acrylic and in plotter adhesive during the processing of the paper pulp and paper make.
The Lightining and public Interaction
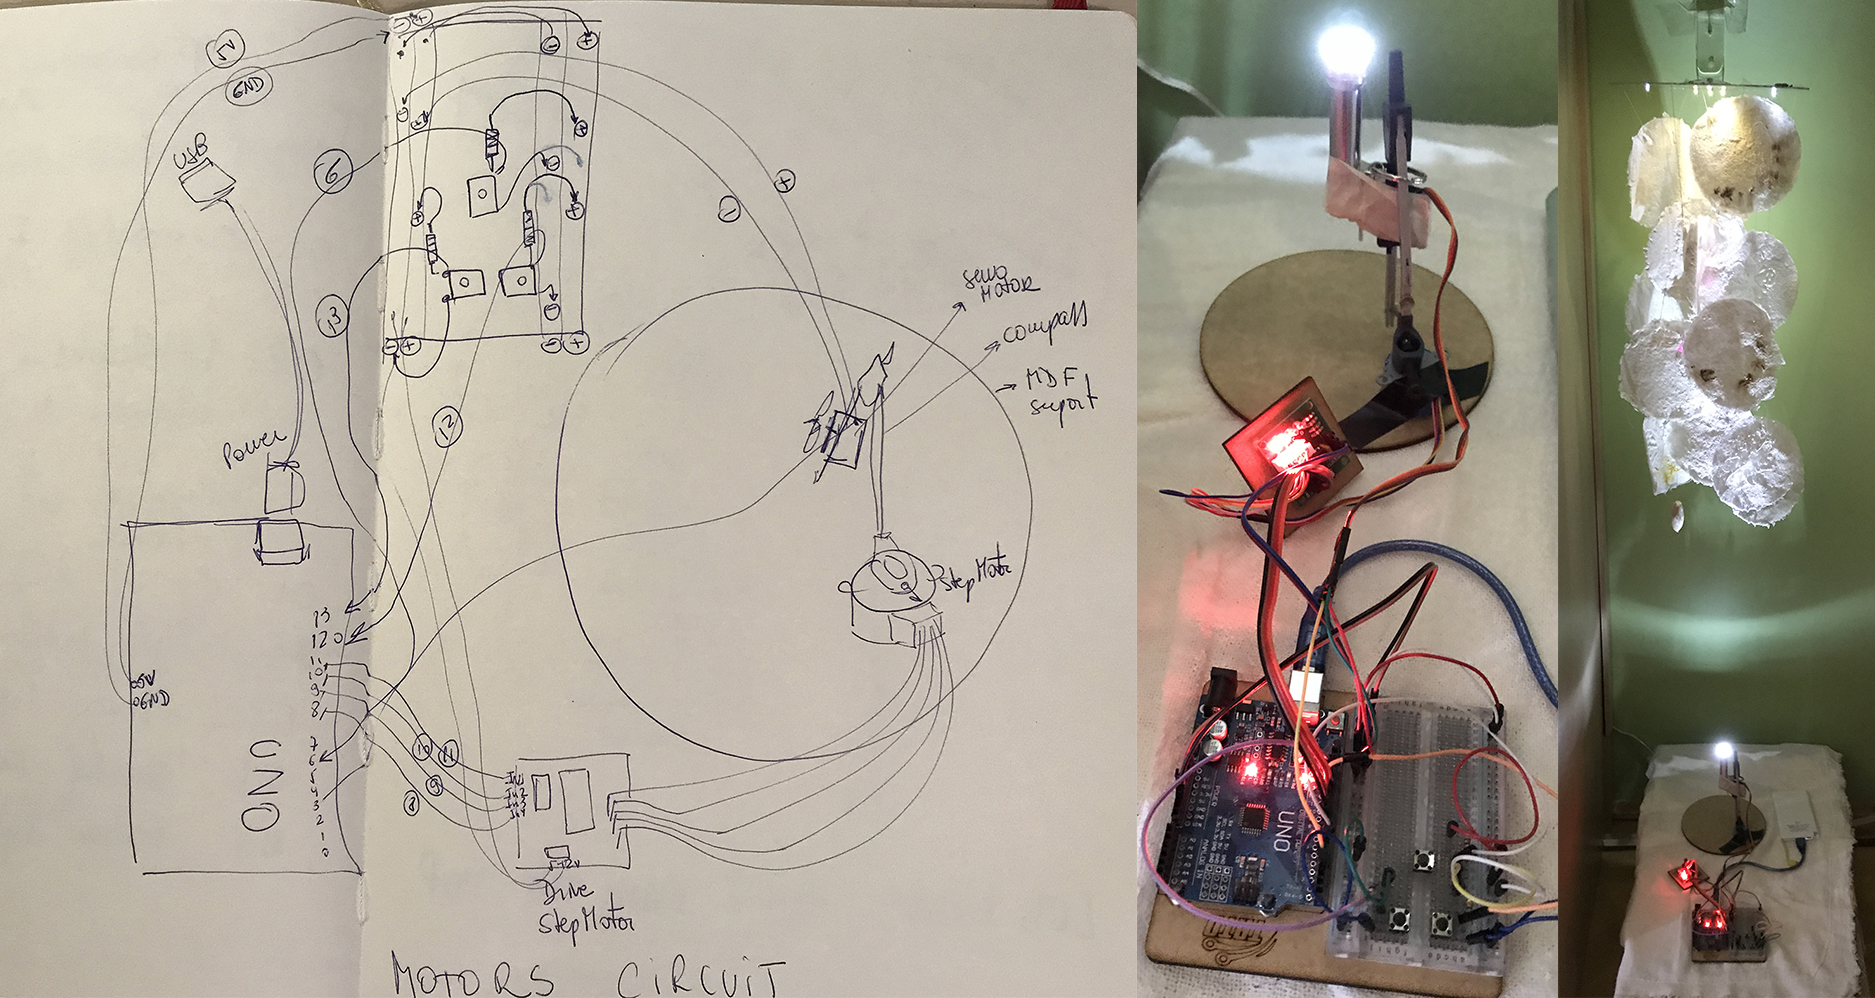
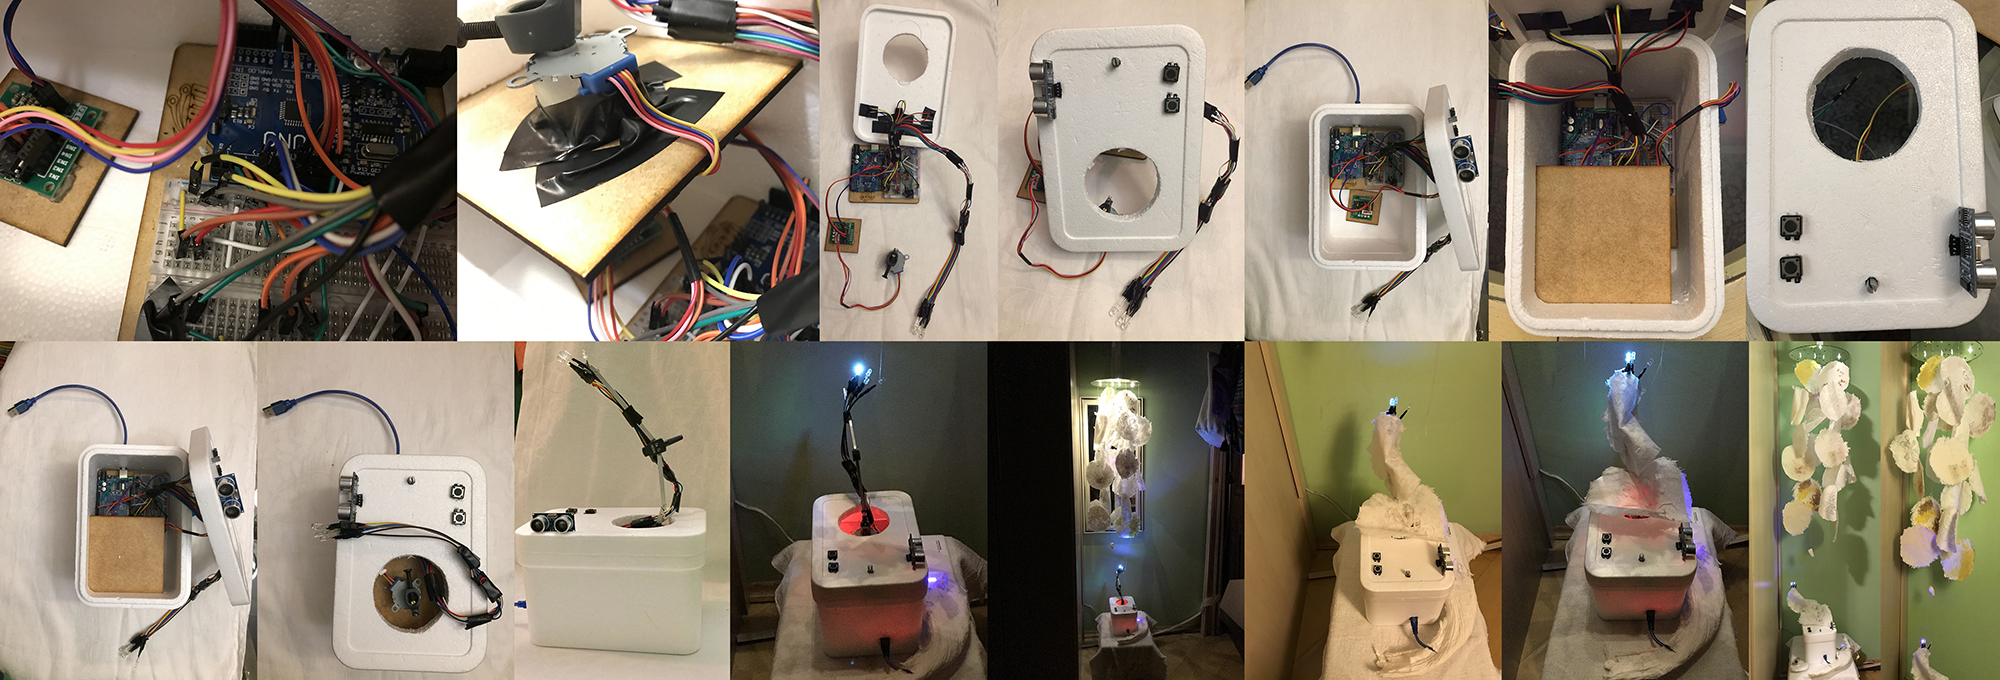
I liked very much of the botton light and decided to instal the public interation of the work on it, so I use the robot made on the weekly assignment from Week 08, installing a LEd lantern instead of a pen in the compass holder, hacked to move with a step motor and a Servo motor.
This construction became like this:
After disscusing with my Mentor Anastasia Pistofidou, we decided that the system should be hiden in a box , and when I constructed this box in two steps to put all the electronic control, I introduce three new elements:
01. The step motor system controlled by buttons to spin to the right (CW) and to the left (CCW). 02. This step motor supports the LED lights that substituted the lantern. 03. 3 warm white LED Lights in place of the lantern. 04. One RGB LED light. 05. I introduce two new elements: 06. A potentiometer to control the color of the RGB LED light (as I've used in the assignement of week 09. 07. A distance sensor to control the intensity of the white LED lights.
The construction of the circuit and assembly was like below.
Final Work
Rizhome - Performance
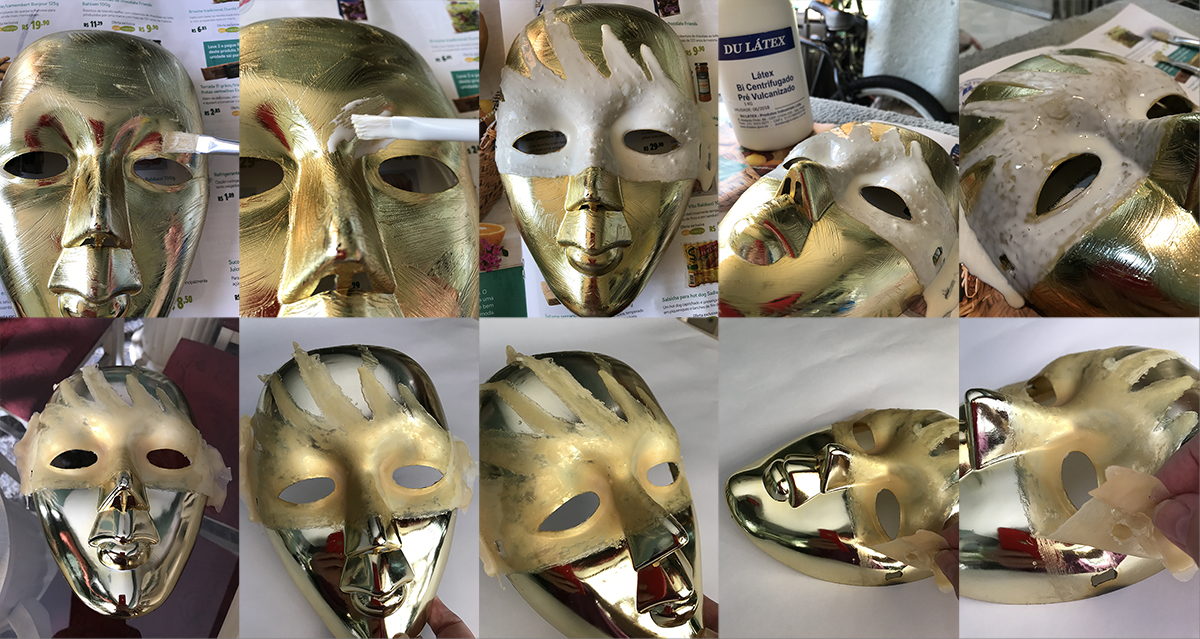
Mask
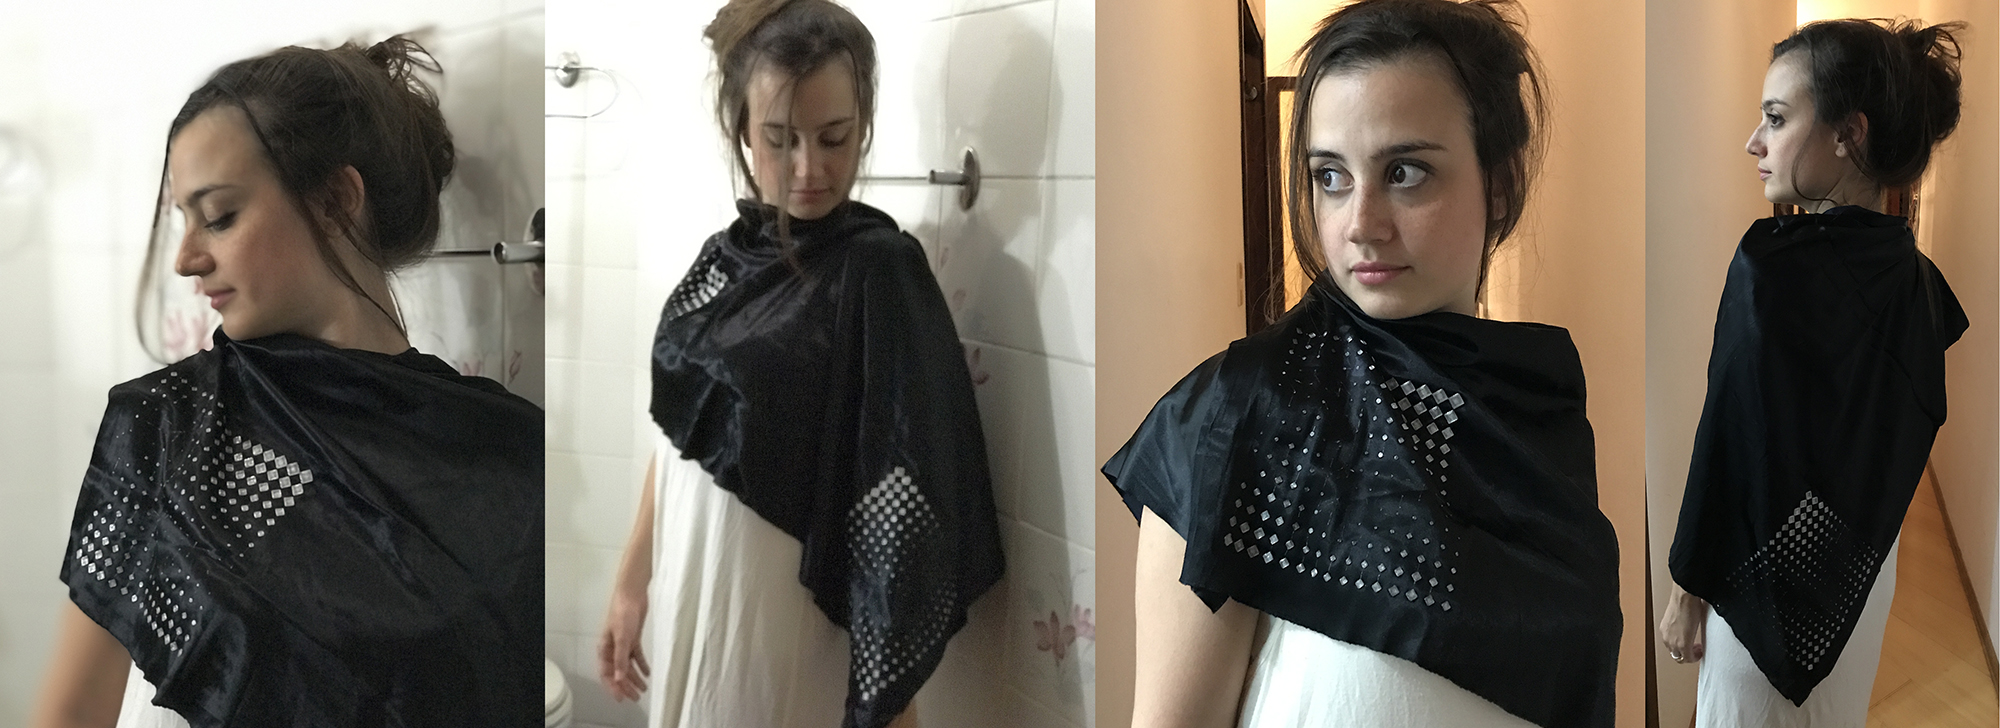
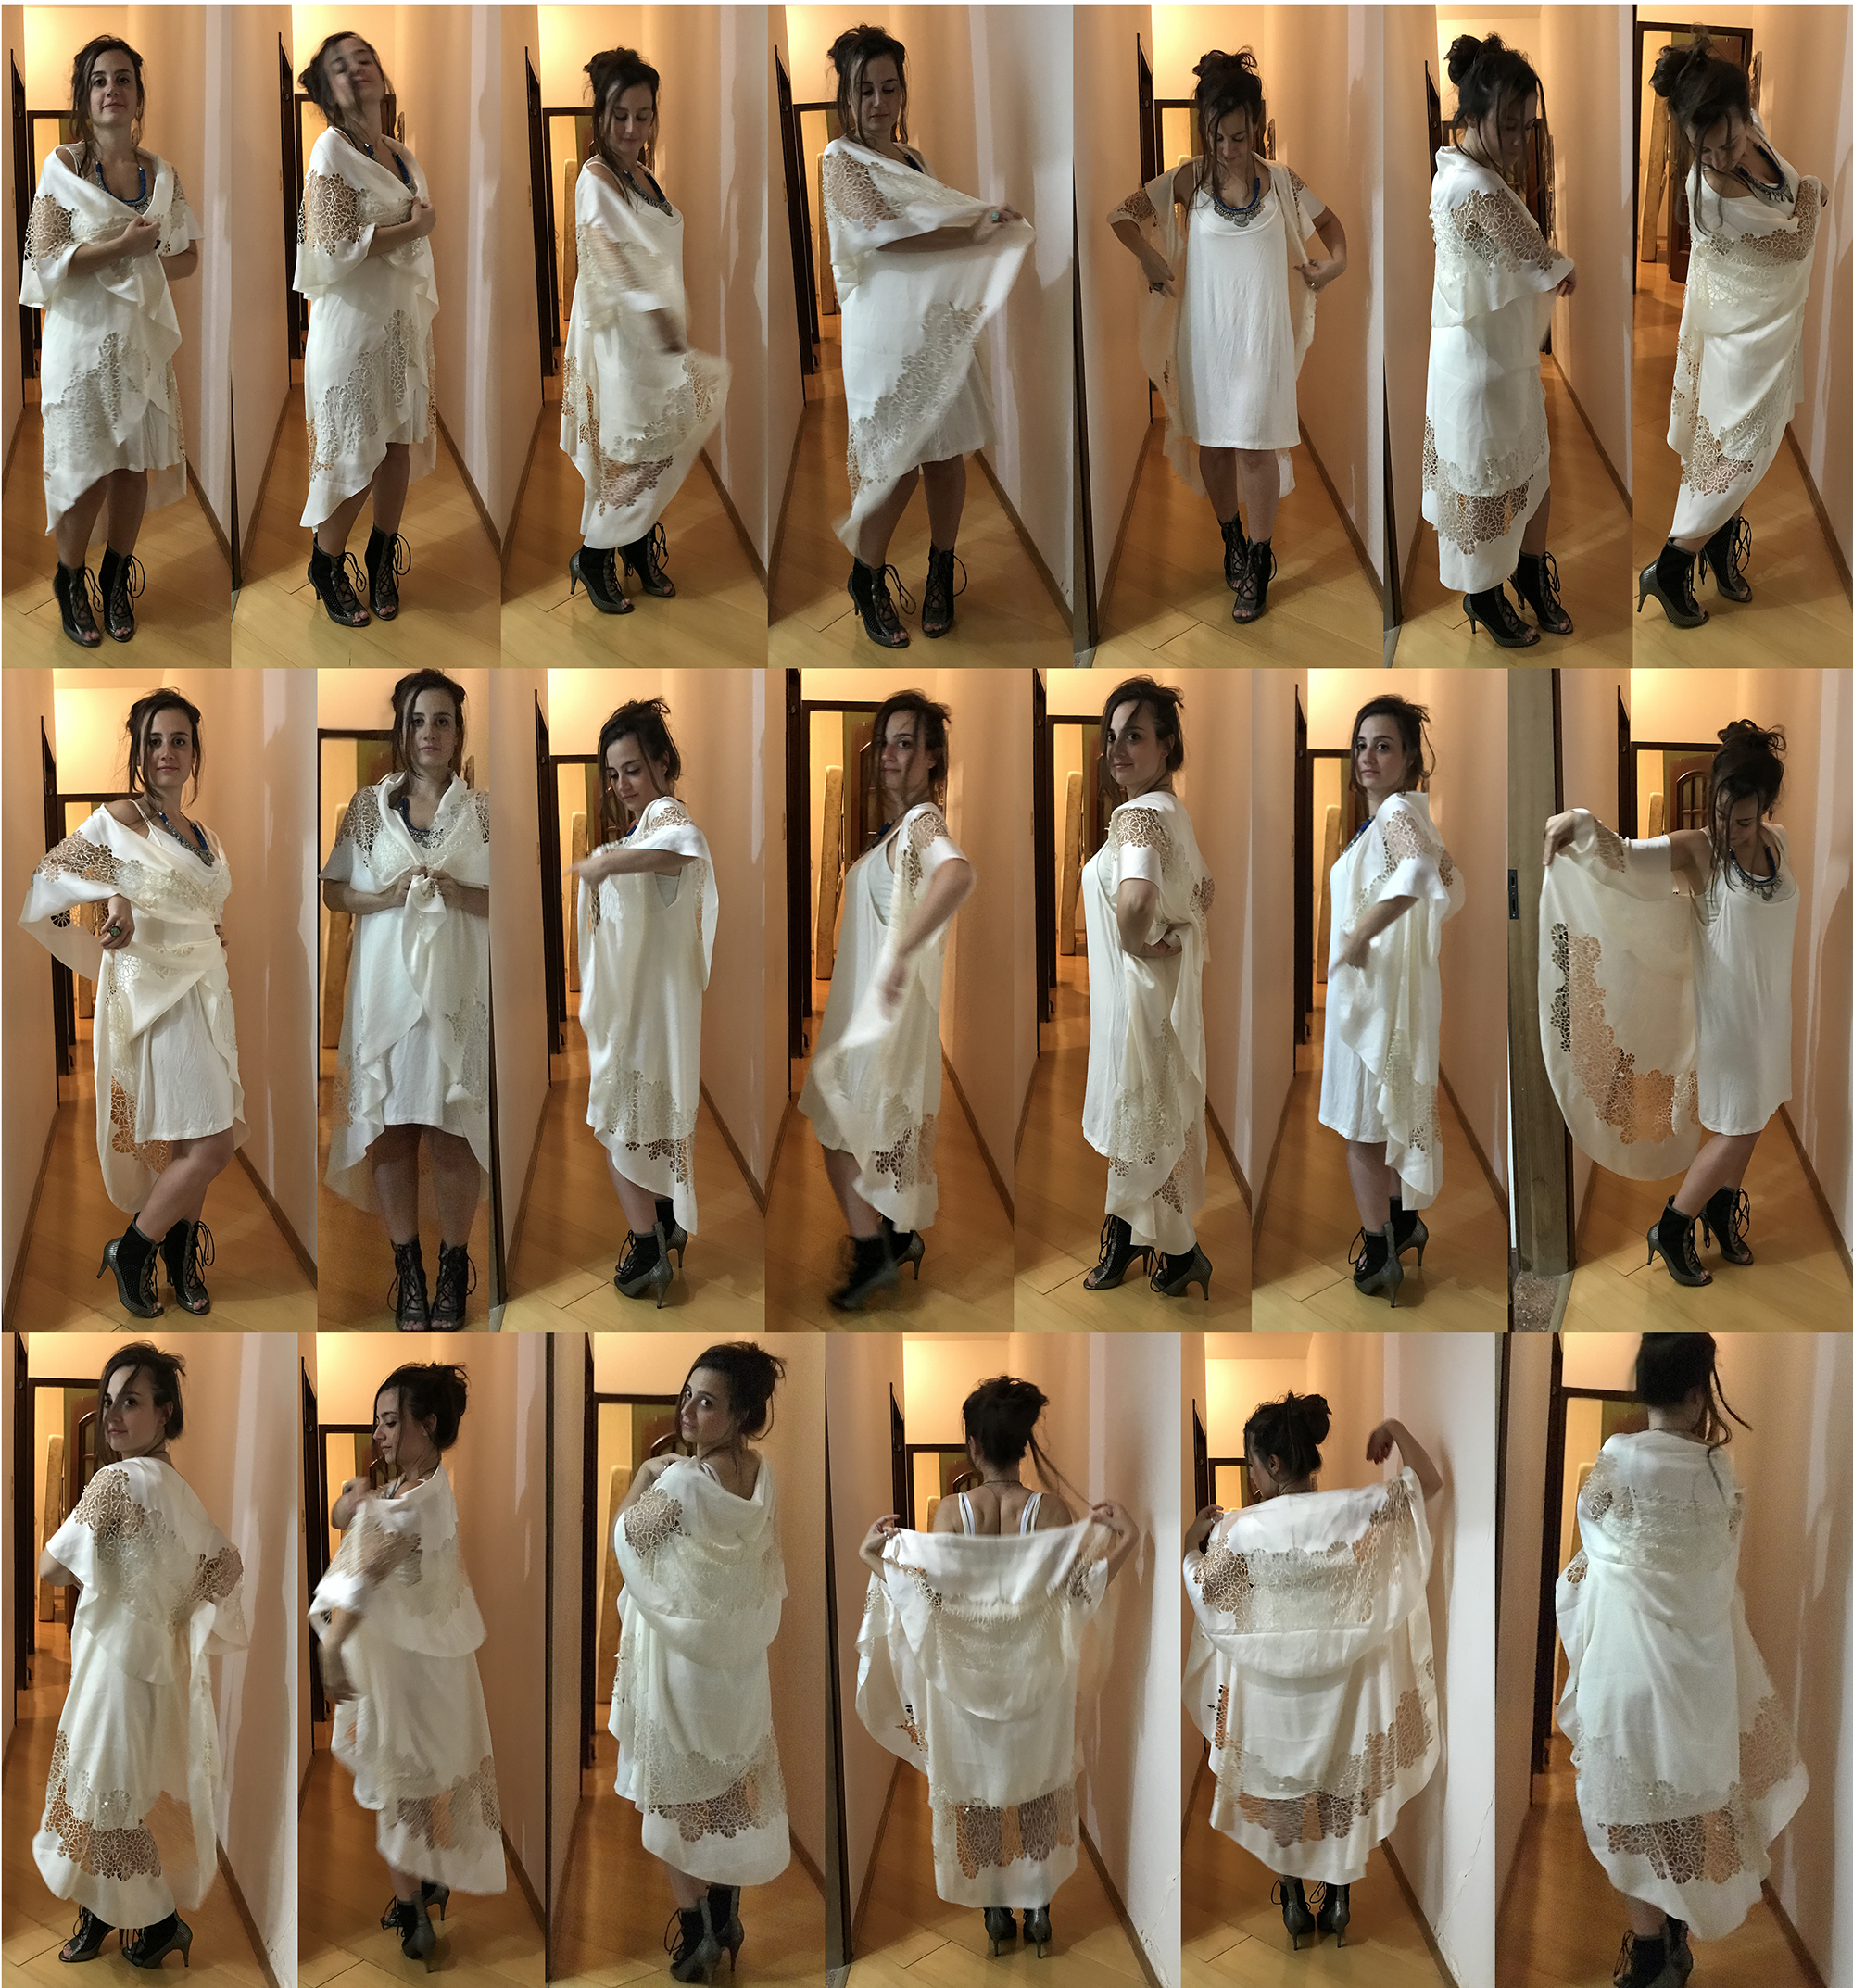
Scarf
Cape
Final Presentation
Presentation
https://drive.google.com/file/d/1PylNTJw7oM-BEHl54pwcjZJt6oxnCyXg/view?usp=sharing
https://drive.google.com/open?id=1PIAtMMlb1_Vle2BjZw1TNRwkO0Gk1F7w
