Week 06. Computational Couture
Program outline
Introduction
Patterns manipulations Box Morphing Loops and iterations Recursive subdivision / localized subdivision Physics and simulations Wrapping Foldable patterns Unrolls and mesh planarization VR representations
Software
Rhinoceros 3d Grasshopper
Machines
3d printer
Materials
PLA plastic, ninjaflex, ABS, SLA , SLS
Libraries for Grasshopper3d
Kangaroo Anemone Weaverbird Cocoon Marching Cubes Mesh Edit Mesh+ Mesh tools Lunchbox VR-Edge Mesh analysis
Assignment
Develop or use an existing parametric model in order to design and rapid prototype your geometries using a digital fabrication method of your choice.
Hands On
Studying the Softwares
I have never used Rhinoceros before. My previous contacts with the program was in the Grasshopper, in some projects for constructing structures like LAT Pavillion in Fab 13, but it was only seeing people doing it, and sometimes asking for the functions to understand how it works.
In Fab13 I attended the workshop “Digital Organisms”, where Aldo Sollazo has given some information in the Grasshopper functions, and in that ocasion I downloaded the Rhino Trial version to try to get in contact with the program. But at the end I used it only a few times and my trial version has expirated. I really liked the program and the instructions and tutorials Aldo gave us in the class and in the Recitation, but only on Sunday night I finally get a new license to use the Rhino, so, today I spend all day reviewing and studying the tutorials, and I'm very happy that I finally begin to understand something in this very rich process.
Tutorial 01 : Data Associative
Elements' Dimension Variation with the distance from a extractor point
01. Creating a grid of geometries, Hezagons. 02. Stablishing the center of each form and not in the x / y axes. 03. Introducing the extractor point. 04. Calculating the distance from each center point to the extracting point. 05. Changing the dimensions from each piece acording to the distance from the extracting points. 06. Introducing Color according with the distance.
Producing the parametric geometry for 3D printing in the Fabric
I've reproduce this tutorial , but decided follow another to construct my pattern to 3D printing in the Fabric.
Step by Step
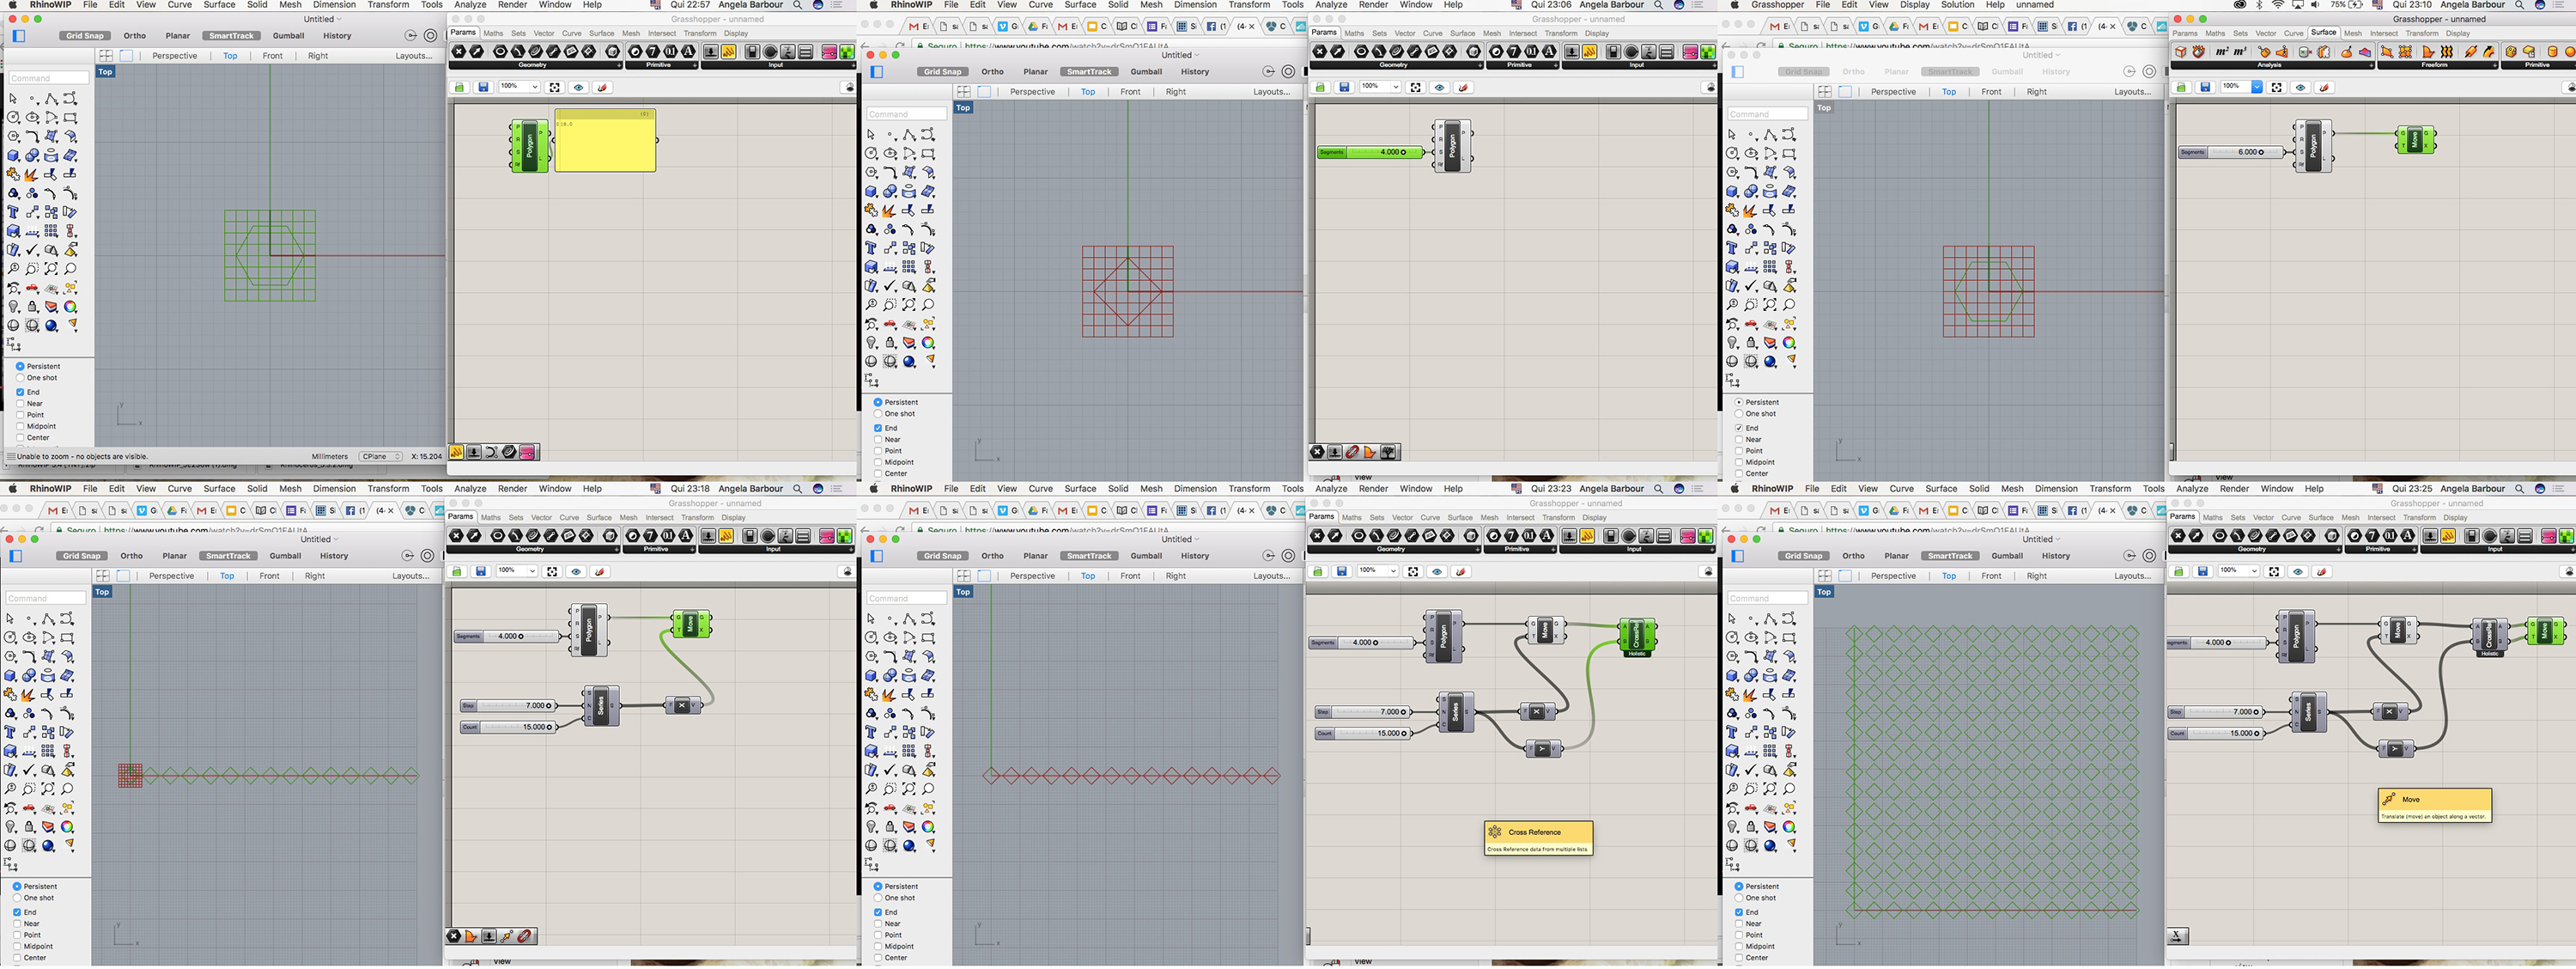
01. Creating a grid of geometries, Squares.In the first ine of the image can be seen how to change the number of sides from the geometry. In the second line creating the grid with 15 columns and 15 lines.
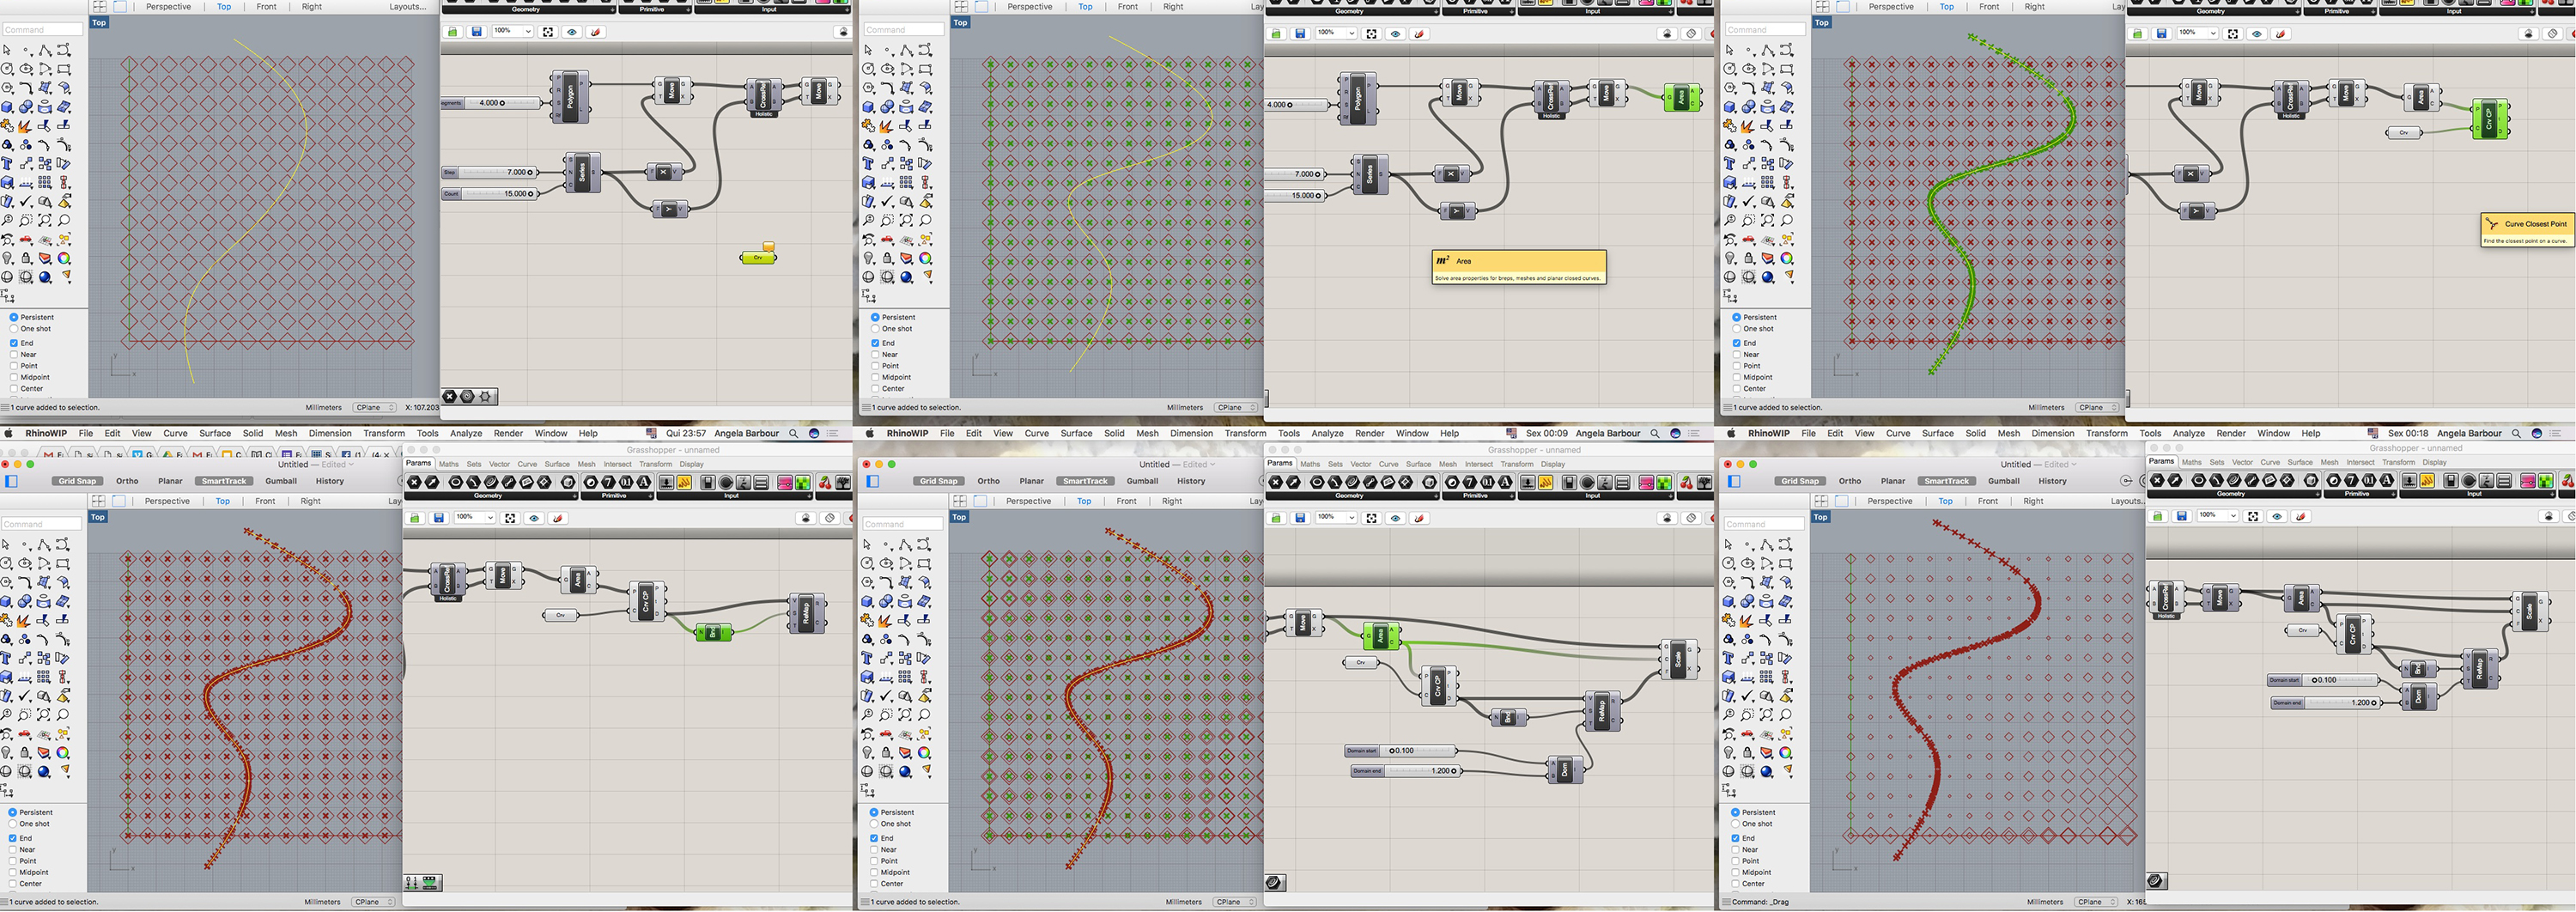
02. Introducing a line as a extractor point.
03. Stablishing the center of each form and not in the x / y axes.
04. Calculating the distance from each center point to the extracting line.
05. Changing the dimensions from each piece according to the distance from the extracting points in the line.
06. Extruding the forms changing the Hight with the distance from the extracting points in the line.
07. Introducing color and changing this color with the distance fro the extrator points in the line, and activate the vizualization of this. The image on the right is the final construction in Grasshooper, where I decreased the hight to only 0,1 or 1 mm, because of the final purpose that was printing on the fabric.
08. Checking several views of the matrix ready to go to 3D Printing programas.
3D Printing in the Fabric
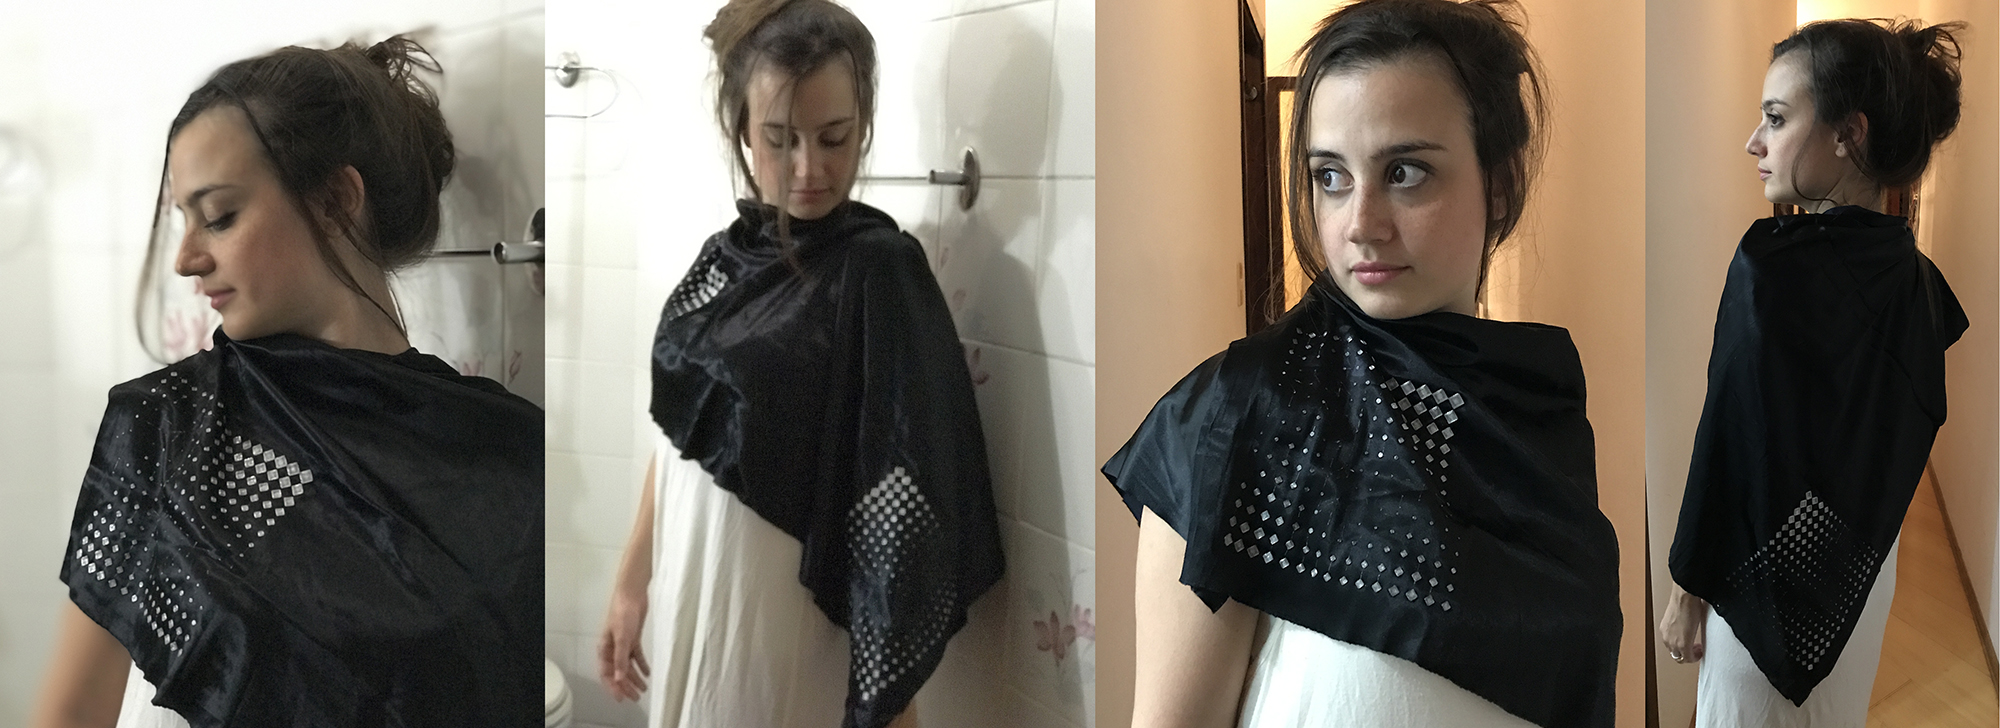
After finishing the Parametric Geometry, and extruding it to 1 mm high maximum, I rendered the file, and save ir to .stl to go to the 3D Printer. I use the Set 3 D Printer with PLA crystal filament, and printed in a syntetic cetim black fabric . Below can be seen the printing process, and the final result. The thinner form has only one layer of printing, and the 0,1mm hight forms have 4 layers of printing. It became very delicate and beautiful.
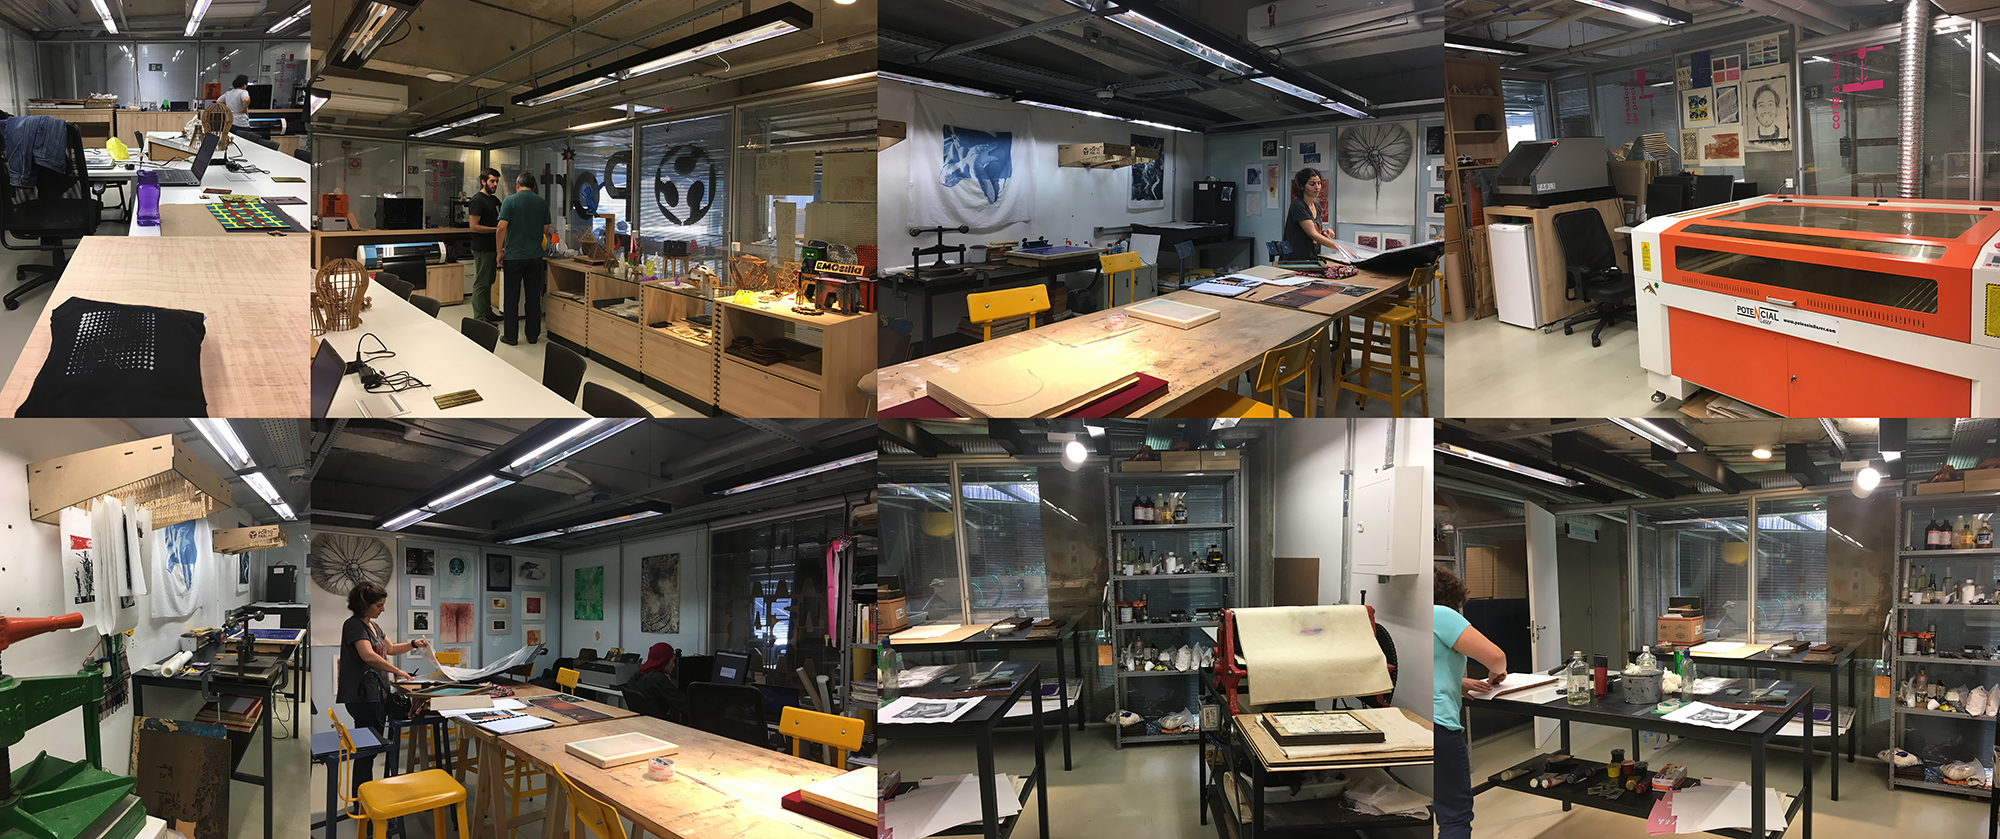
In the images below something about the PortoFabLab, a FabLab parterner in the project, and where I developed this assignement. The PortoFabLab was idealized and founded by me when I was the Executive Director of the Porto Seguro Cultural Space, and is a FabLab dedicated to Art Projects in special, as you can see there is an engraving atelië atached with it, and these symbiosis is incredible good.


