Week 03: Circular Open Source Fashion
Hacking the Fashion Industry
by Zoe Romano
Program outline
- Intro teacher
- Circular fashion
- Hacking the fashion system
- Agile fashion
- Modular elements
- Modular seams
- References
Tools/software
- 2d drawing software
- illustrator, rhino3d & grasshopper
- valentina project
- openfitlab
- laser cutter
Materials
sealing textiles, synthetic textiles that melt and seal the edges of the cut outs vegetable tanned leather (chrome tanned leather is toxic when heated) felt, natural and synthetic (preferably pla or other biodegardable felts) neoprene (check for composition that no toxic particle/fumes will be released when heated)
Assignment
The students will have to design and fabricate a modular reconfigurable system or seamless garments. The soft connection can be designed to be implemented in the assembly of a garment, being applied on the seams or it can be designed as single elements that act as construction parts of a garment.
The whole process needs to be documented on the personal webpage.
Their task is to upload their open source file, accompanied by a manual of materials and a tutorial of how to make it and track its life throughout the whole course. Keep metrics of it while the duration of the course, use social media to share and track its spreading,.
Modular Fashion
by Zoe Romano
Hands On
This week assignment is to create a modular system:
I begin searching for fashion designers that work with it to know a little better what can be done. And I really falled in love with the work of Eunsuk Hur
Particularly the project Nomadic Wonderland, where she creates many parts of modular pieces and construct a space that integrates with the woman in the scene.
https://www.eunsukhur.com/about-nomadic-wonderland
I will try to be inspired on it to creat my modular pieces, based on the brazilian flowers and plants, so I can at the end construct an installation in my artistic work.
Studies
Since the beggining I knew that the regular and geometric forms didn't interest me, so first of all I research for many natural formats, than I draw in paper many of them that I think could be inspiring, below you can see some of these draws, and the last one that I decide to do for the assignment.
Draw and final file to laser cutting
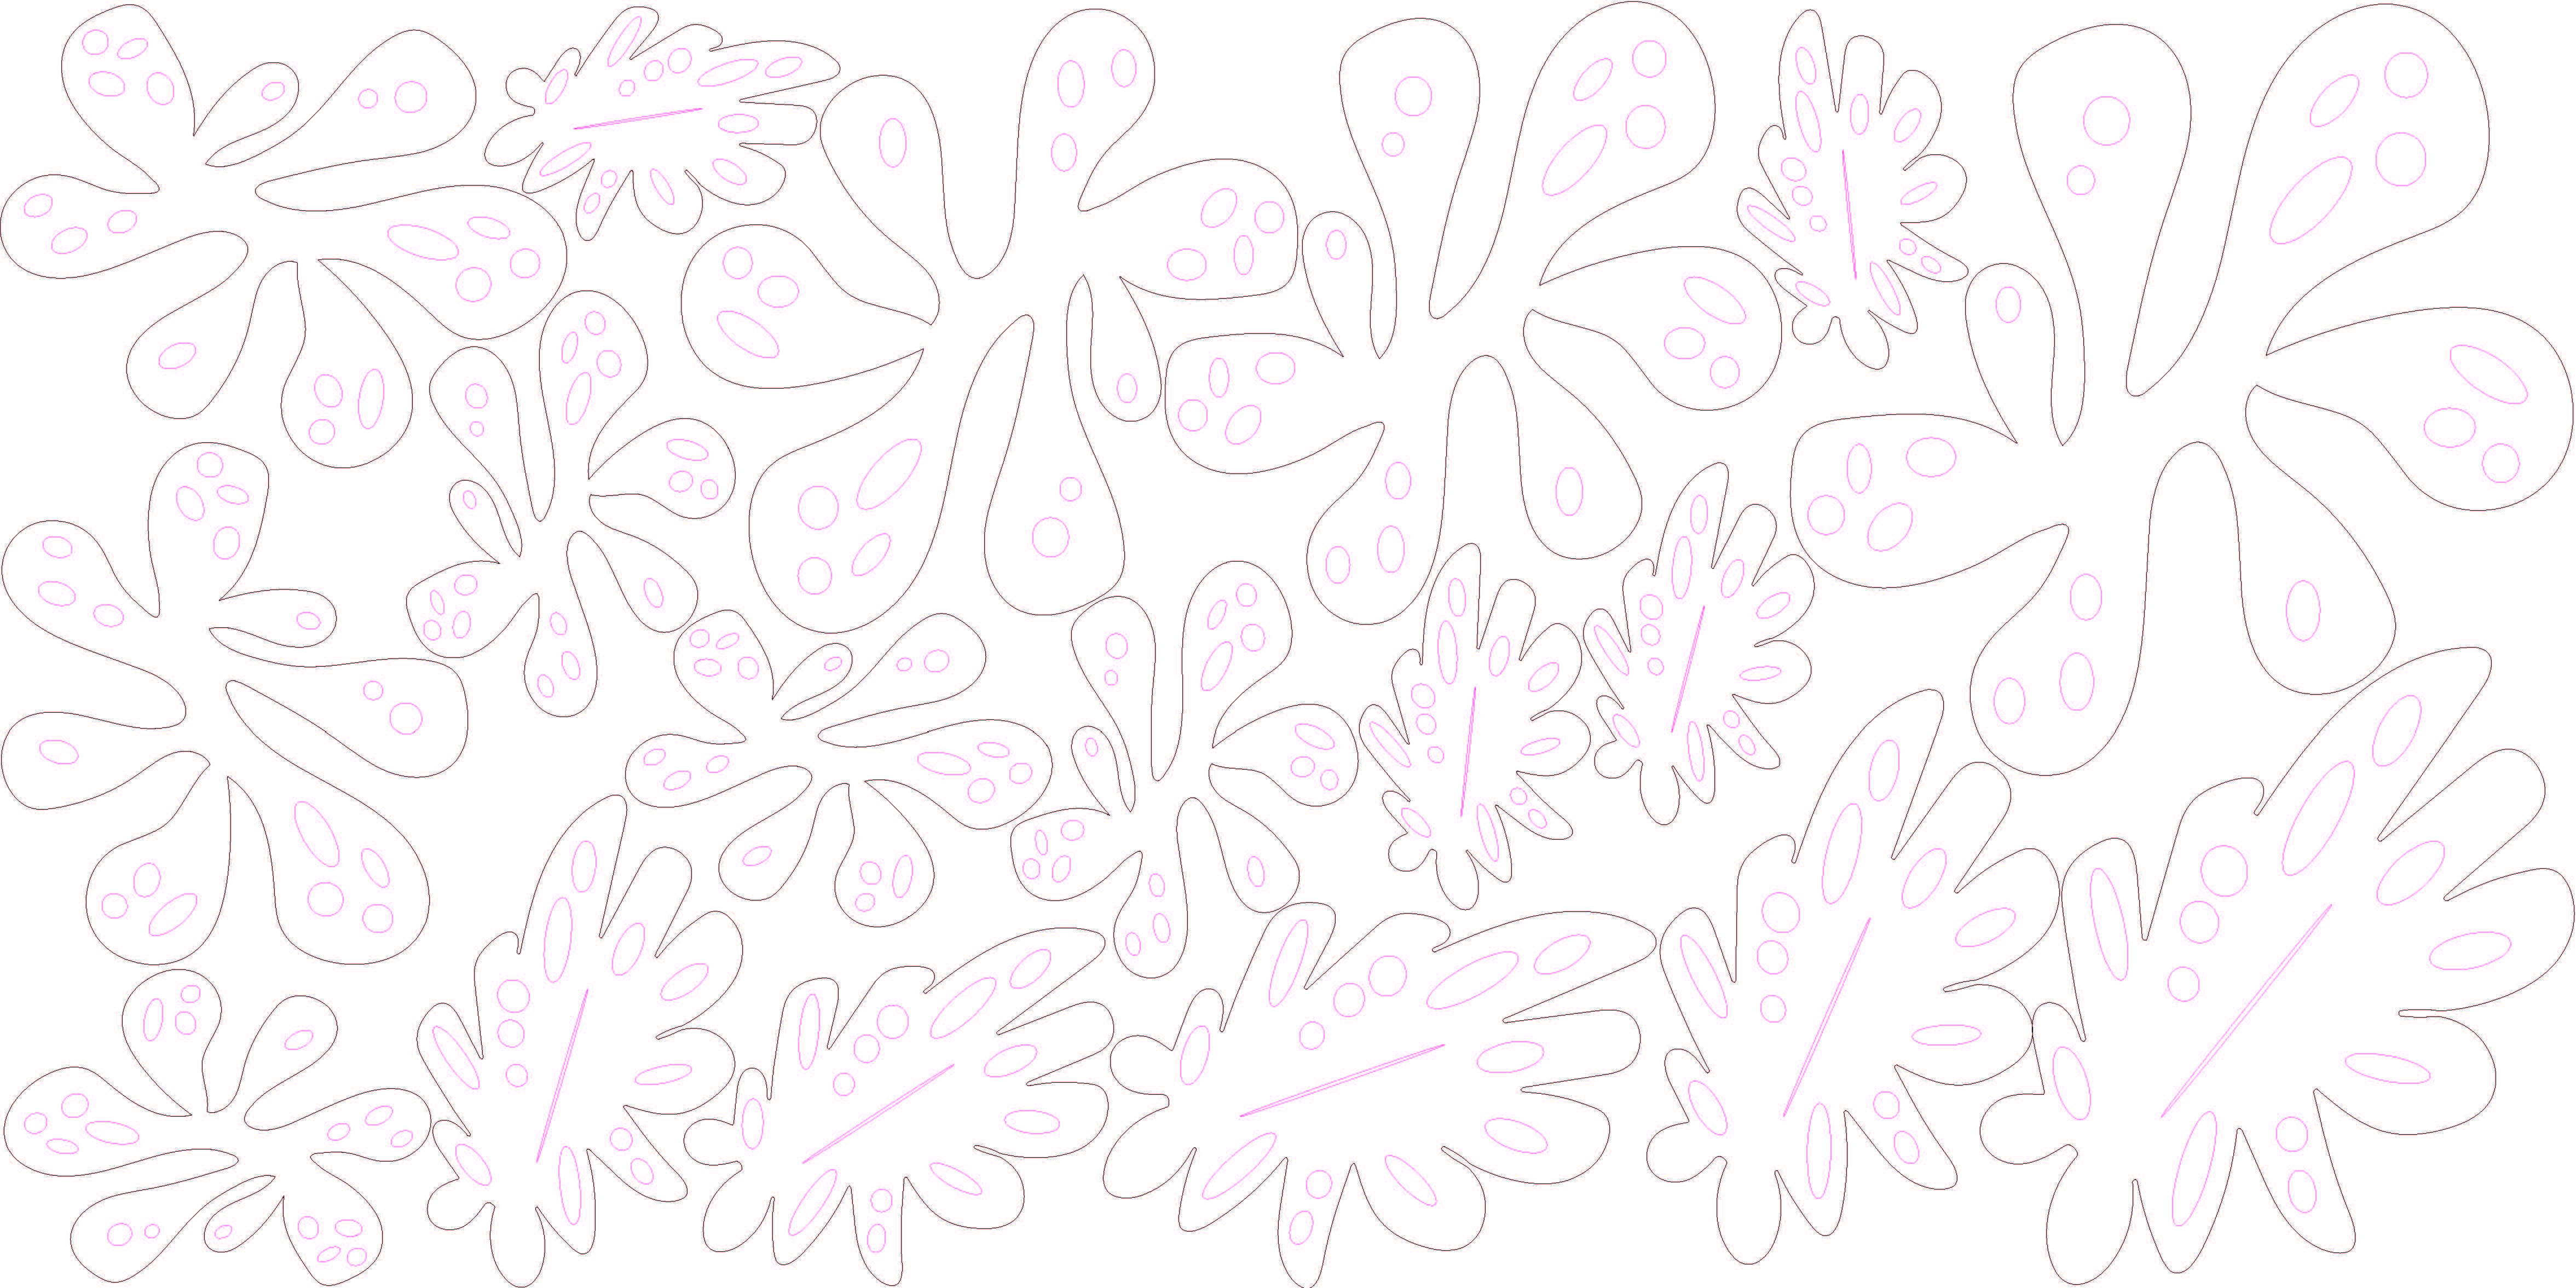
From the draft I draw the images on the Ilustrator, for more diversity possibilities I've drawn them in four different sizes and placed in the board to cut, 01 from size one (biggest one), 02 from the second size, 03 from the third and 05 from the smallest one. I have also some problems in drawing the images, because I used the shaper tool for having more freehand drwas, but it has constructed forms with thickness and double contour, at the end I had to delete the contour of each from and to put as minimum thickness for Laser Cutter to recognize as cut and not engraving. But at the end everything was ok. Instead of grouping the forms inside separeted of outside, I wrok with different colours for each one, read for froms inside the figures, and yellow for the contour of the forms.
Laser Cutting
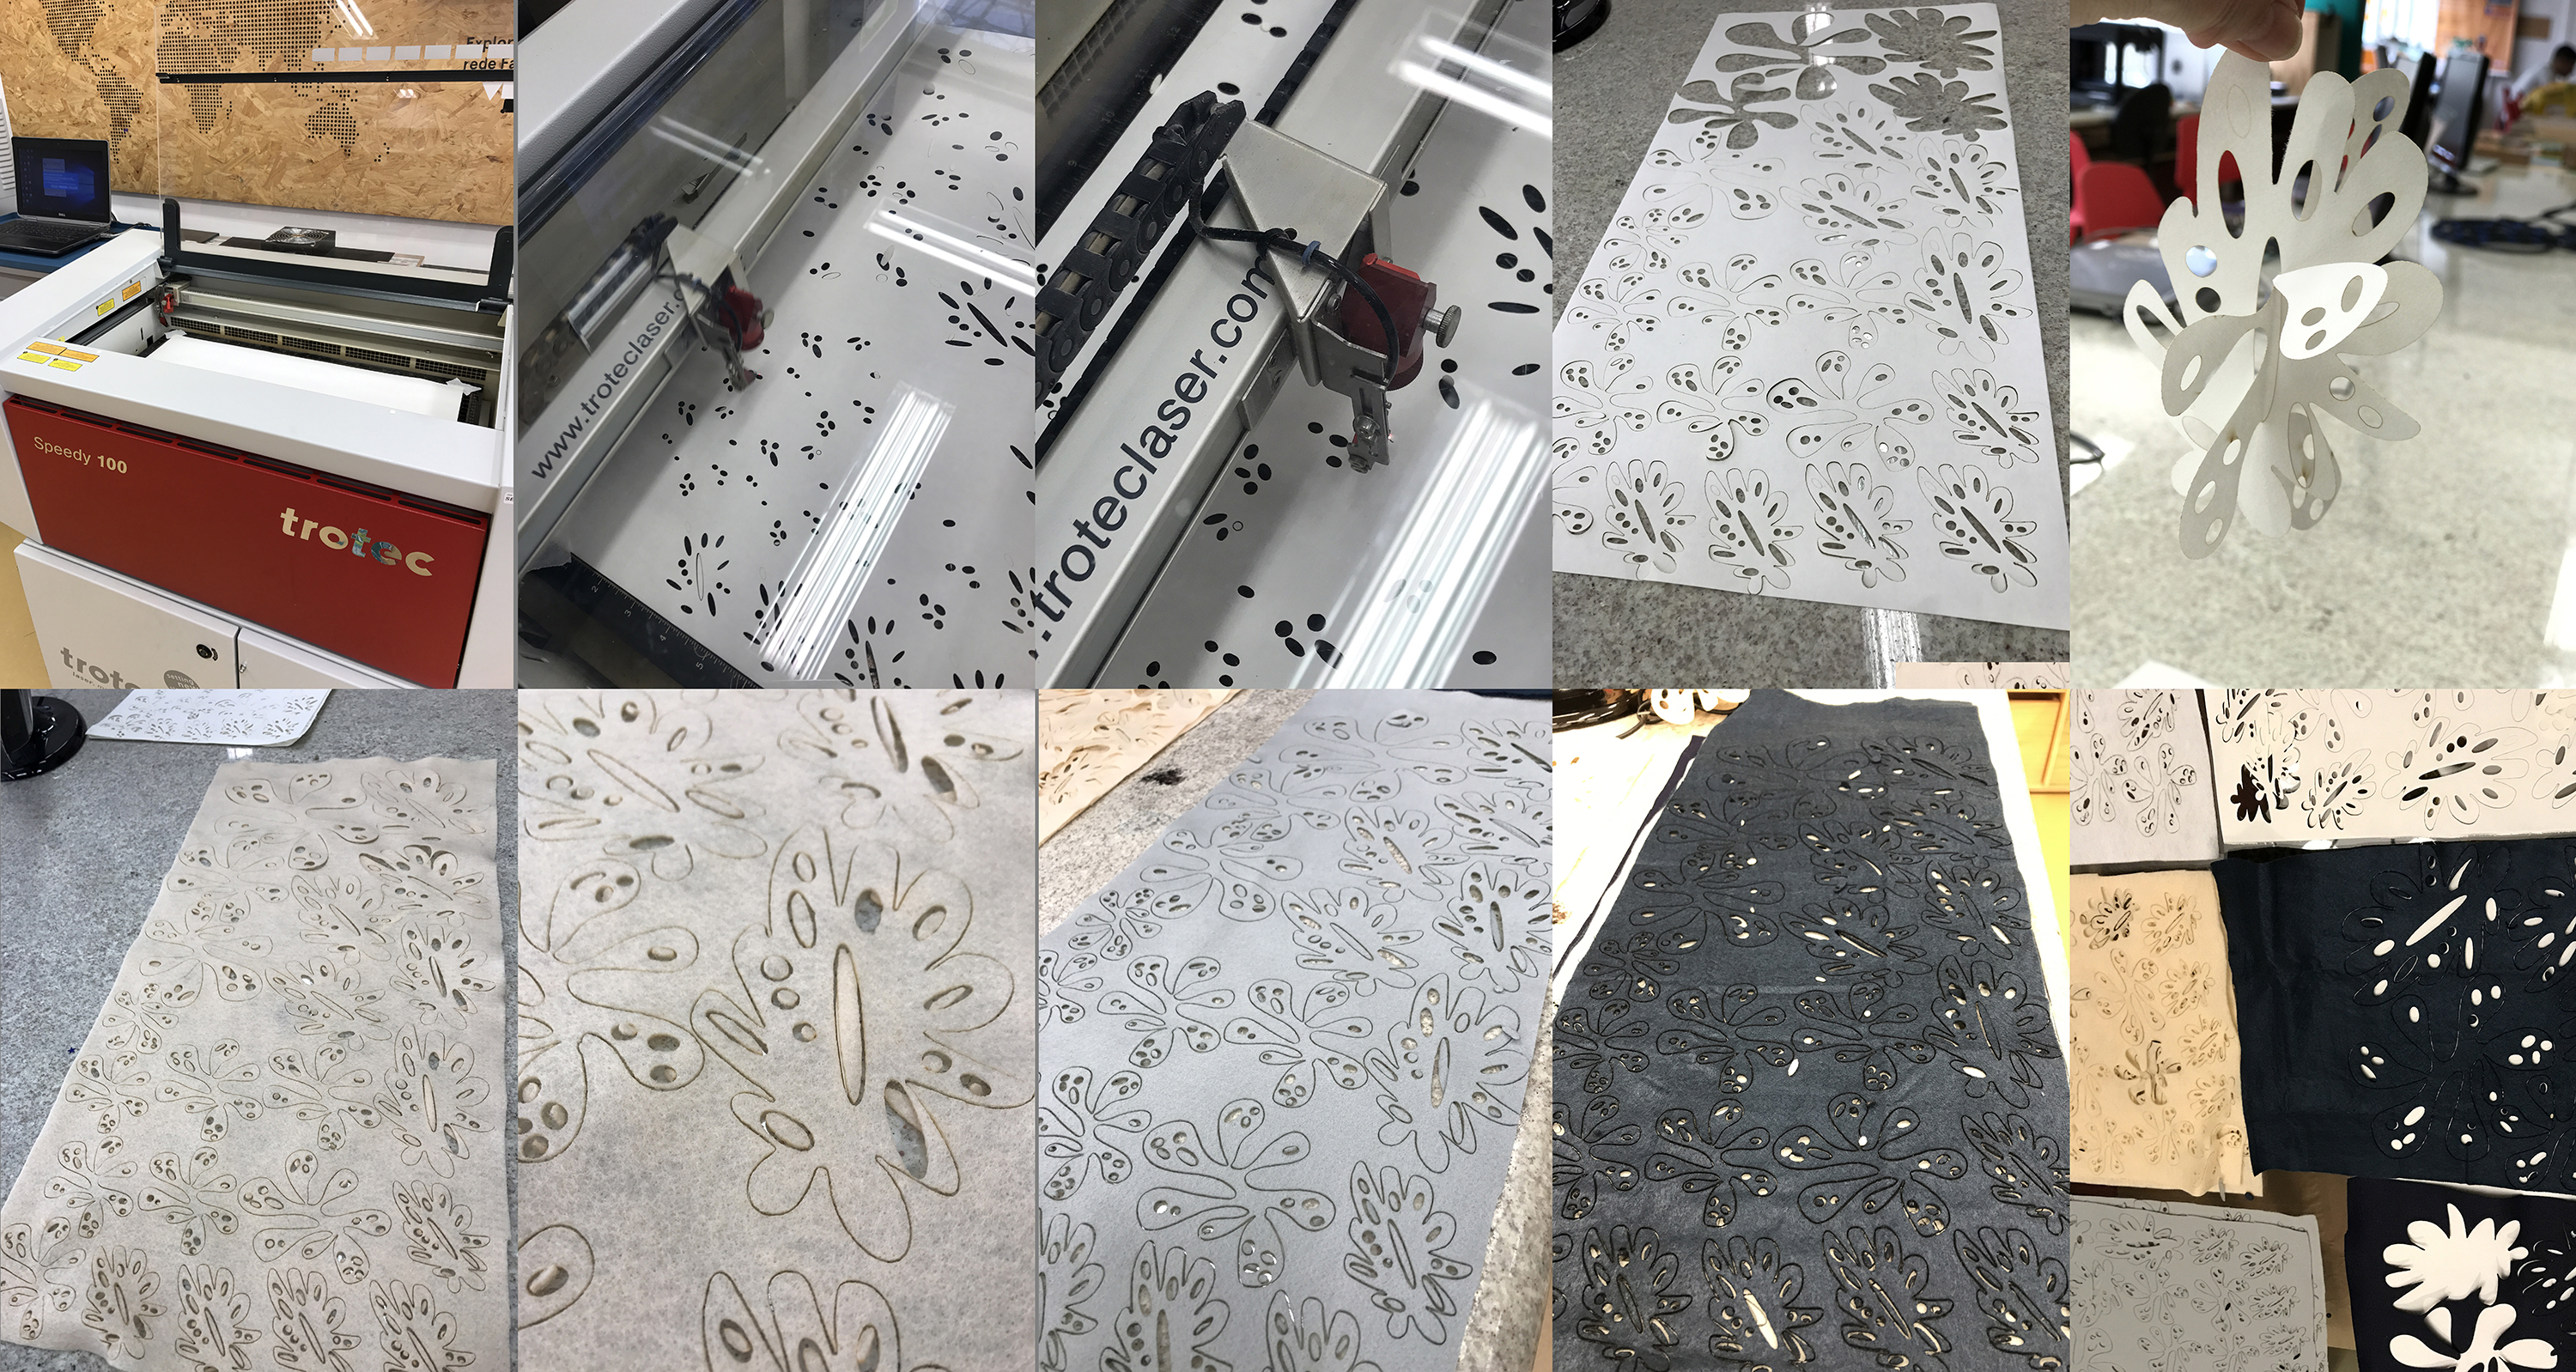
For the Laser Cutting I've used the Trotec Speedy 100, from the FAbLAb Escola Sesi SP, and used the felt fabric from different colours in the size of 300 x 600 mm. Them I send to cut first the red forms and after the yellow ones. Some problems I had was: 01. Some of the circles was still wit thickness greater than minimum and so they appeared engraved and not cut, I've done a test on paper, and fixed the final file to cut. 02. The red forms cut very well but the yellow ones didn't, after I've seen the specific power and speedy from each color were different, so never more, forget to check the configuration from each color when sending the file to cut. 03. I worked with Power cutting 30 and speedy 2, it was the limit, because I didn't want that the fabric looks like burned, specially in the small formats. 04. Different colors of fabric have different thickness, so at the end I had some problems with two of them that didn't cut very well. So, better test each fabric before going to the final production.
Mounting / Assembly
When I started to mount the garment, I noticed that the pieces could be released one from another, because the central groove was a little wide, so I re-designed the cut and cut it all again, to be able to have a fairer and safer fit of the joining pieces, the modular elements.
So the final design is the following:
Note that I used different colors for the internal parts and the external conyour if the pices because it is important to be able to select the Laser cut to cut first the internal elements and after the external contour, otherwise , the pieces already cut will move when the laser cut the internal elements.
And the file can be seen and downloaded in
https://drive.google.com/open?id=19z0G5KKvj8SzwRrzBB14pDBYZxRzJql3
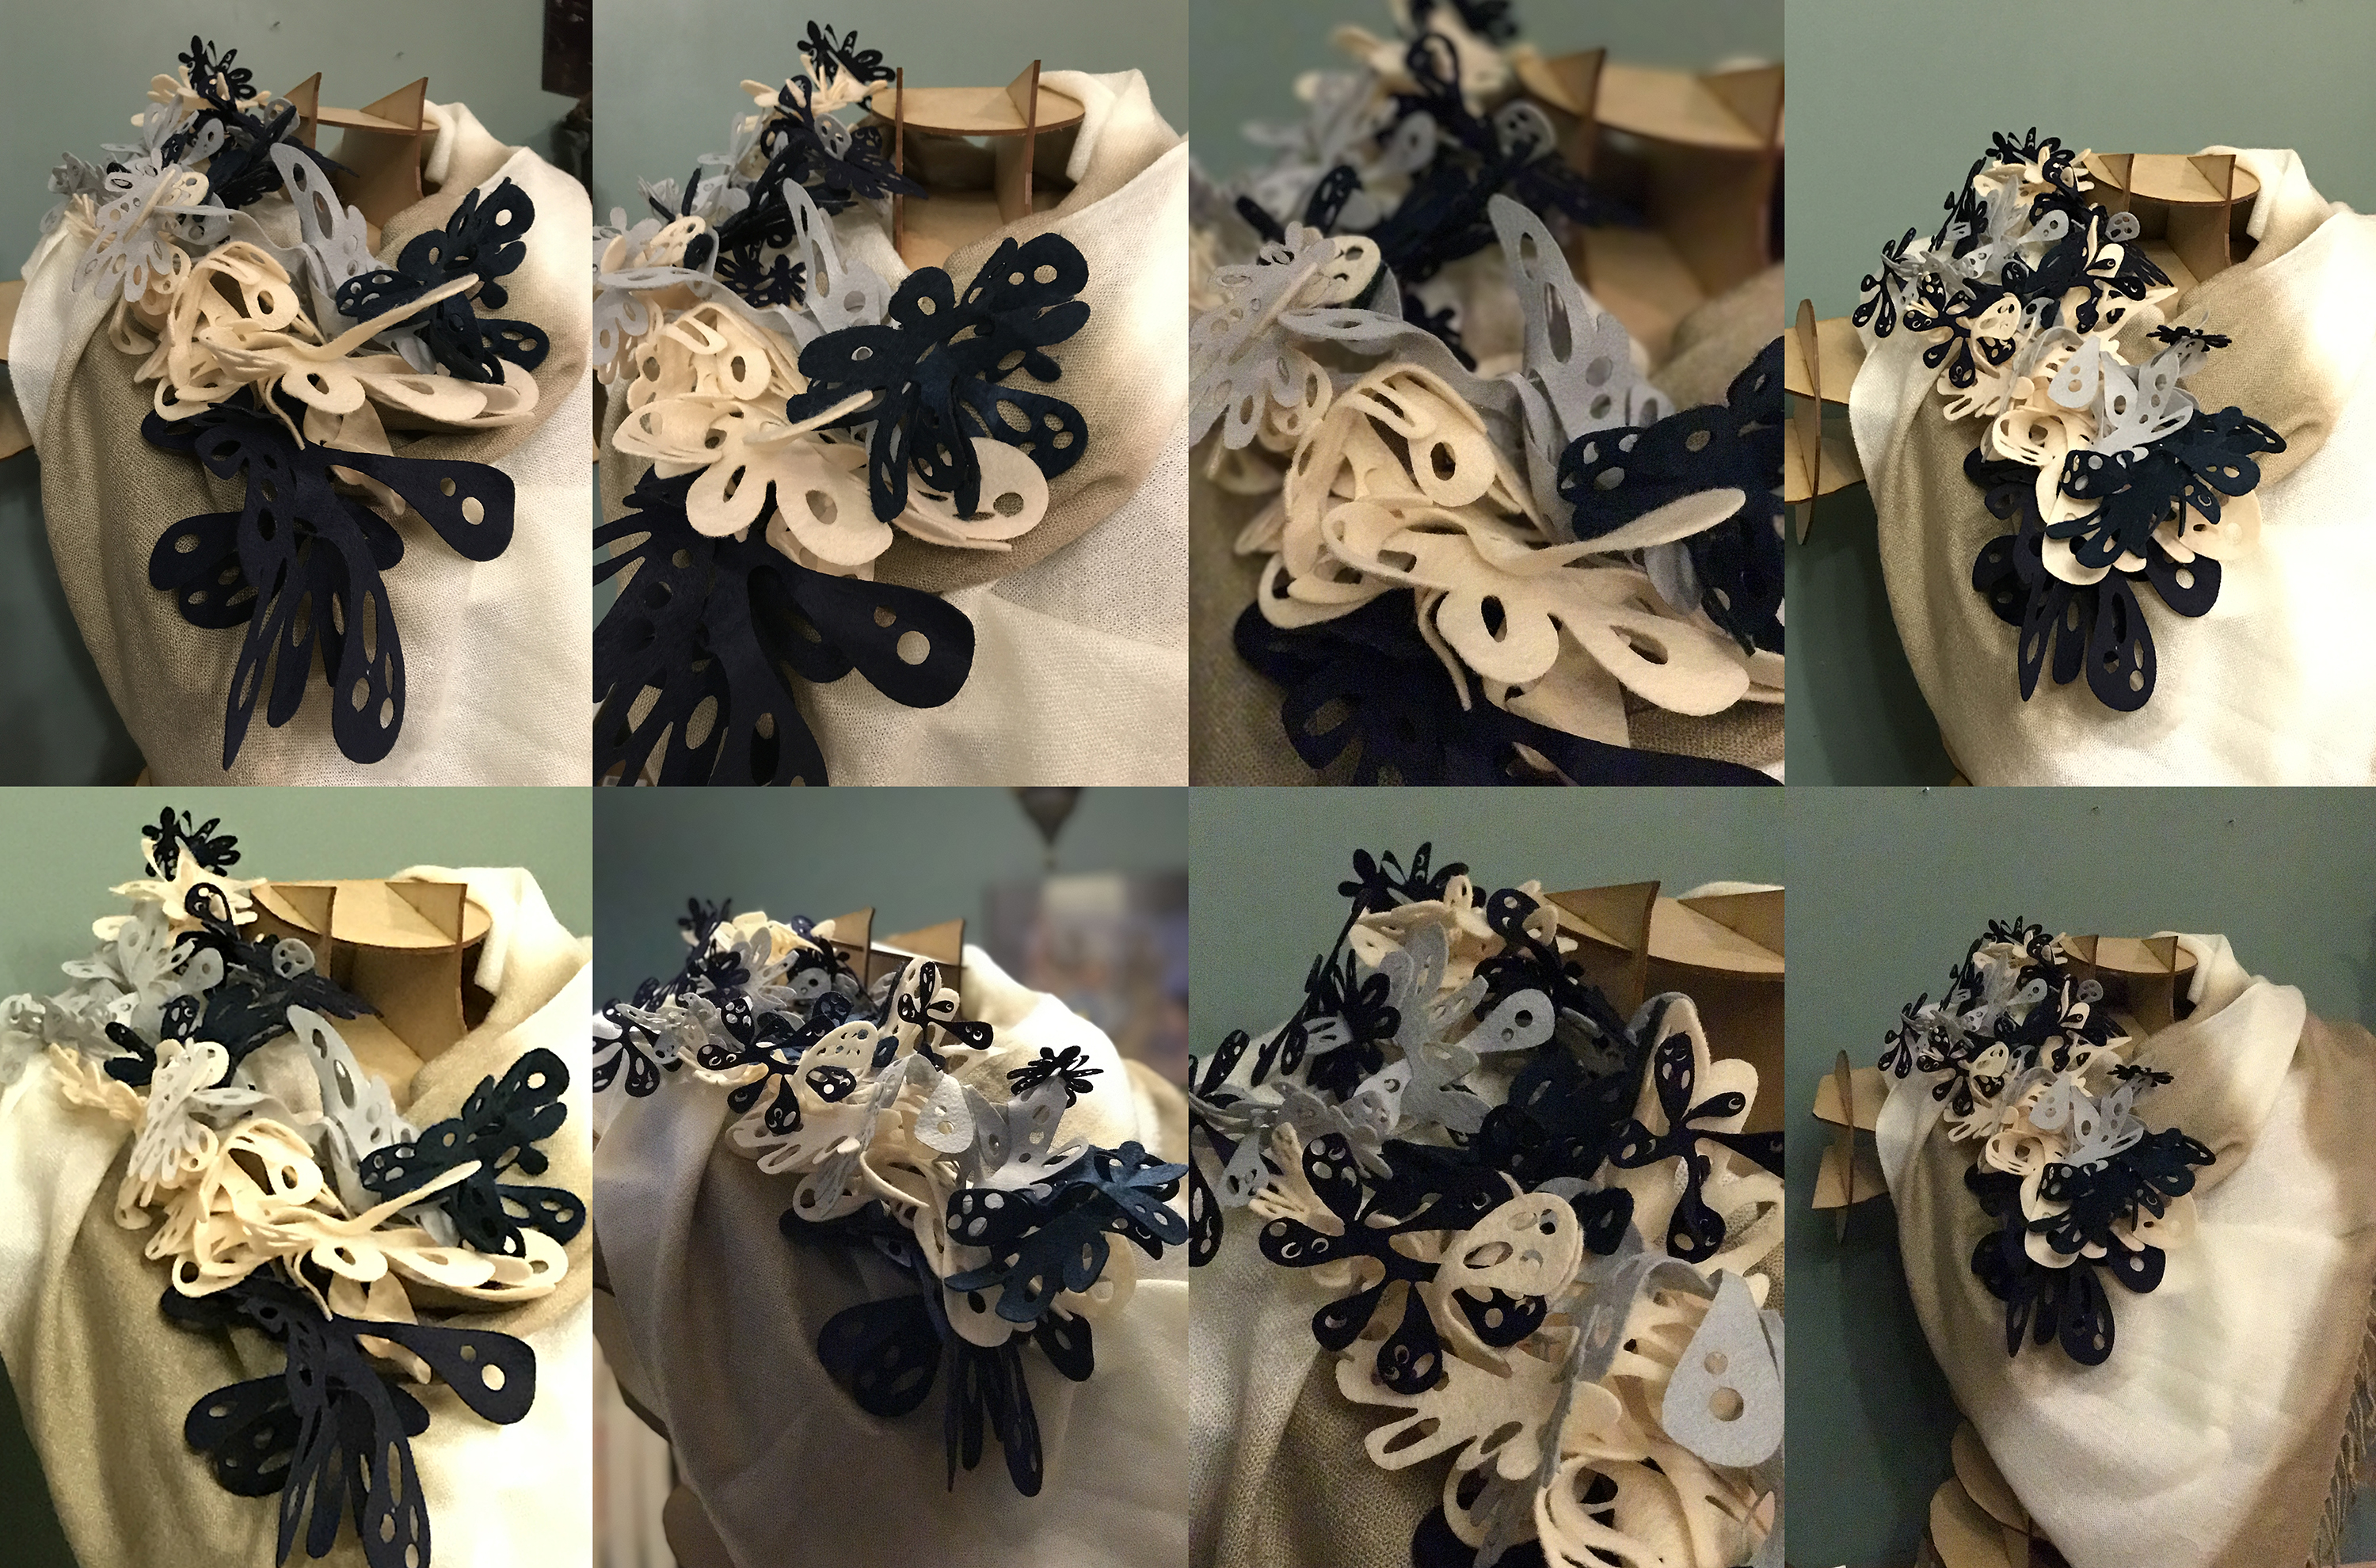
The final assembly with this new design is as in the image below:
Final Result
Sharing the File - FLORA by Ângela Barbour
If you want to produce this garment or other objects with these elements here is the Link to the final file, to laser cut:
https://drive.google.com/open?id=19z0G5KKvj8SzwRrzBB14pDBYZxRzJql3
Please, if you download and use it mark with the hashtags:
#fabricademy2017; #modularfashion; #angelabarbour; #flora_angelabarbour
and send me the link where it is published and used , and I will be happy to know about it !
angelabarbour@gmail.com
The all project is also published for sharing in the App OS (Open Source) Circular Fashion
https://oscircularfashion.herokuapp.com/project/-L7aSoNHx5flt41jCoi2
Enjoy Modular Fashion and Flora !
;-***


