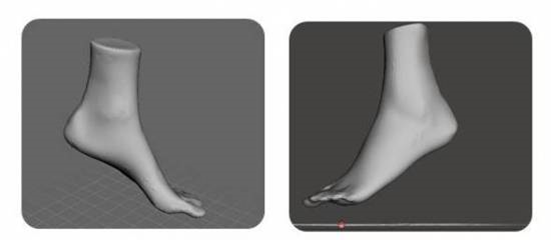
Week 2: Digital bodies
03.10.2017 l FabLab Workshop
The 3th of October is the day of German unity and therefore a bank holiday. But as were are a group with limited experiences when it comes to modeling and operating machines we decided to do a FabLab workshop to become more familiar with our new working environment. We started at 10 in the morning and got an introduction in 3D Scanning which was also the first step for our second assignment.
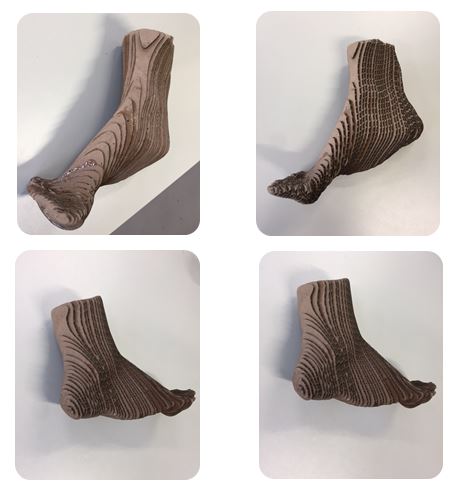
I choose to scan a limp, my lower leg including the foot. Maybe I can use it for further modelings in our final project by designing a splint or prothesis. The scanning worked quite fine so I could use the second try. I imported the obj. file in Meshmixer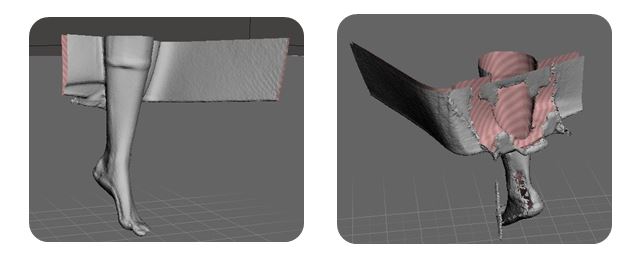
To come from the raw version to a solid version I proceed some steps:
- Use the edit button to use the transform function where you can adjust your model in the position you need
- It make sense to choose a triangle surface to make modeling for your computer as easy as possible (regarding calculation and data processing)
- With the select button you can select the brush and determine the size to mark specific parts of your model to modify it
- If you have selected the specific part modeling can start. For basic modeling you will find the most important functions under the dropdown edit.
- After fundamental modeling is finished you can work more detailed with the sculpt function.
- If you are satisfied with the result you can use the edit button and there you will find the function make solid
- Save it again as an obj. file
After we finished our preparation it was time for the next video session with all of you. We could enhance our knowledge about digital bodies and Anastasia showed us some more possibilities of modeling. I really like the creative and 'out of the box' approach. We finished our intensive day with our first laser cut which was a great and successful closure.
05.10.2017 l FabLab Session
I decided to produce my model with the Lasercutter. I was thinking about using wood as material but in consideration of the time difference (6h in case of wood and 20 minutes in case of carton) and the case that we are 15 people, I decided to use carton as material. I finished the smoothing process of the model and processed it in SlicerFusion360 to prepare the cutting process.
- Import the obj. File
- Adjust the size of your model. I used the real measures of my foot
- Select a construction description. I chose Stacked Slices
- With the function Slice Direction you can modify the direction in several dimensions
- To process the final steps in Adobe Illustrator I saved the file as an dxf.
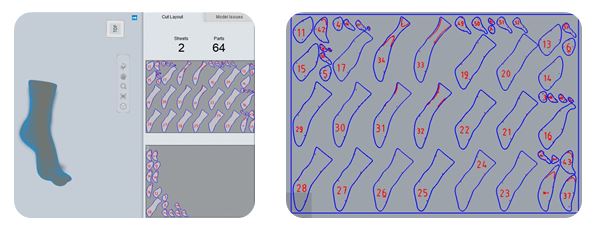
With Adobe Illustrator I could do the final settings to send the model to the Lasercutter.
- Import the dxf. file
- Select all your parts and with STRG+ J you can join 'dots into lines'
- Activate Color mapping. Determine via the click box of Raster and Vector whether the material should be carved or cut. The different color could be seen as different layers of your model. You can determine speed and power for each layer. For the blue layer I used 50% speed, 50% power and clicked the vector (to cut it) and for the red layer 50% speed, power 15% and raster (to grave it)
- Focus the jog of the laser
- Start the job
The laser cutting took 20 minutes per slide and finally I had all the parts I needed to glue my model.
10.10.2017 l FabLab Session
I wanted to glue it at home but I had some troubles. I came early this morning in the FabLab to ask our supervisors. The problem was that some parts were missing therefore I have to cut again. The function 'Assembly Steps' in SlicerforFusion360 really helped me to reconstruct the way how to glue the model.
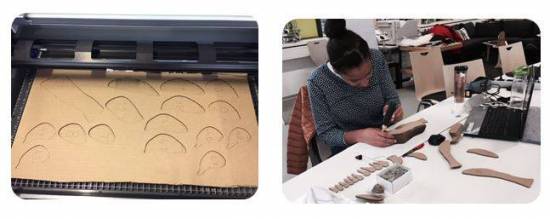
Finally, I am not 100 per cent satisfied with the result because the model differs from the digital version but I learnd a lot in the past week and it is the beginning and I hope I can improve :)
Lessons learned:
The main learning I take from the past week is that we have to deal with a lot of new systems and machines. I takes some time to get use to all this and to work more efficient. Furthermore, I would do some advance checks next time so that I will not recognize at home that some parts are missing. In addition, I would choose another direction of slicing because it was a bit difficult to recognize the right form. All in all, it was my first digital body. The result is not perfect but i think it is just the beginning and I think the overall goal is reached. I enhanced my knowledge and I produced something which came close to the digital version and maybe I will call it abstract art. I think with painting the shape of the foot could be improved.
