Week 08. Open Source Hardware - from fibers to fabrics
Global Instructors: Mar Canet & Varvara Guljajeva
Program outline
Intro teachers
Techniques & history
Knitting
History
Knitting as first manufacturing home machine
Weaving
history
Machines
knitting machines
mechanical
electronic
digital / industrial
looms
mechanical
electronic
digital industrial
open source machines & hacking machines
knitic
circular knitic
open knit → kniterate
updating the industry with new tools, democratizing machines
Hands On
Hacking or constructing a machine
As I had no knowledge in dealing with motors, that is the operation principle of the machines, I've decided trying to construct a machine with some elements I use to develop this knowledge of the different kind of motors.
In this way I use two different motors:
Step motor and Servo Motor joined to a drawing compass to automate its function.
01. Materials
Compass
Step Motor with its drive board
Servo Motor
Arduino Uno Board
Cables
Protoboard
Pen, paper, LEDs, tape.
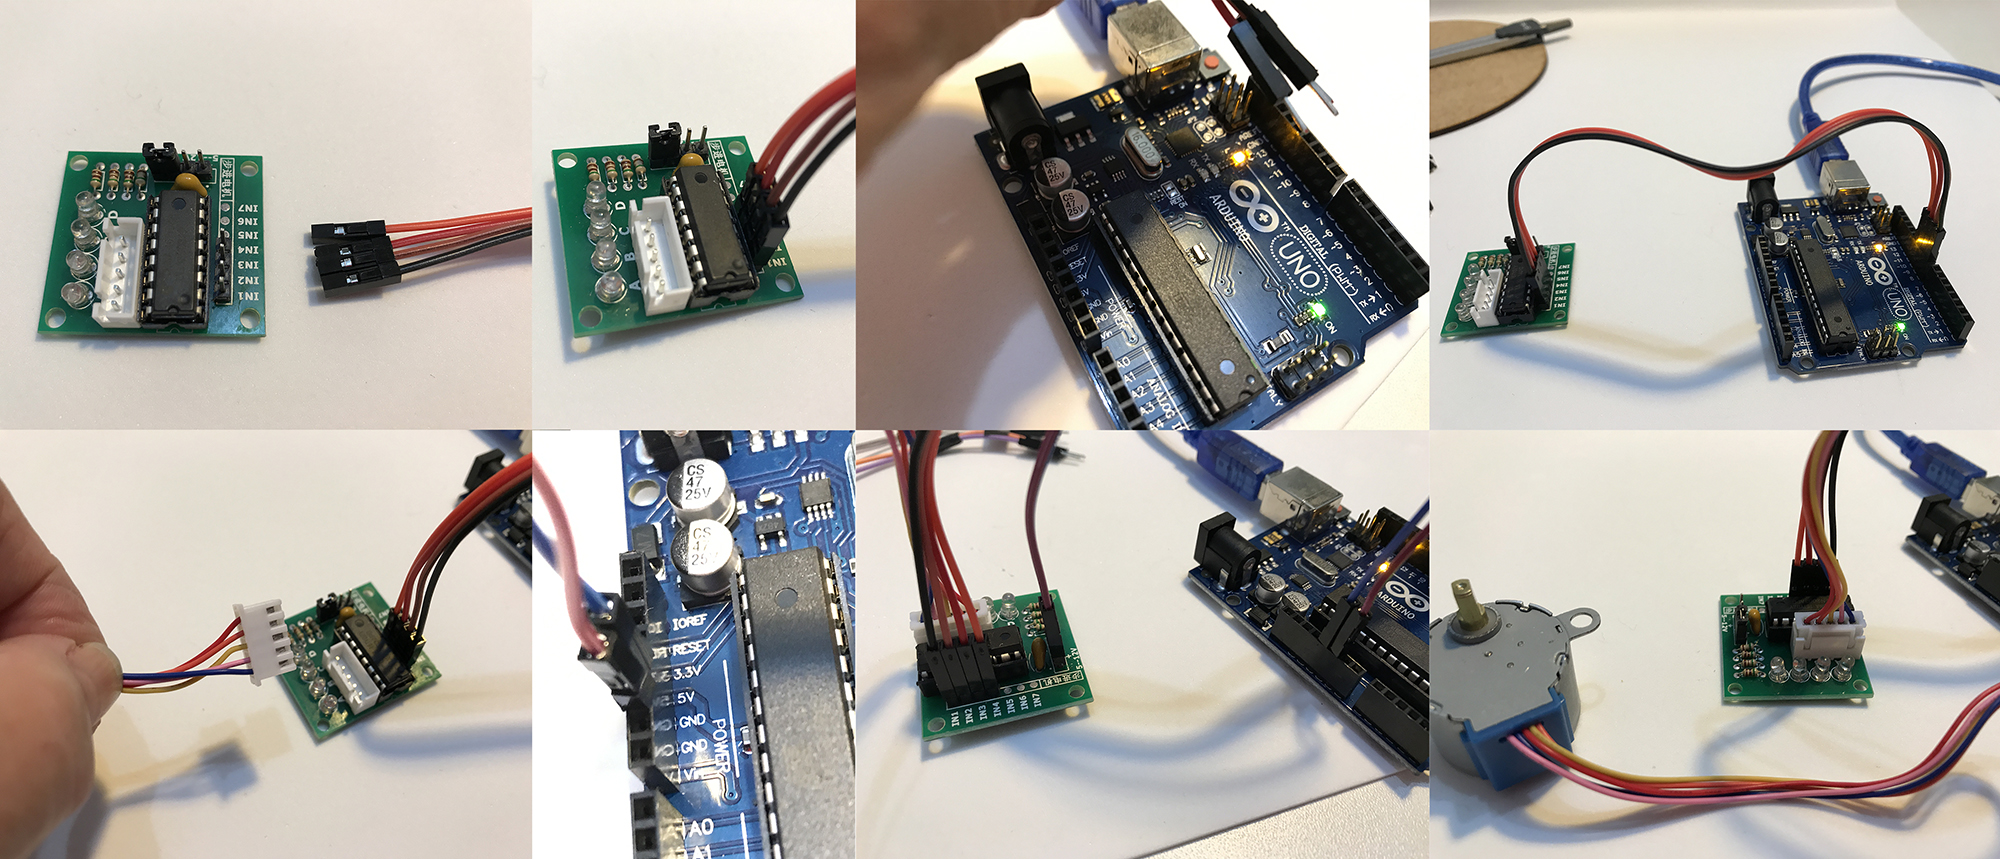
02. Installing Step Motor
a. First join four cables from the stepmotor drive board to ports in the Arduino UNO (I've chosen ports 8 to 11 )
b. Plug the cables from the setpmotor to its drive board
c. Join the cables from the drive board to 5V and Gnd in the Arduino Uno board
Ok the StepMotor is joined. To test if everything is ok, I uploaded to Arduino board the program to move the stepmotor to one direcccion to another, directly, and everything was ok.
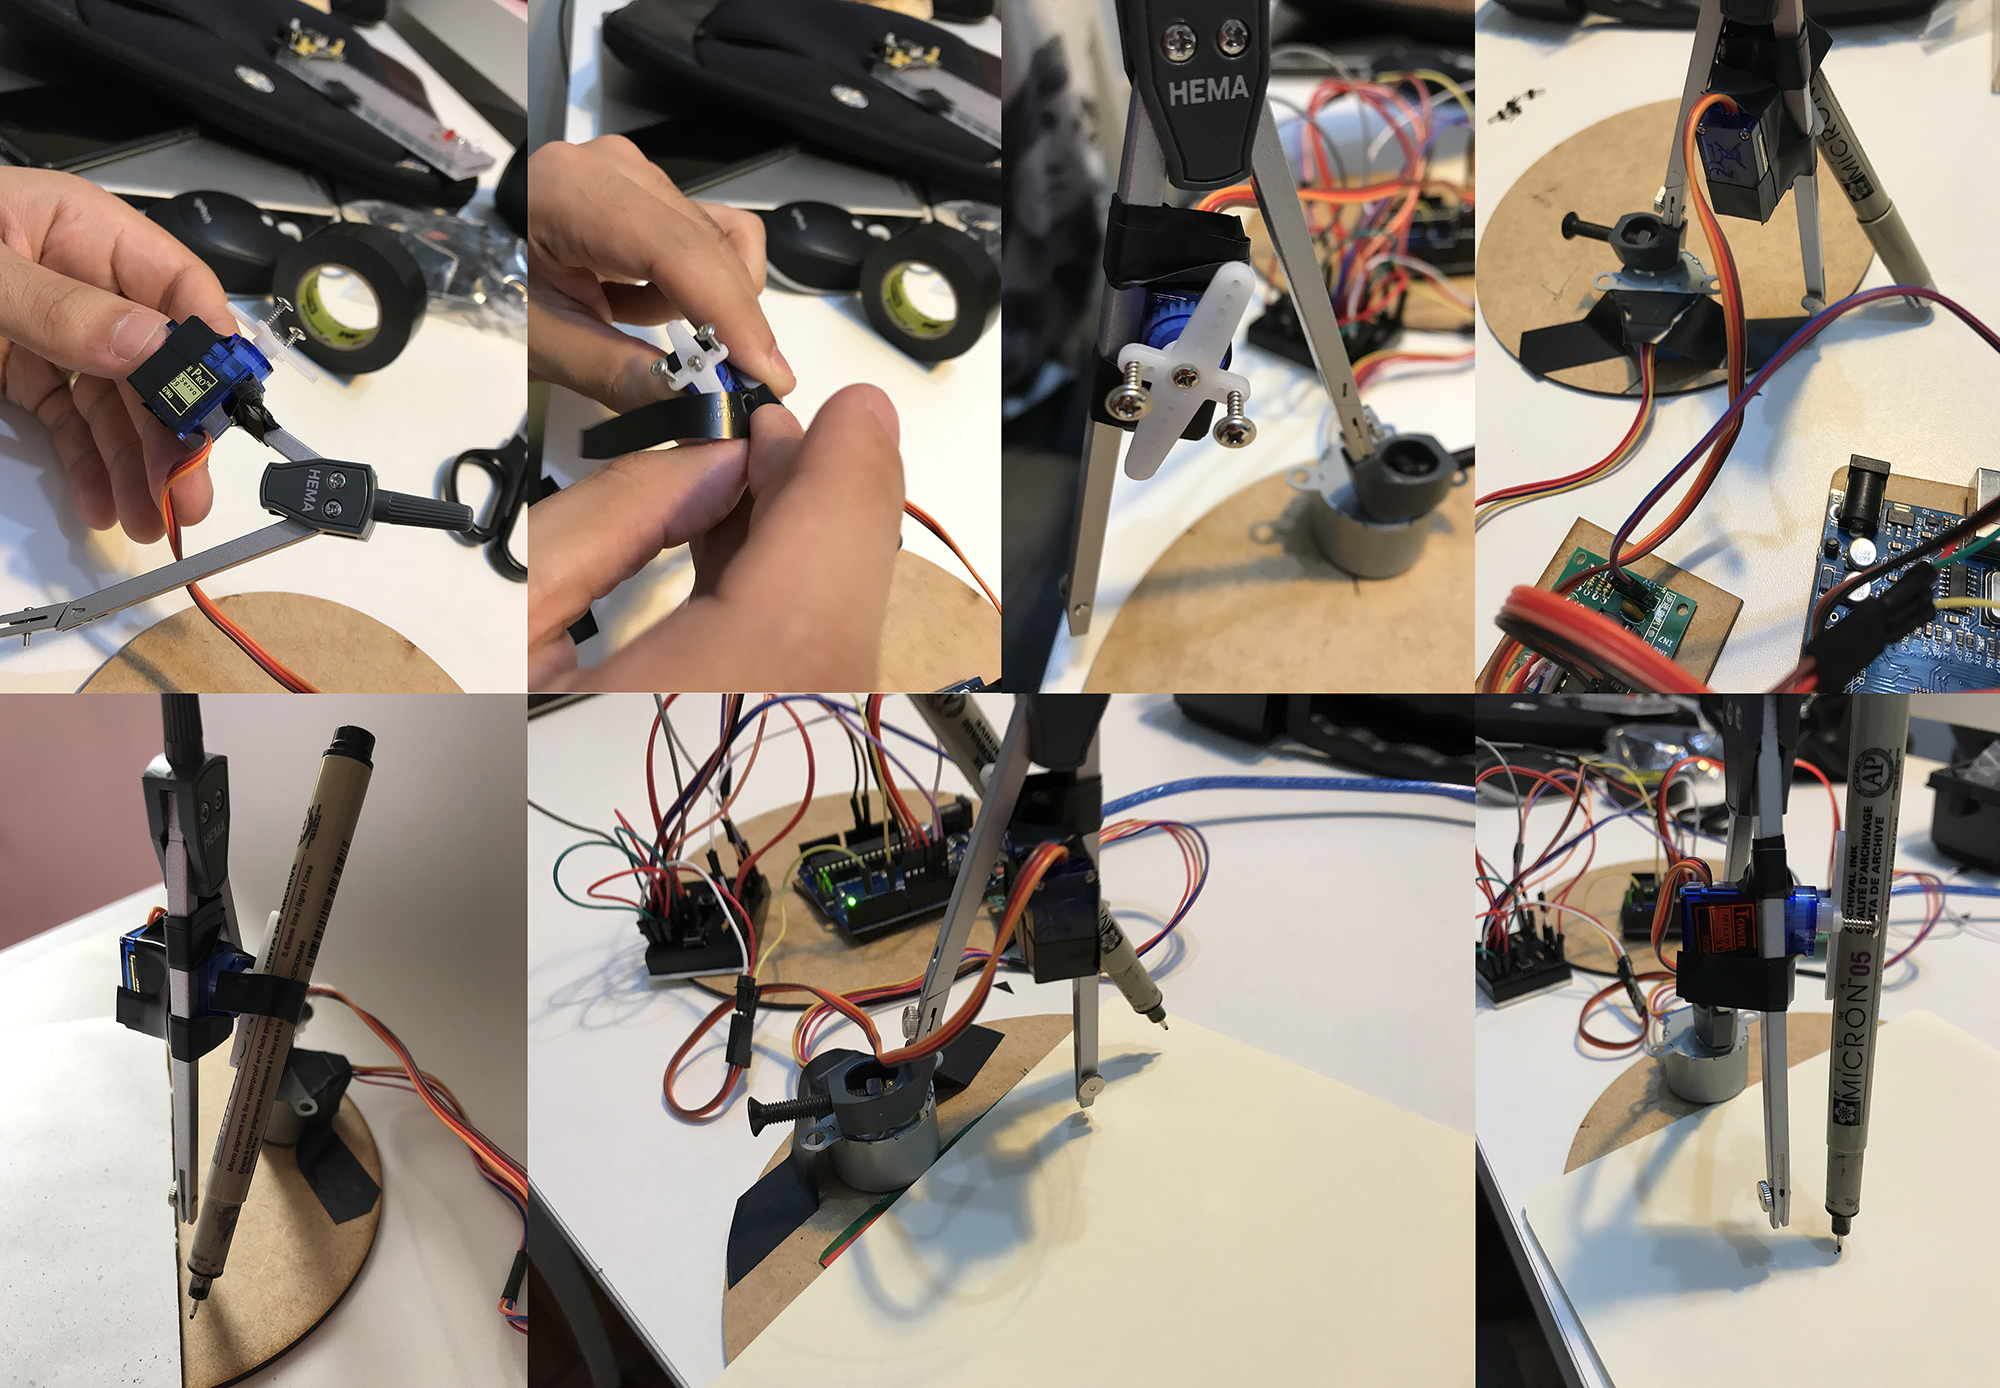
03. Installing Compass
a. First place the pencil adapter to the Compass.
b. After attach the compass to the stepmotor by the adapter, securing the adapter screw on the motor shaft.
c. Attach the pen to the other leg from the compass with tape.
d. Test drawing to one side to another in a sheet of paper.
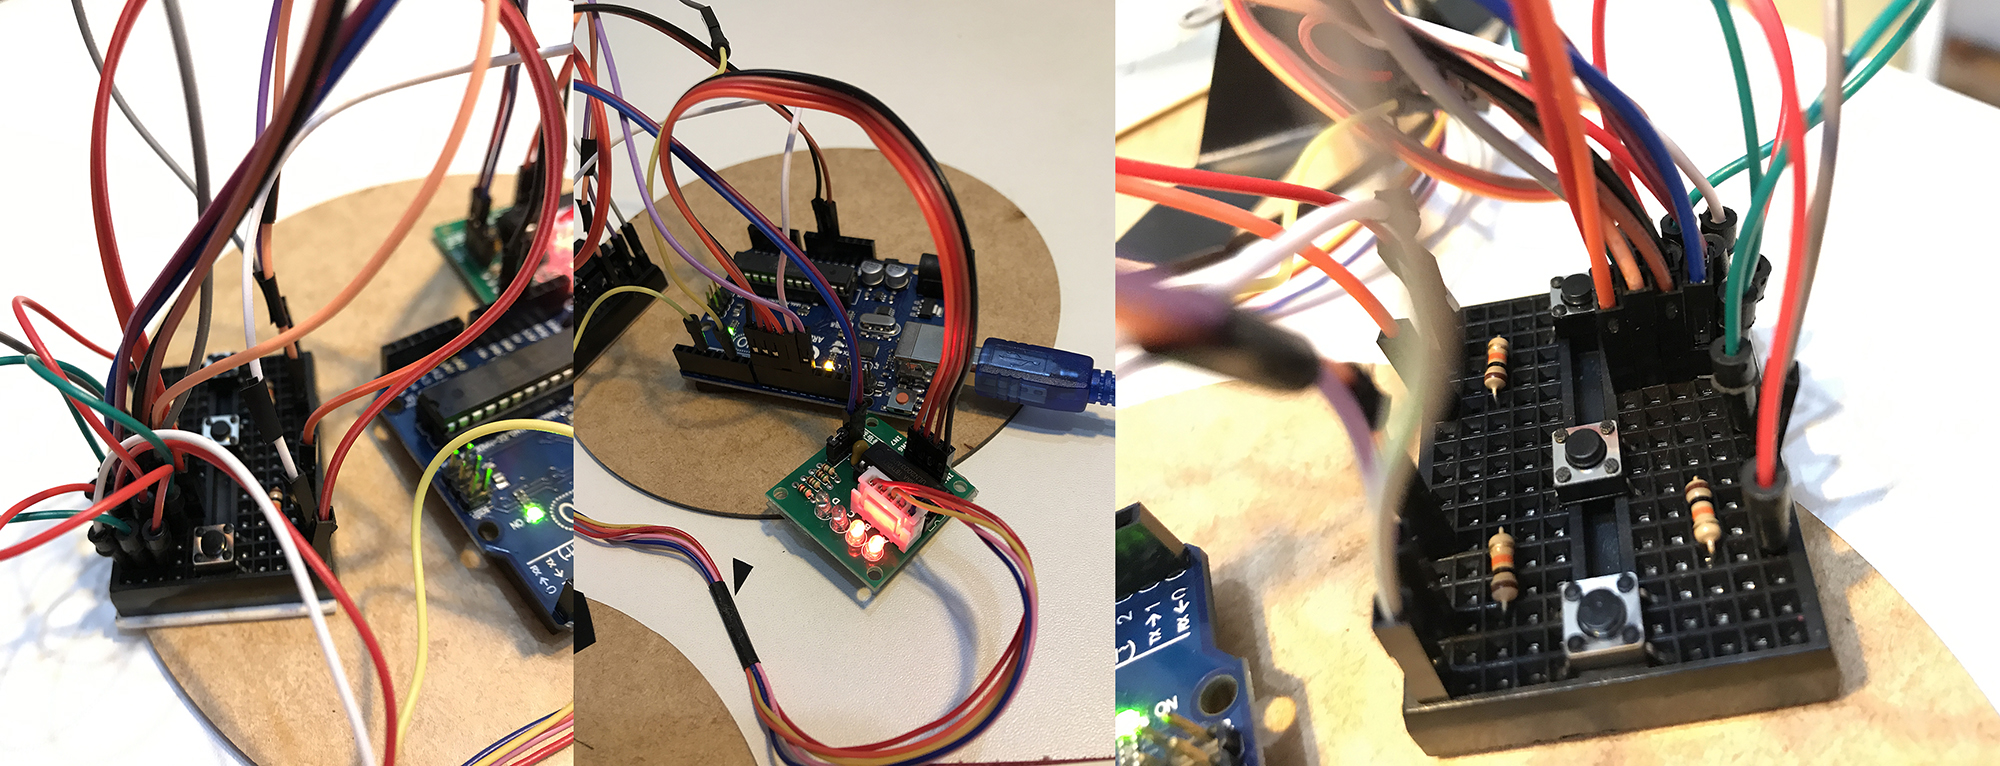
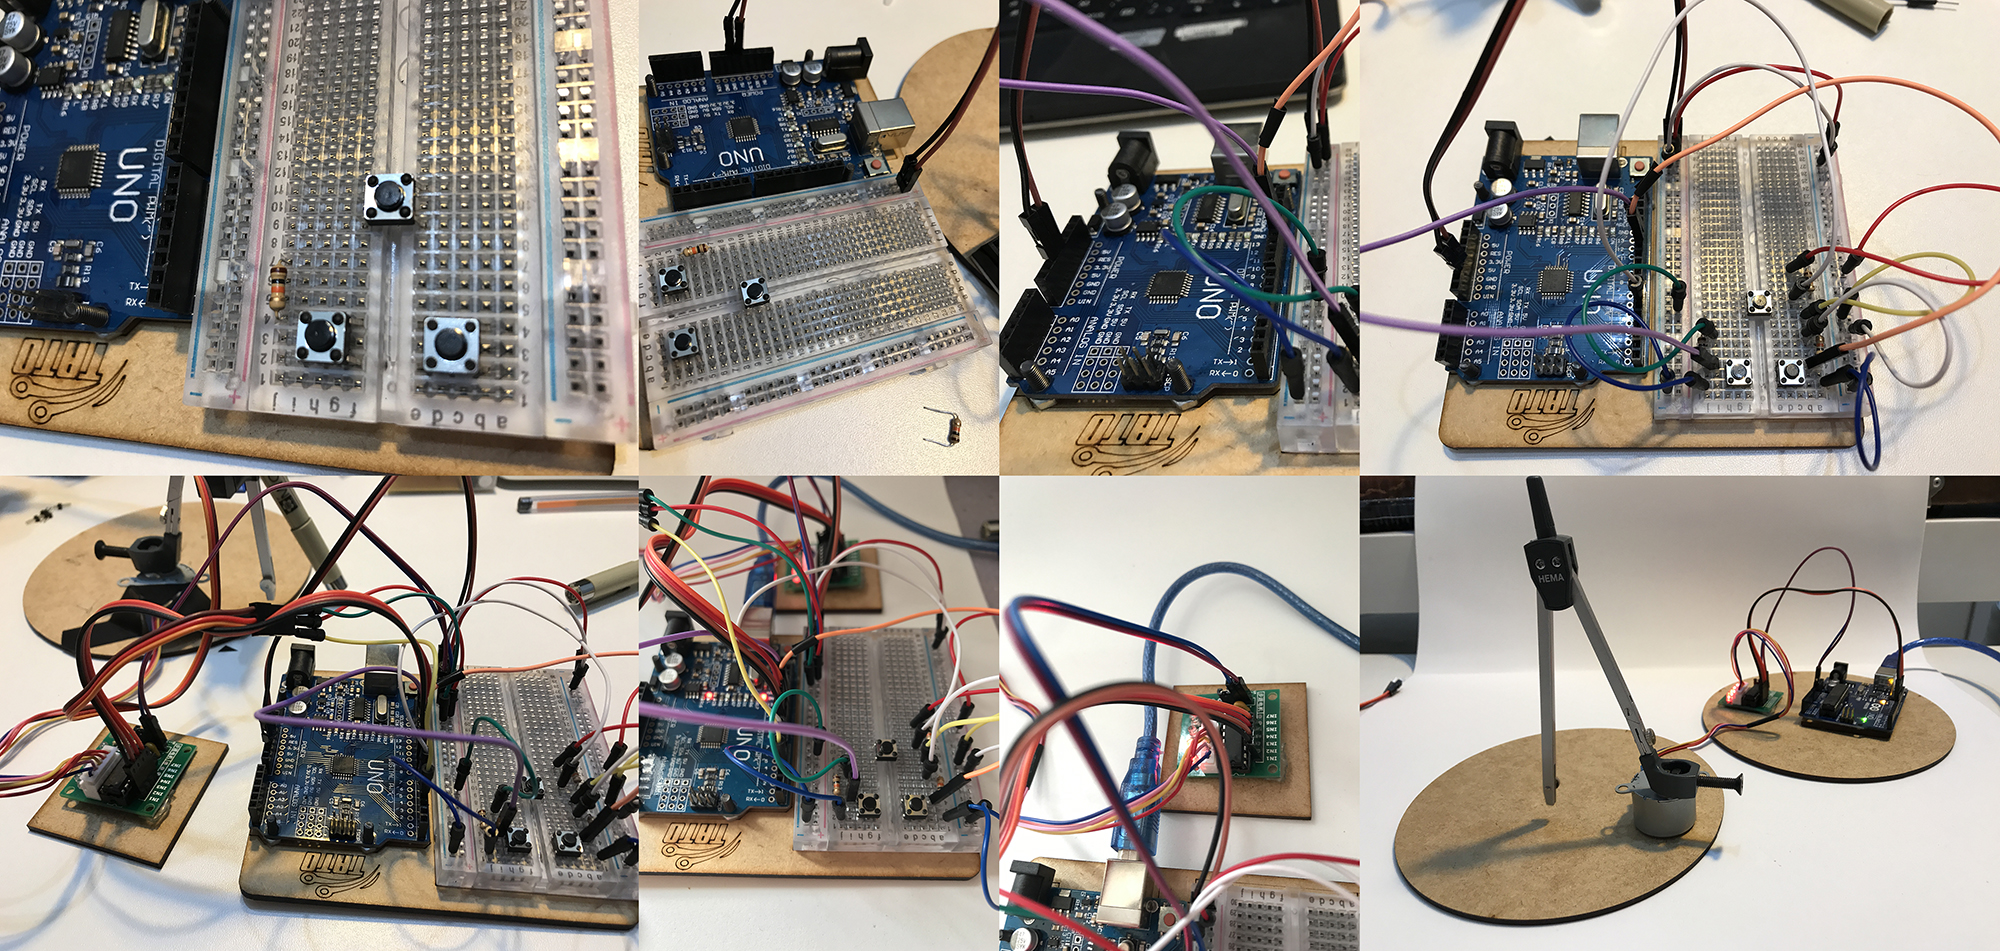
04. Installing Buttons
a. Install 3 buttons on the protoboard: one for to control each direccion movement from the stepmotor and the other to control the servo motor.
b. For each button install a resistance in the board .
c. Connect the 5V to the resistance, and it to the output port on arduino board.
d. The buttons has to be put in the one leg of the resistance and the other to GnD, so when the button is pressed the current doesn't go to the controlled element .
05. Installing Servo Motor
a. Attach, with strong tape, the servomotor to the compass's leg that is not attached to the stepmotor.
b. Put the propeller from the servomotor on it and attach two screws .
c. Glue with tape , the pen between the screws .
d. Adjust the height of the pen, so that it touches the paper when the engine turns.
06. Drawing with Joined Movements
a. Test drawing in a paper, the control from the buttons and the movement of the motors.
b. One button makes the stepmotor turns to CW direccion, while pressed.
c. The second makes the stepmotor turns to ACW direccion, while pressed.
d. The third button turns to 30 degrees the inclination of the pen when pressed (touching paper), and returns to 60 degres the inclination when pressed again, clearing the paper.
e. The draw occurs by the hand movement of the board containing the paper.
f. The movement of this board with the paper is a step to be developed later.
07. Remodeling the electronic structure
After everything was all right I decided to remodel the electronic structure in a bigger protoboard to clear the access to the buttons and controlling.
08. Programing the controls in Arduino
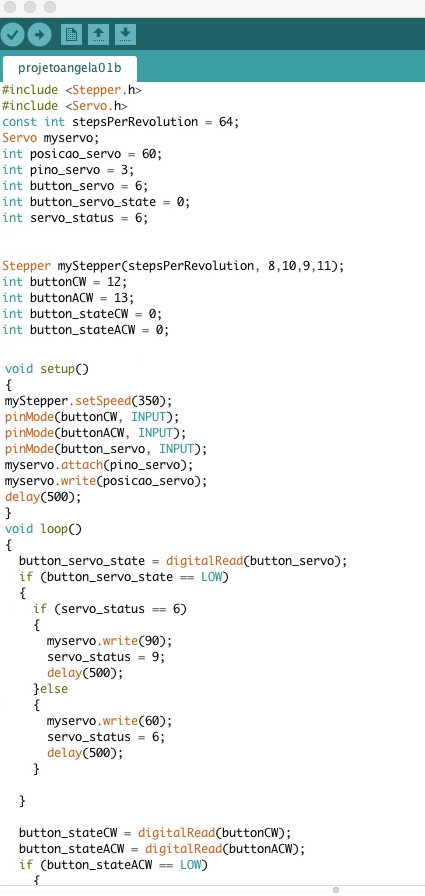
Here is the final program in Arduino, to install the two motors: step and servo motors with their libraries.
Install the buttons to:
1. control the movement direction of step motor : CW or ACW
2. control the anglo of the pen with the servo motors: perpendicular to the paper (read to draw), or 30 degrees up (standby).
With this configuration the control of the draw is made by hand with the buttons. I could after program in arduino the control to a automatic draw, and also use this machine to other purposes as controlling and moving a light system in my final project.

