Week 11. Soft Robotics
Global Instructor - Lily Chambers
Program Outline
This class will focus in the study of a specific field in robotics, the soft robotics. Unlike rigid robots we are mostly used to, soft bodied robots have similarities and performance characteristics similar to living organisms or the human body. Soft-robotics are based in Bio-inspired design or biomimicry and have applications in wearables, rehabilitation prosthetics, surgical robots, rescuing and others. We will focus on the fabrication of soft actuators, sensors and grippers using novel materials, artificial muscles and performative locomotion design.
References
Biomimicry
Locomotion
Pneumatics
Flexures
Molding and casting
Assignment:
Level BASIC: Pneumatic wrist brace
Level Intermediate: Soft Gripper
Level Advanced : Pneumatic, digitally controlled system
Hands On
Constructing a Soft Gripper
I consider myself as a basic level in Soft Robotics, but I was tempt to make the Soft Gripper, but in a way to explore more the possibilities of the silicone, than 3D printing, because I've thought on those people that perhaps will not have the 3D printer close to them, so I search for a gripper project without 3D printing, and I've found this one that I replicated.
https://www.youtube.com/watch?v=uPx8xwRpfFk
https://www.instructables.com/id/Soft-Robotic-Grabber-No-3D-Printer-Required/
01. Materials
For the Mold:
Cardboard (about two square feet)
Box Cutter
Cutting Board
Hot Glue Gun
Scotch Tape
Gloves (latex free)
Robot:
Smooth On Ecoflex 00-30
Scissors
Printer paper
Nail
Soda/water bottle with lid (at least one liter)
1/8 in OD pneumatic tubing
Curling ribbon
02. Constructing the Mold
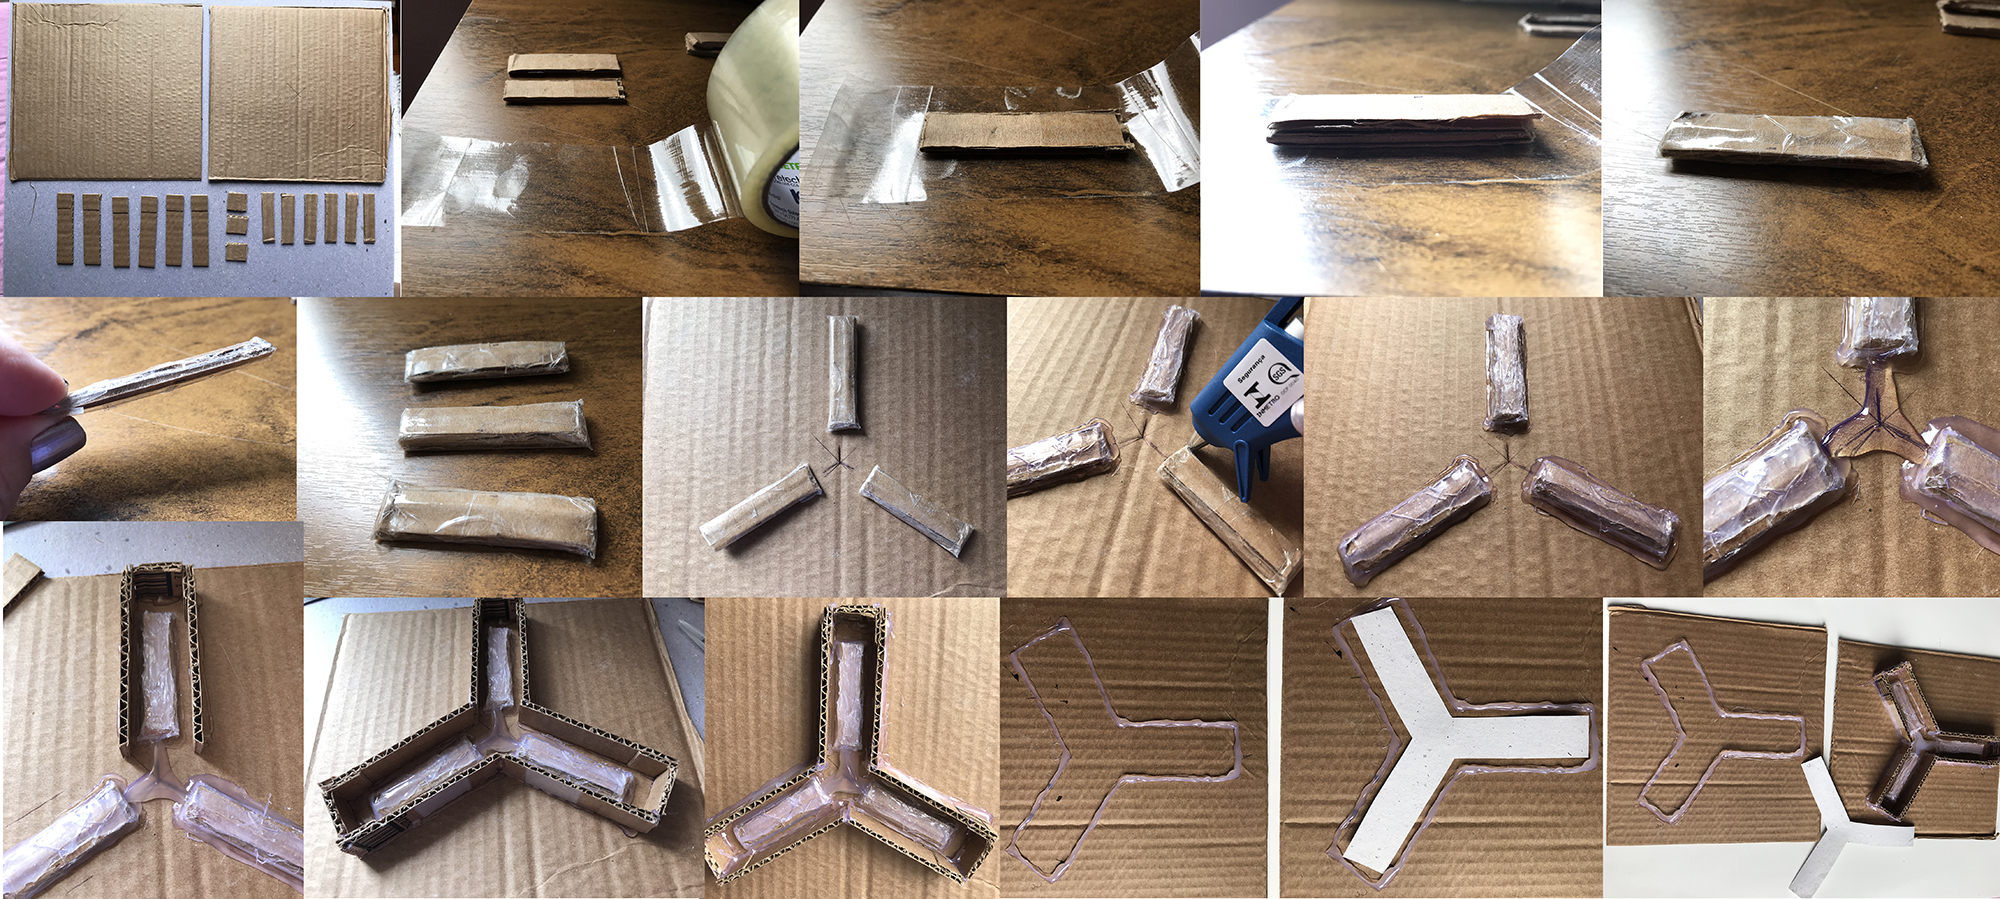
a. Cut the cardboard
6 pieces 6,3 x 1,3 cm
6 pieces 8,9 x 1,9 cm
3 pieces 2,5 x 1,9 cm
2 pieces 23 x 23 cm
b. Mounting the mold
Wrap the each two pieces from 6,3 x 1,3 cm together with the tape.
In one of the 23×23 cm cardboard draw the center and 3 legs separated between 60 degrees from each other.
Put them in the right position as in the image, forming the 3 legs separated by a 60 degres from each other, and distance of 2 cm from the center of the figure.
Glue everything in the position with the Hot Glue Pistol.
Make the conection from one leg to another with HotGlue, so it will be the link between the three air spaces when ready.
Put the 8,9 x 1,9 cm pieces like the walls from the mold, and close the end of each part with the 2,5 x 1,9 cm pieces, everything glued with HotGlue.
In the other 23x23cm board draw the contour of the mold constructed, and make a small wall in this draw with the HotGlue.
Cut a piece of print paper with the draw and dimensions of the interior of the Mold.
03. Filling the mold
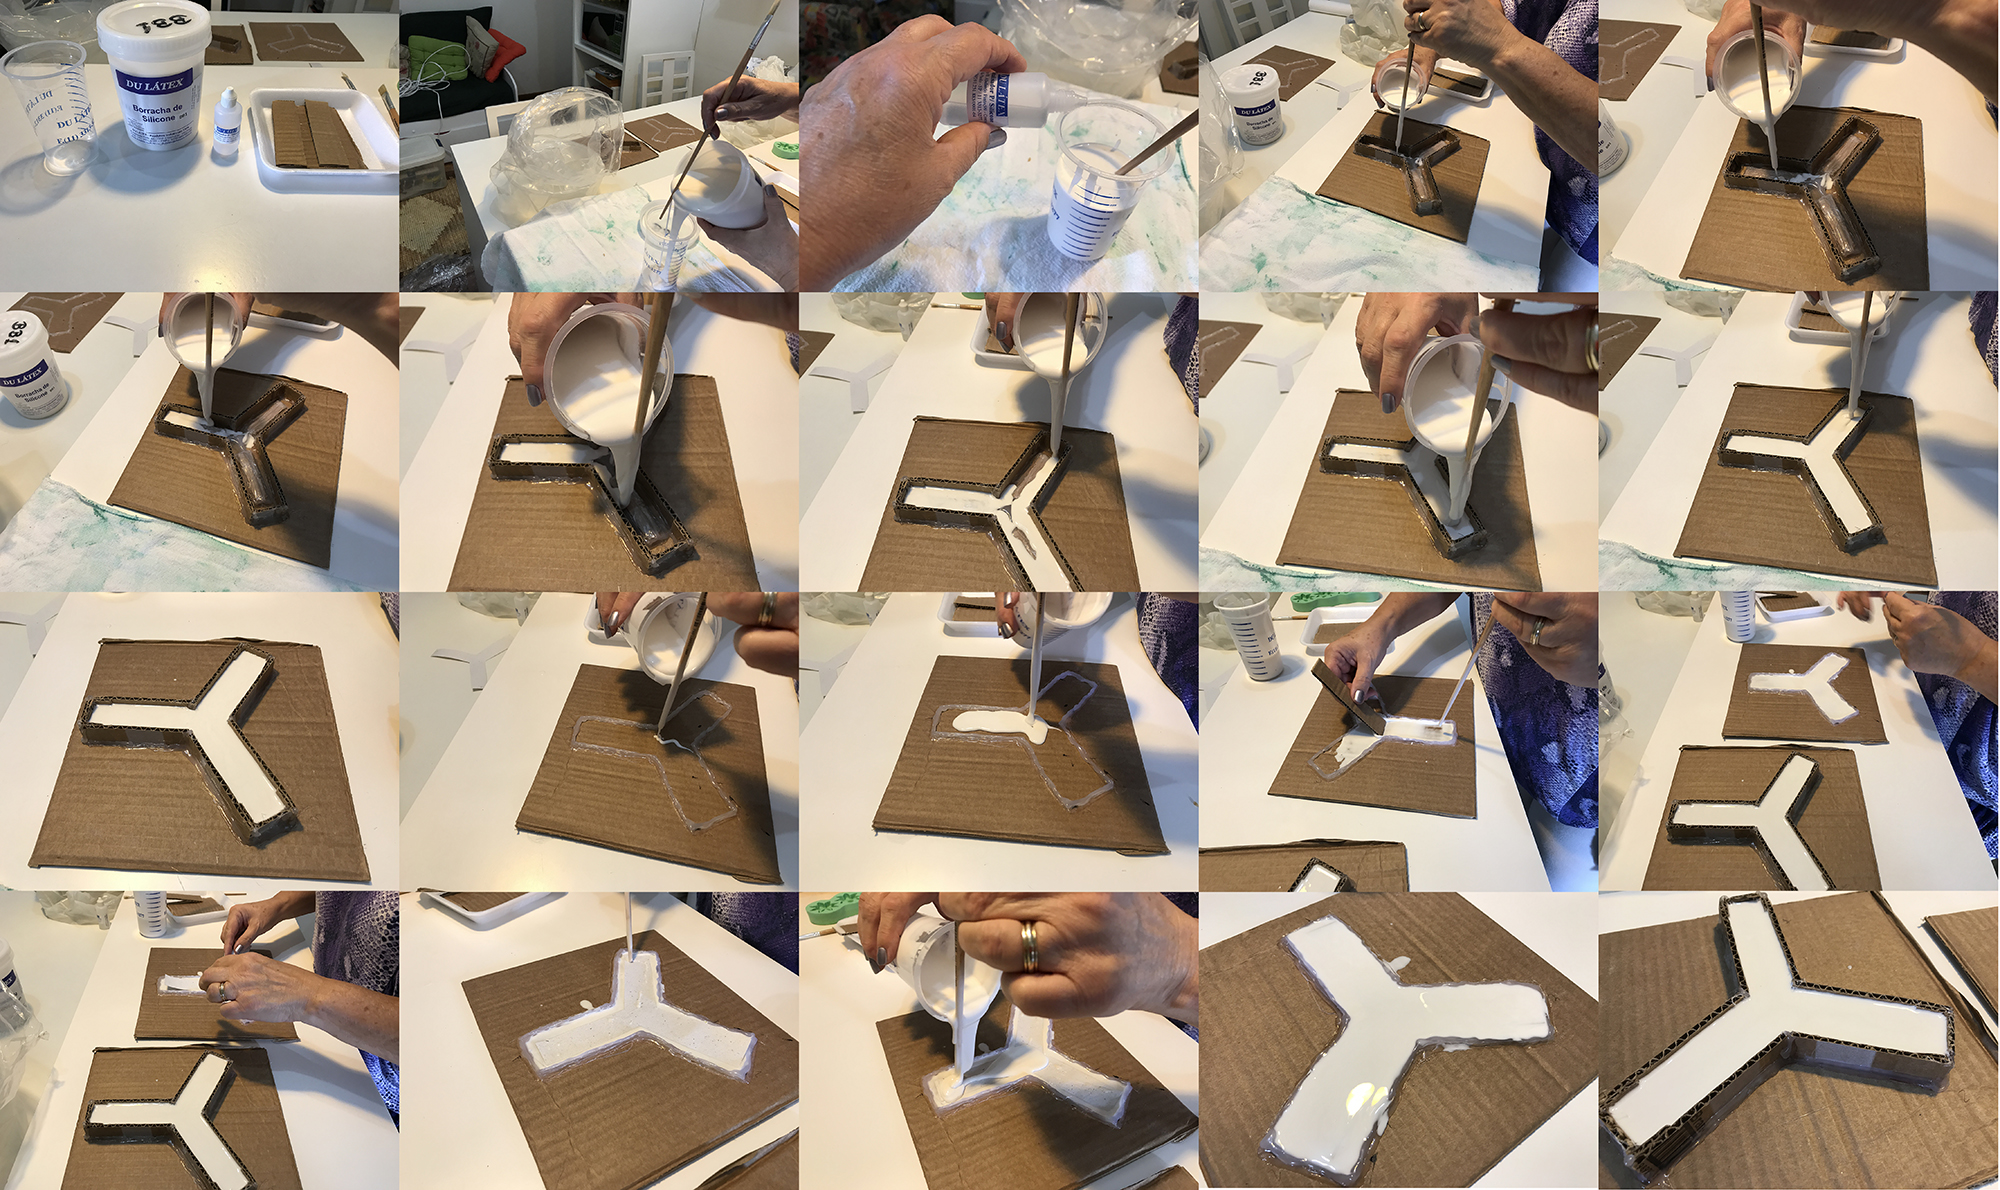
Prepare the Silicone Rubber, mixing the catalizer With the silicone rubber solution in the proportion indicate for the manufacturer.
Stir gently with a stick so as not to bubles.
Pour the solution into the mold until you have a thickness for about 3mm above the air chamber.
In the mold B (for the basis) pour a thin layer very well distributed , than put the paper cut in the correct format, and another layer above.
Wait four hours to solidify or polymerize
04. Unmold and Joining the two pieces
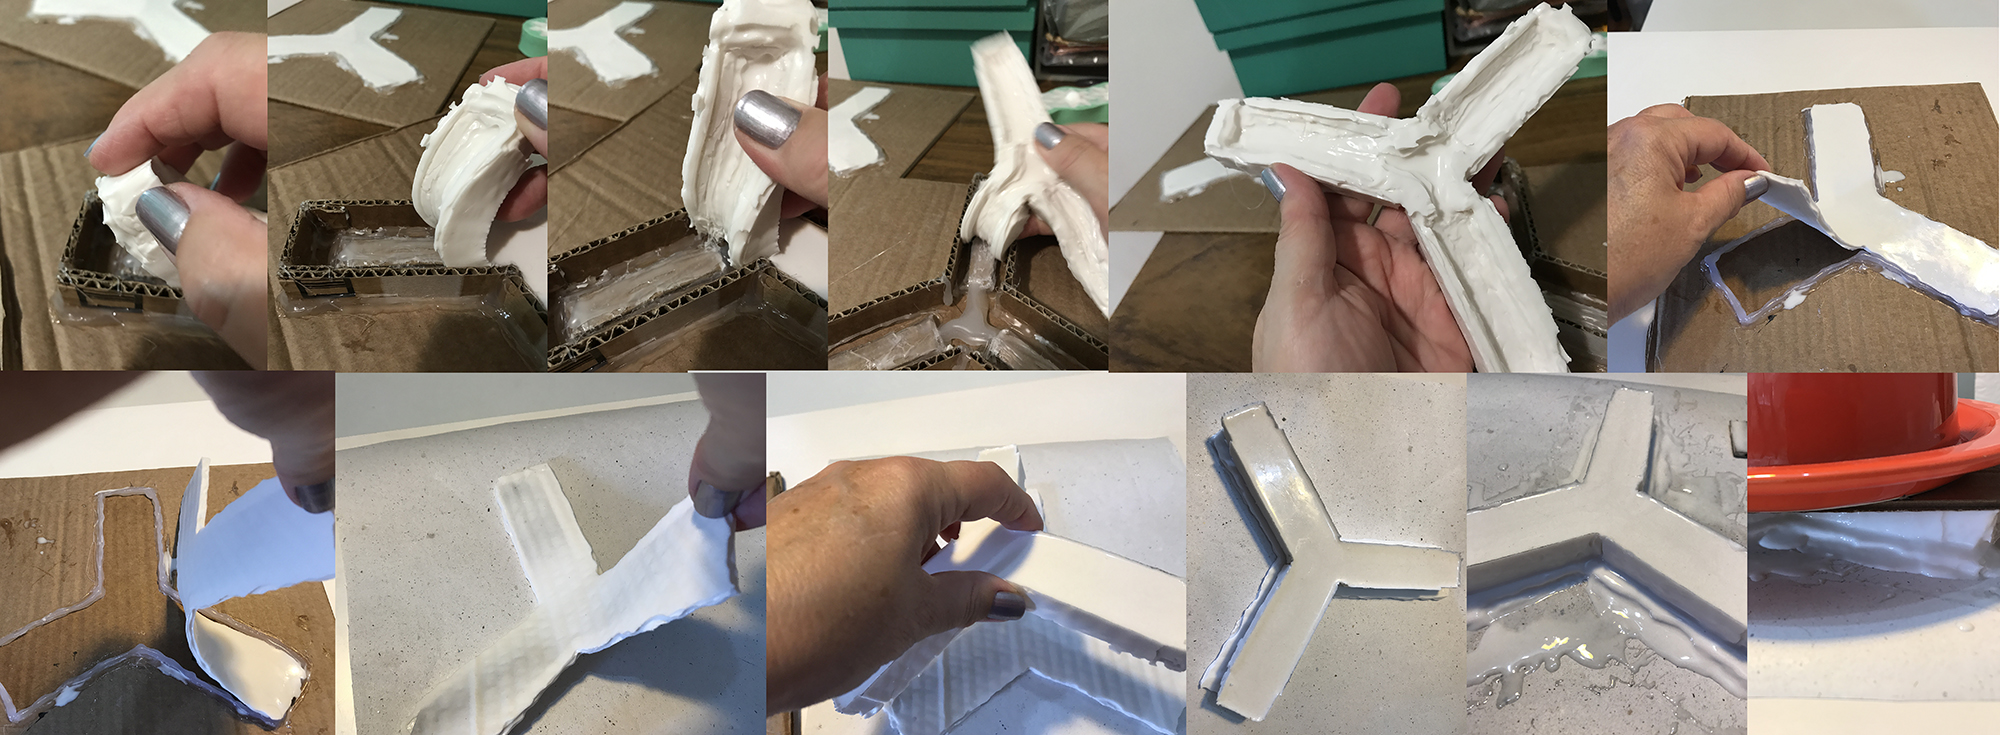
After 4 hours, verify if the silicone is already polimerized, dried and like a rubber.
Remove the pieces gently from the Mold and put the basis over another cardboard and the piece A over it.
Join the two pieces with another fresh bath of Silicone Solution prepared with the catalyzer.
Be sure that every space between the two pieces is very well connected and take care to fix any imperfections.
Let it dry and polymerize for at least 4 hours.
05. Installing the air system and Testing
After everything is completlly dried, repair the edges, and cut the burrs, so the piece is as uniform us much as possible.
Take a Plastic Botlle, of at least one liter and drill a hole with a nail in the cap, so you can insert the tube on it, seal with Hot Glue.
In one side of the Gripper, between two legs insert the bulb gently until it reaches the air chamber, seal it with the silicone rubber.
Wait everything dry and test pressing the bottle that will blow the gripper.
06. Problems
I have some problems, that were:
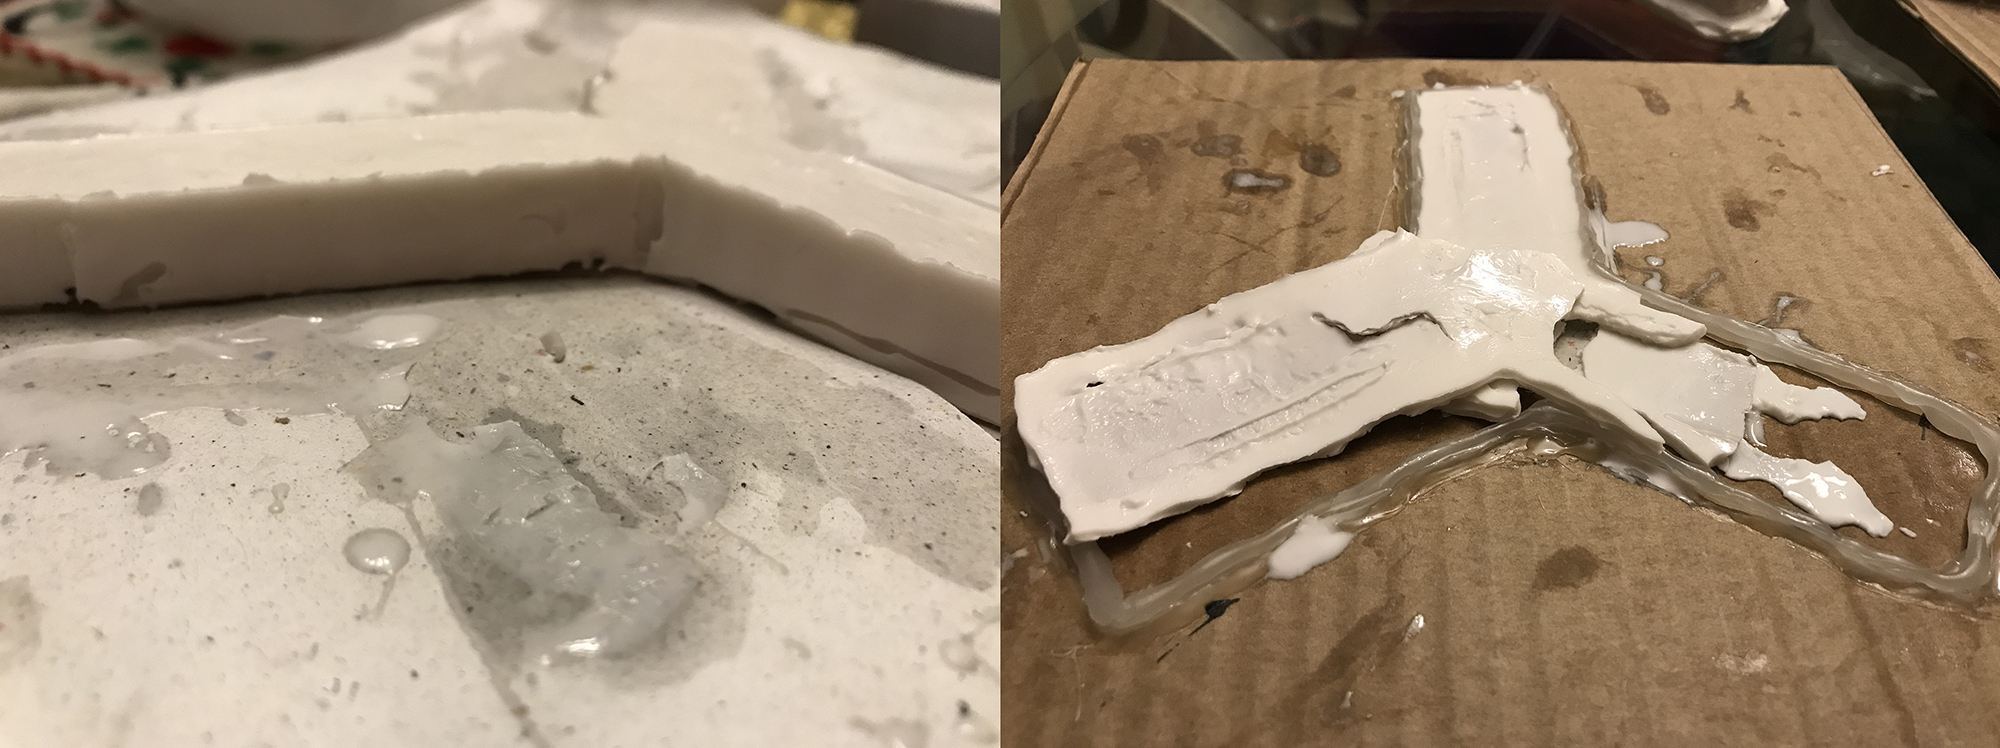
1. The silicone I've found here in Brazil is not very elastic, so when I inflate the gripper to test and after I should still wrap each leg with the ribbon to more resistance and control of the movement, but as I said the silicone rubber produced, was too hard.
2. I've made a layer too thick above the air chamber, so it almost doesn't move with the air pressure.
Pressing the air inside the botlle I can see some movement but not enough to move the gripper's legs.
3. Than I've tried making another piece with less thickness above the air chamber and with less catalyzer to see if the silicone rubber would be more flexible, but at the end it doesn't polymerize very well and I couldn`t unmold perfectly the basis.
So I'm trying to obtain another kind of silicone to make everything again.
07. Trying Again
I made everything again, this time trying to make the gripper thinner.
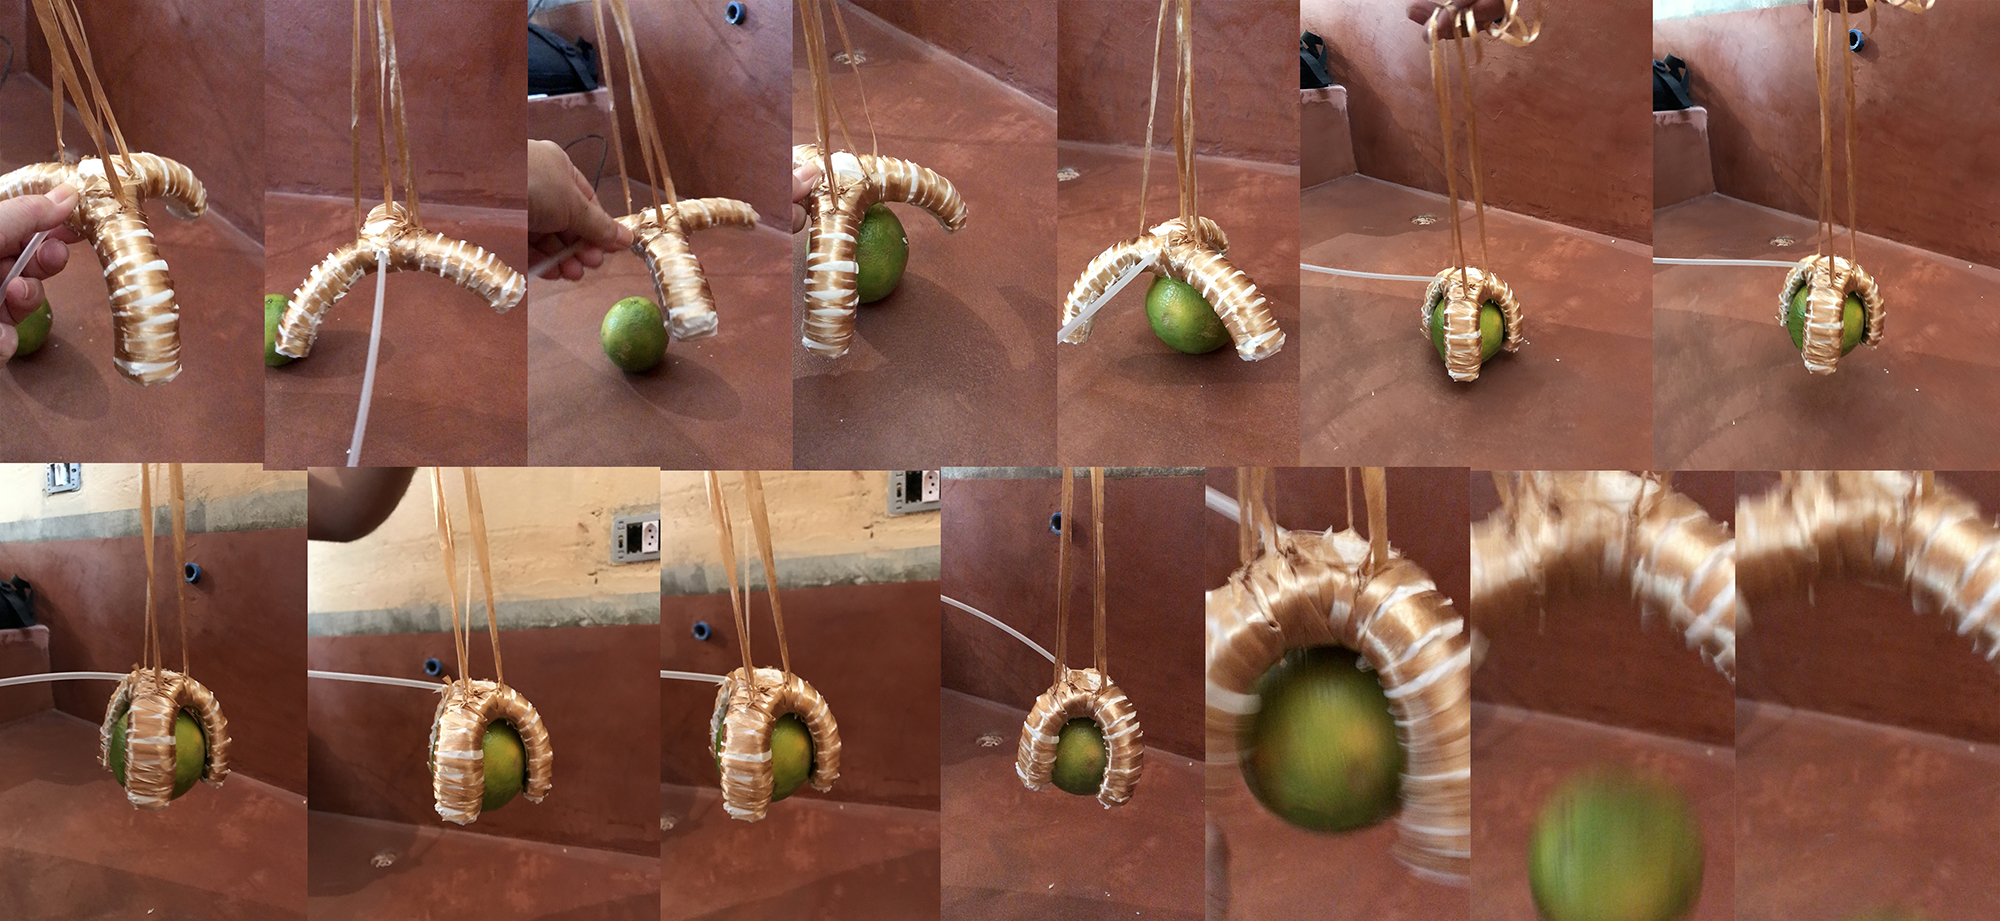
01. After constructing another gripper, I saw tht it was slightly curving with the pressure of the botle with air.
02. So I covered with the curling ribbon as indicated in the tutorial.
03. At this time I've seen that at the entrance of the poliestireno tube to the gruipper, it was a air leakage, so I have to unwrap the Gripper to fix this problem, with more fresh prepared silicone rubber.
04. Now it seemed to be ok, so I let it dry very well, and tryed to push with the air botle bomb, but the curve produced was not enough to make the Gripper woks.
05. So I decided to push the air with the compressor, but I was afraid that the structure was not strong enough.
06. It seems to be ok, after some attempts finally I could pick up and raise the orange.
07. But after only a few seconds, the pressure broke the silicone, and the orange dropped down.
Well, I'm happy that I could achieve the challenge, and pick the orange up, but rhis material really isn't the best to make this experiment. The entrance of the poliestireno tube was too fragile ! And the adhesion of the tubo to the silicone ws not the best. I really use exactly the same tube they use in the tutorial, but I think it would be better if I had used silicone tube.
08. Also , next time I will insert the tube when doing the silicone, because the imperfections around the tube hole, was what caused the almost explosion of the Gripper, opening a big hole like a knife cut.
But it was incredible useful doing all these attempts, because I could expience very much the silicone, the air pressure, and many details involved in the whole process.
