Class 12 : SKIN ELECTRONICS
Mask and Beating heart with Lilypad and a MAX7219 8x8 LED matrix
Assignment Project Description
- Use one of the project’s option (carnival masks or tech nails).
- Personalize it with your project: change/add electronics (LEDs, acceremoter, etc).
- Improve the design: change the colors, add some crystals or other 3D
- elements.
- Presentation: explain your motivation and how you personalized your project.
Mold face with plaster
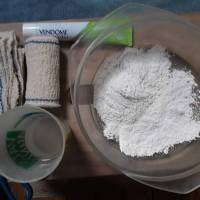
Protect your work surface with a plastic film or a piece of oilcloth. With scissors, cut pieces of strips from 20 to 30 centimeters, these short lengths are easier to handle. Fill a container, such as a basin, with warm water and add the plaster. Dip a strip a few seconds, cover the face (it's easier if there are two of you) then run your finger over it to spread the plaster. Continue by laying a second strip that you will overlap slightly on the previous one.
once the face is completely covered, a new layer is often necessary for more solidity, change the direction of the installation and avoid making the connections in the same places.
Wait for the assembly to dry before unmoulding.
Decoration mask
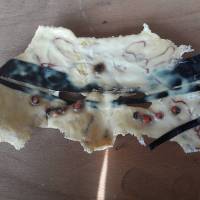
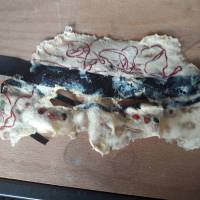
latex is applied with a brush inside the mold in several layers. Beads and ribbons are added before. and layer of latex is added so that the accessories dry inside.
Observations
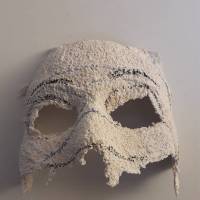
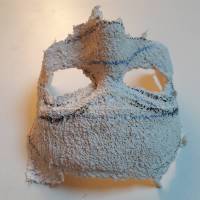
the result is not what I expected, the appearance of the latex has turned yellow and the dried accessories look like a scary mask. the plaster mold was not strong enough and it softened with latex, it would have been necessary to add many more strips to have a greater thickness. the latex is badly spread and difficult to unmould, it has dried with the fibres of the medical bands. I dare not even put it on my face… it would be necessary to have 2 face molds in PLA or foam (3d or CNC printer) between which latex or silicone would be poured.
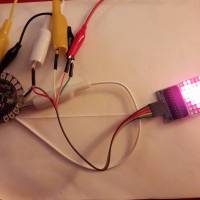
Beating heart with Lilypad and a MAX7219 8x8 LED matrix
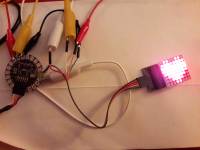
I don't have the necessary hardware for the assignment but I bought an ELEGOO Starter Kit Arduino UNO R3 including an 8×8 LED.
I connect the 5 wires of the matrix at + and - of the lilypad, the 3 other wires are connected to pins 10, 11, 12.
I downloaded and unzipped the LEDControl.h. into the Libraries folder of Arduino IDE installation. The code is annotated to make it easy to understand. Here is the link to download it: https://github.com/wayoda/LedControl
https://www.minitronica.com/matrices-led-8x8-arduino-max7219/

#include "LedControl.h"

//We declare the pins: DIN, CLK, CS and the number of displays connected in series.
LedControl lc=LedControl(12,10,11,1);

//Pause between frames
unsigned long delayTime=900;

//Code of the 2 frames that we are going to show:
//little heart
byte Heart1[] = {
B00000000,
B01100110,
B11111111,
B11111111,
B01111110,
B00111100,
B00011000,
B00000000};
big heart
//big heart
byte Heart2[] = {
B01100110,
B11111111,
B11111111,
B11111111,
B11111111,
B01111110,
B00111100,
B00011000};
Sub to transform array #1 into a pattern for the array
void Heart1GO()
{
  for (int i = 0; i < 8; i++)
  {
    lc.setRow(0,i,Heart1[i]);
    lc.setRow(1,i,Heart2[i]);
  }
}
Sub to transform array #2 into a pattern for the array
void Heart2GO()
{
  for (int i = 0; i < 8; i++)
  {
    lc.setRow(0,i,Heart2[i]);
    lc.setRow(1,i,Heart1[i]);
  }
}
This sub will only be run once when the Arduino is started.
void setup() {
lc.shutdown(0,false);    //We started the LED matrix #1
lc.shutdown(1,false);  //We started the LED matrix #2
lc.setIntensity(0,5);    //Intensity of the LEDs in the matrix #1
lc.setIntensity(1,5);  //Intensity of the leds in the matrix #2
lc.clearDisplay(0);      //We turn off all the LEDs in matrix #1
lc.clearDisplay(1);    //We turn off all the LEDs in matrix #2
}
This sub will loop over and over again while the Arduino is powered.
void loop() {
Heart1GO();         //We show the pattern #1
delay(delayTime);   //little pause
Heart2GO();         //We show the pattern #1
delay(delayTime);   //little pause
}
As we have seen in the previous examples, each digit or character is composed of a binary code that defines the status of each LED in the array. To generate these codes quickly and easily, you can use a small Windows application based on an online tool: https://www.riyas.org/2013/12/online-led-matrix-font-generator-with.html
