Week 05. E-textiles and Wearables
Program outline
Introduction
why soft, why embedding conductive materials threads fabrics inks hard soft connections Machine-sewable Hard/Soft Connections crimp beads Perfboard/Conductive thread Metal machine popper/Conductive fabric Hand sewable metal popper/Conductive thread Wire/Conductive fabric (soldering) Wire/Conductive thread (soldering) actuators shape memory alloy fabric speakers flip dot & flapping wing soft sensors pressure sensor joystick stroke accelerometer switches stretch sensors potentiometers Materials
Machines/tools
soldering station solder tin embroidery sewing machine hand stitching
Assignment
The students will have to produce one soft sensor experimenting with the materials available at the lab. Trying to reproduce the same sensor with different materials/techniques (hard/hard hard/soft soft/soft).
Hands On
Interactive Cap
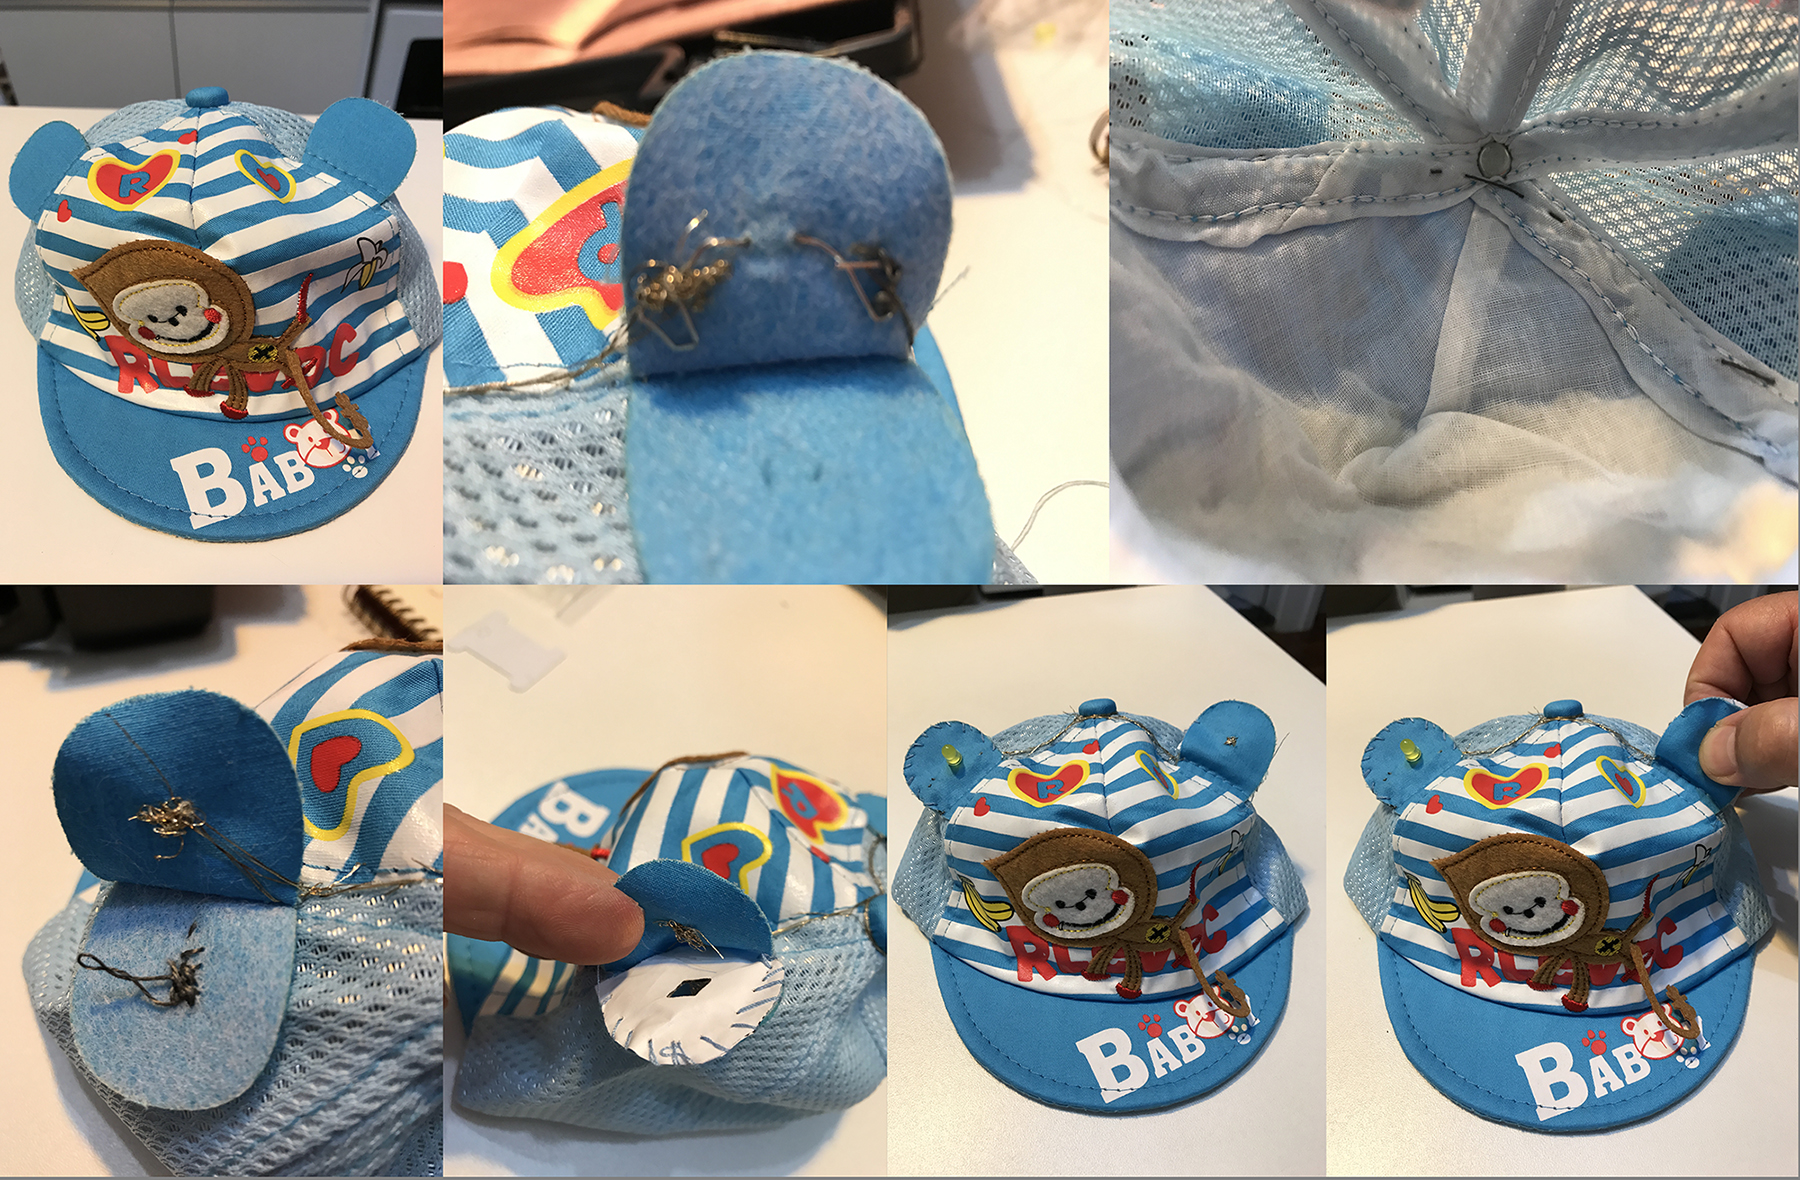
This class was extremely exciting and as it was in the same week my first grandson has born I decided to make an interactive cap to him. For that I firstly developed a pressor sensor to instal in one of the ears of the cap so we can turn on the LED light on the other ear with the pressure of the first one.
01. First of all I installed the blinker LED in one ear, by turning its legs and stitching them one by one with conductive thread, that was the unique material I could find immediately in Brazil. The other conductive materials I had to buy from the USA and it took a long time to arrive. 02. The negative Leg I stitched to the ear and crossed the cap by outside until reaching the other ear, where I constructed the pressure sensor to turn on the battery. 03. The positive Leg I stitched to the ear and crossed the cap by inside until reaching the other ear, where I constructed the pressure sensor to turn on the battery. 04. I open the second ear and I stitched a pocket to hold the battery. 05. Inside this pocket I've embroidered a little ness with the conductive thread, which is the contact point with the negative side of the battery. 06. I've done the same with the conductive thread that came from outside, or from the negative Leg from the LED light. 07. In the cover of the pocket, I've done a hole, from where the line ball could reach the negative side from the battery, when pressured the both parts from the ear. 08 So in this way by pressuring the ear the LED light on the other ear begin blinking.
Well it is a very simple project but I love doing that, because, electronic always was a monster to me , and now I can enjoy so much this matter with this new approach of being able to do almost anything, in a simple way. It was also a challenge to fin conductive materials to work on it because there was noone here disponable, so I've bought a multimeter and began reading all threads that I have in the Ateliê and find a very old and special one, a gold line that where used for my grandmother to embroidering special clothes, it is a very good conductive thread. I could after also find to buy here the grey conductive thread.
Well I enjoyed so much.. but I can't say the same for the little Benjamin, that couldn't understand very much yet, and preferred to sleep ! ![]()
![]()
But I'm sure he will be happy when he grows up and see this Grandma documentation and his inspiration to my project !
Materials
Materials just arrived from USA ! A friend of mine bring it to me, so it arrived quickly ! Otherwise it would take for about a month or more.
Now I 'll work in the assignment !
Handmade Paper with conductive thread inside
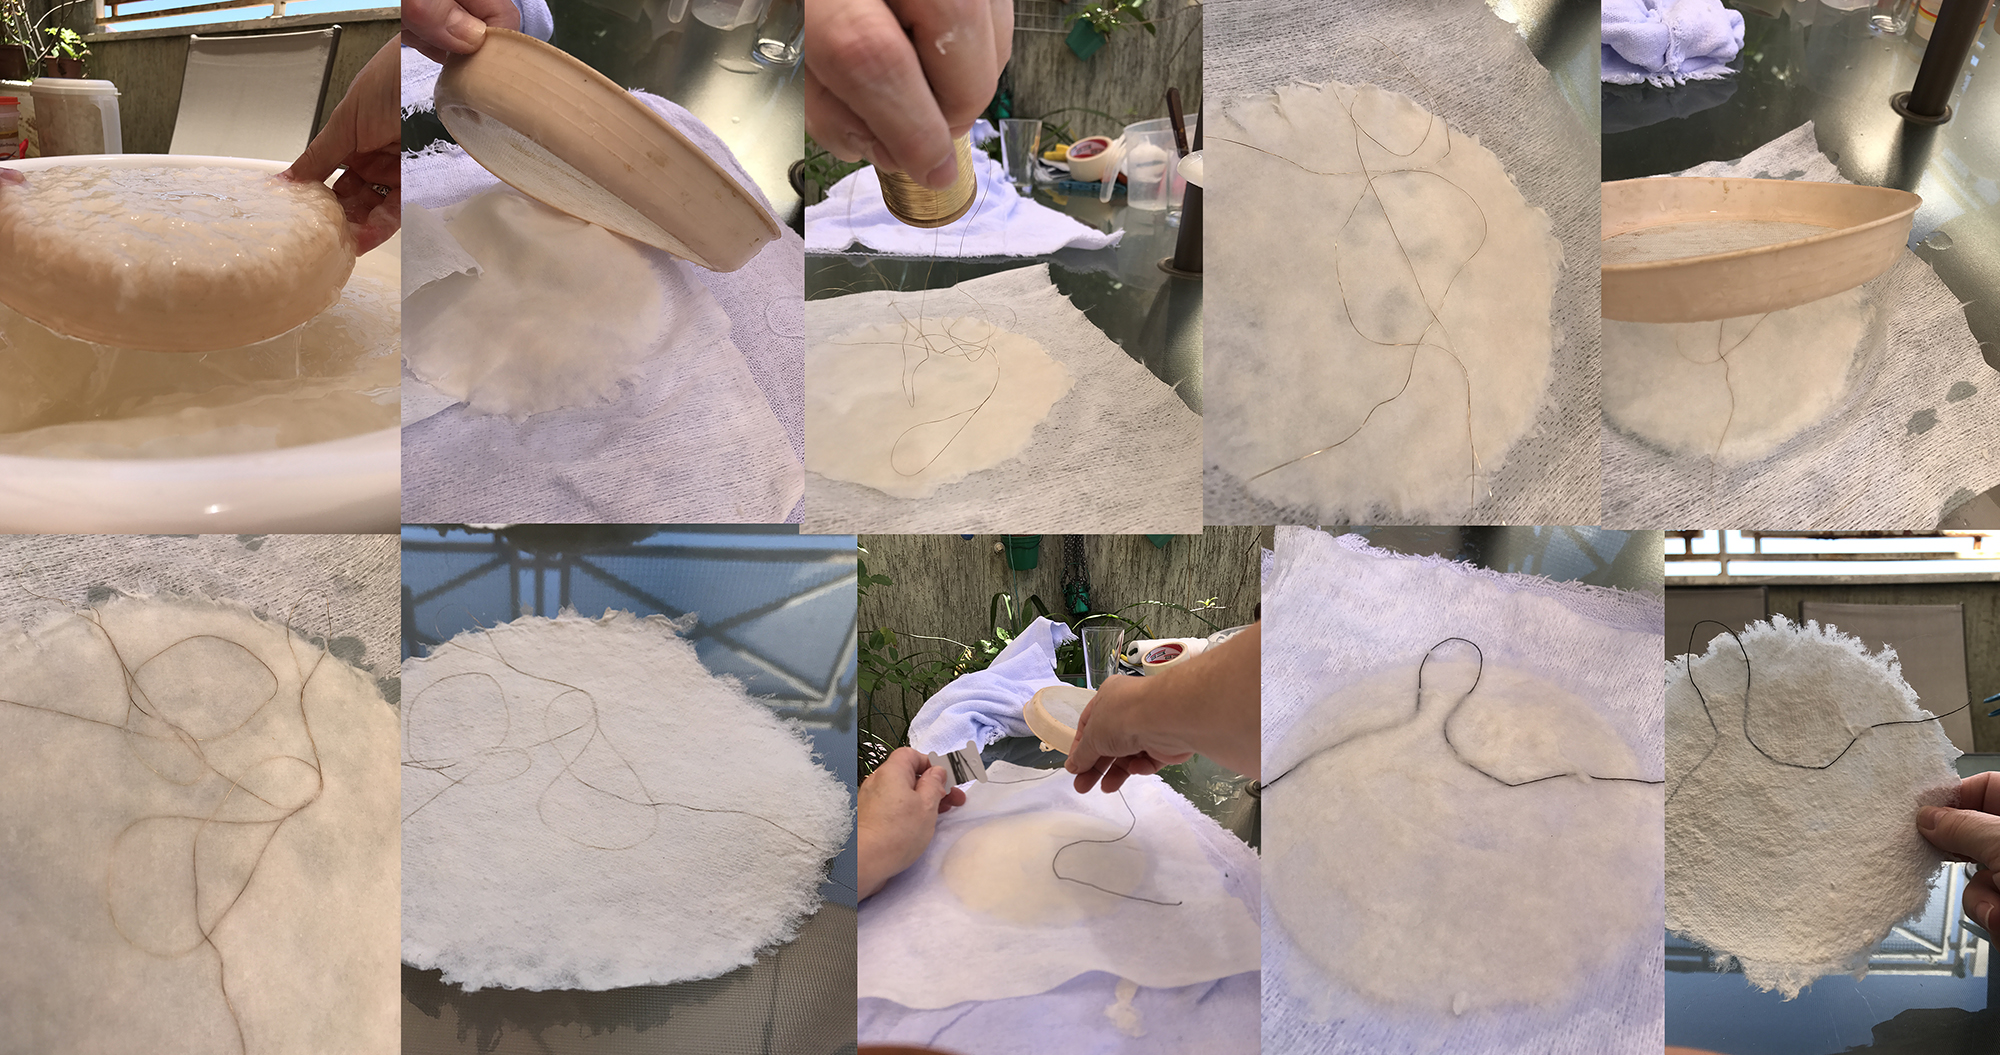
01. First of all i've made the cotton pulp, using the discarded slices of cotton air filter from the Trucks, as I've explained in the assignment of the week 07.
02. So I collect pup for doing a first layer of paper and put in a textile suport (using as a scafold)
03. When still wet, I gently put the conductive thread over the paper sheet.
04. After I've deposited another layer of cotton pulp, so the thread was inside the paper at the end. Of course letting a middle part out of the paper, to be able to connect a LED after the sheet dry.
05. Finally , after drying, i take the textile support from the cotton paper.
Installing the LED light in the Handmade Paper
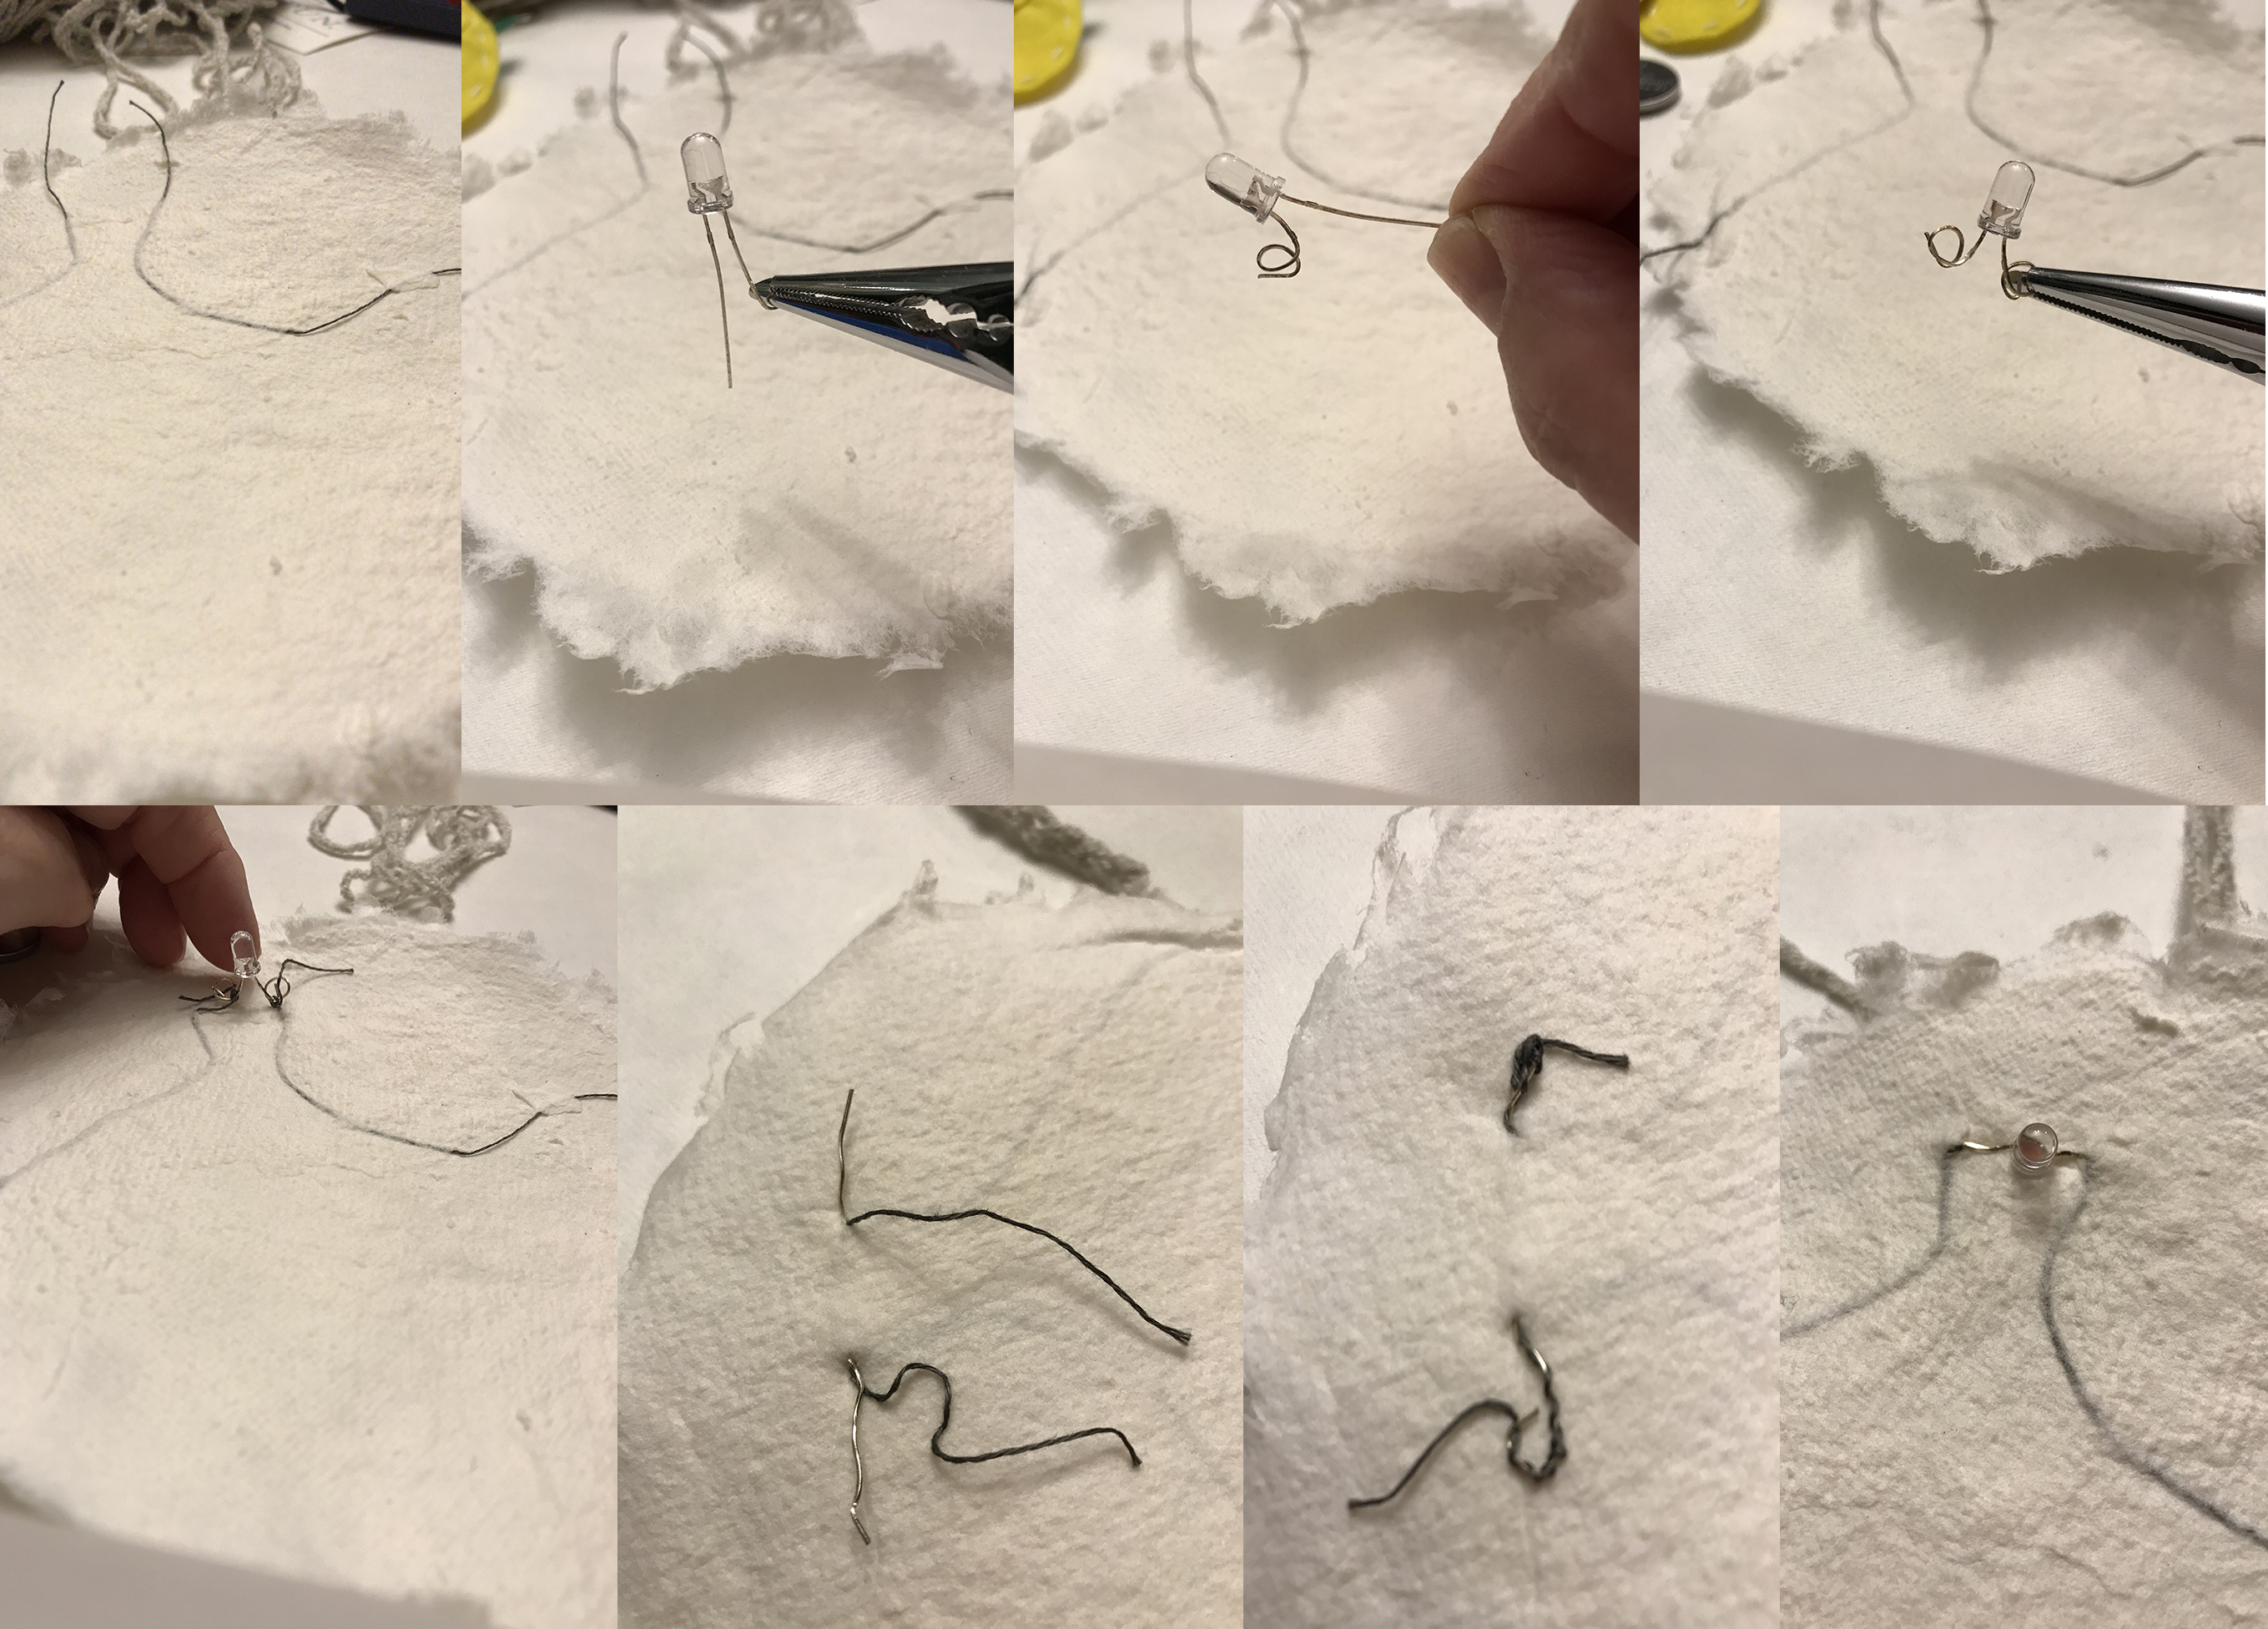
01. First I open the thread in the point I would insert the LED light.
02. Second I passed the LED legs through the paper, taking care of marking the positive and negative ones.
03. After that, I used joined the conductive thread inserted in the paper to join the legs of the LED to the circuit.
Creating an interactive paper with a pressor sensor
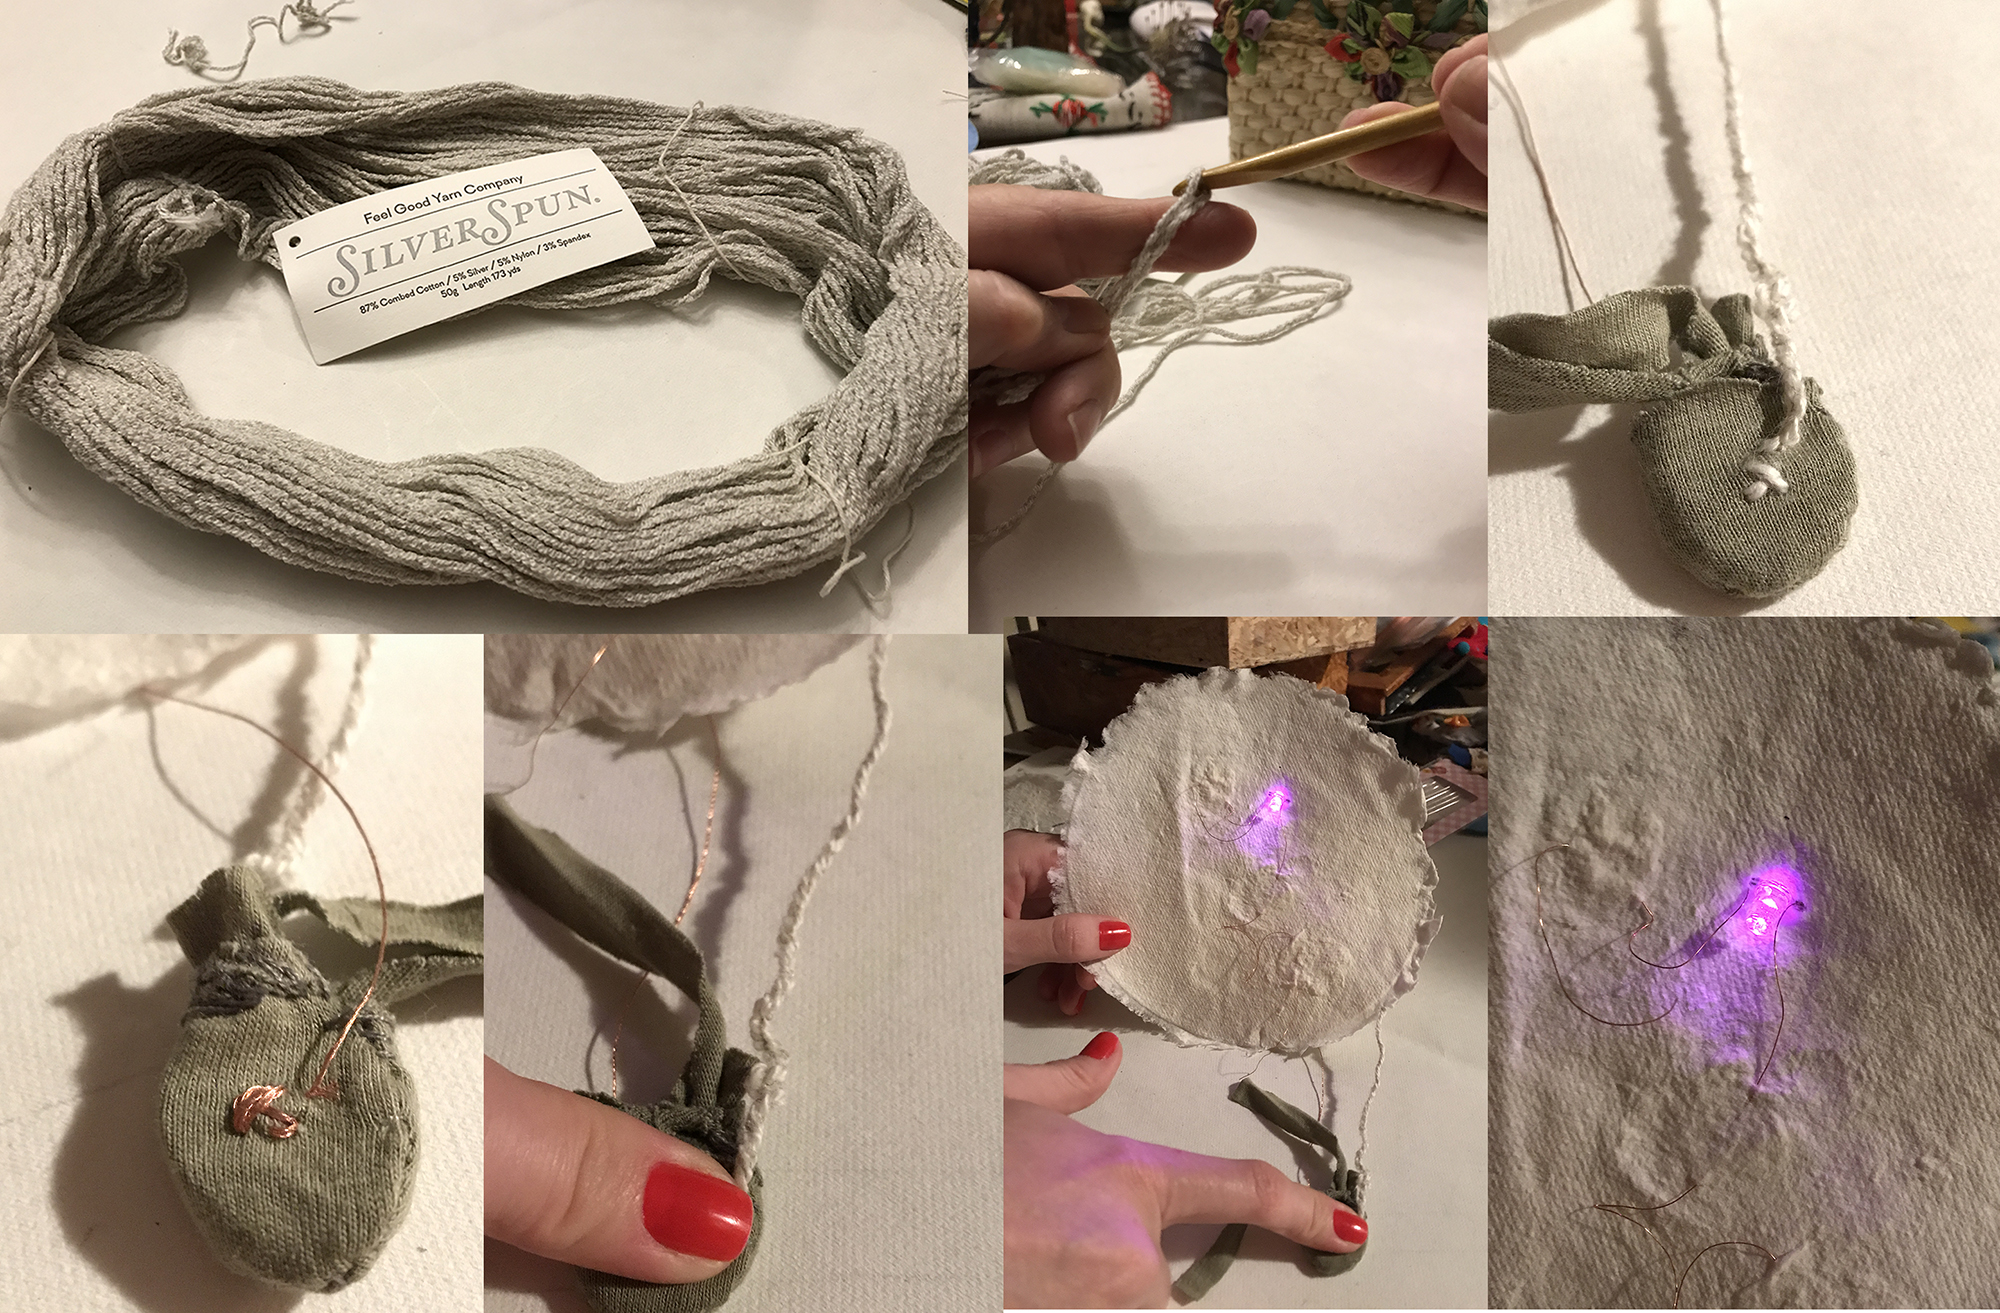
01. I use an old Tshirt to make a litle bag to carry the battery.
02. In the same bag I constructed the pressor sensor connecting a conductive thread embroidering in one side.
03. In the other side I used the Silver Spum thread to make a crochet chain.
04. This crochet chain was at the end embroidered on the other side of the bag.
06. The intention was that the sensor was activated strechting the crochet chain, because, as we studied, with the strech of this kind of thread the resistance decreases and the current flows through the circuit.
07. But the result was not that, but the sensor was activated by pressing the crochet chain against the battery bag.
So this was the final result:
I think all this knowledge was incredible, because, it is really very simple to make sensors and circuits with many different materials.
PS. I have done many experiments in this field that are distributed here, and in the weeks 09 and 12, and also in the final project, because many of this I used at the end.
